How do you build a practical survival shelter in the wilderness? What materials do you need? How do you choose the best design for your survival shelter? How do you make it effective? These are survival shelters that you could most realistically build without any extra tools.
I have built several survival shelters for fun throughout the years, but thankfully, I have never had to use one in a wilderness survival situation. I have also studied and watched many articles and videos on various types of survival shelters and bushcraft. I have selected the 8 most popular and practical ones for you in a wilderness survival situation. You could most realistically build these survival shelters without any extra tools beyond what you find in nature.
Key Takeaways
- Building a survival shelter is just one of the many skills needed to survive in the wilderness, such as purifying water, building a fire, and using a compass.
- The best strategy for wilderness survival is to prepare properly for hiking and hopefully avoid a survival situation altogether
Contents
1) Natural Shelter

Natural shelter includes rock overhangs, caves, tree roots, hollow logs, or sturdy fallen trees. When lost, this is often the quickest way to establish a shelter and camp. Often, natural shelters can be modified to reduce wind and rain exposure. They also often let you focus on laying down bedding and getting a fire going before nightfall.
Pros
- Quick modify
- Require less energy
Cons
- May not be as safe due to logs or rocks falling
- May also be home to other animals or pests
- May not provide adequate weather protection without modification
Materials
- Natural shelter
- Bedding materials such as vegetation or branches
- Sticks or rocks to modify the entrance
Directions
- Look for rock overhangs, large exposed tree roots, or whatever naturally might provide a temporary shelter
- Add a thick layer of bedding material
- Add a fire pit outside of the shelter with plenty of firewood for the night
- Modify entrance as needed
2) Debris Cocoon or Nest Shelter

Cocoon or nest shelters are temporary emergency shelters that provide insulation protection from the elements. They are constructed by gathering as much debris as possible and crawling in the middle to sleep.
Pros
- Easy to construct with minimal tools
- Adaptable to various situations and terrains
- Helps maintain body heat
Cons
- Can take time to gather a large enough pile
- Dirty and sometimes difficult to get in and out.
- Not always waterproof in downpours
- Fire hazard if using a fire pit nearby.
Materials
- Piles of leaves or dried grass or other vegetation
Directions
- Find a location, preferably under a tree with lots of leaves or dried grass nearby
- Gather a massive pile of debris, providing at least a few feet of padding off the ground and 3-4 feet around you in depth.
- Bore a small tunnel in the middle where you will sleep
- Plug the entrance with a bundle of debris to reduce drafts
3) Lean-To Shelter

Lean-to shelters provide a fairly quick way to get out of the rain or sun. They are often paired with a good fire as they provide little protection from the cold.
Pros
- Simple to construct
- Provides shade and basic rain protection
- Works well with a fire
Cons
- It doesn’t provide any insulation from the cold
- Exposed if the wind changes direction
Materials
- Sturdy log/stick several feet long for main beam
- Several sticks for frame
- Large amounts of branches, leaves, grass, moss for roofing
Directions
- Secure main beam stick/log between two trees (can also have one end on ground)
- Lean branches and sticks against one side of main beam to create a roof structure
- Fill gaps with branches or other debris
- Shingle roof with bark or moss starting from bottom up to waterproof roof
- Remember to create a bed inside shelter to insulate from ground
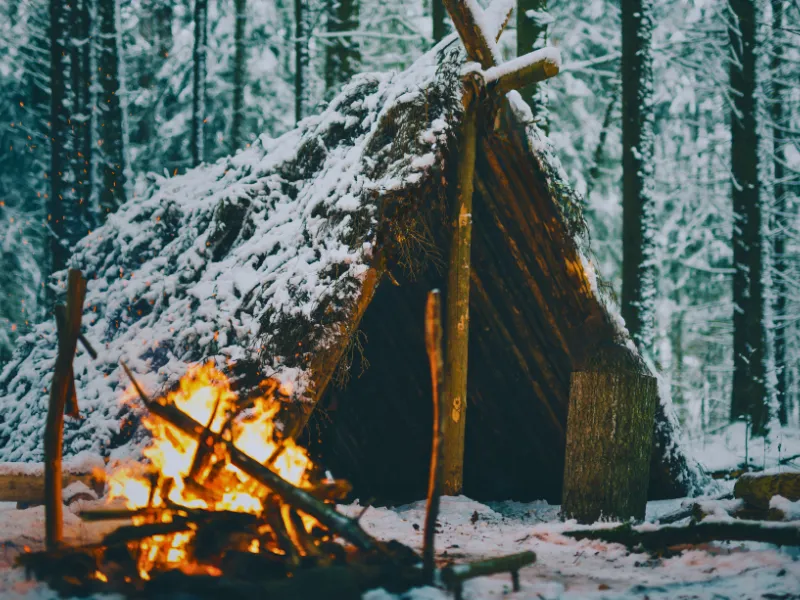
4) A-Frame Shelter

An A-frame shelter is an upgraded lean-to shelter with a roof constructed on both sides. A-frame shelters provide more protection from the elements. They also require more time and skill in the construction process.
Pros
- Protects well from wind, rain, and sun.
- Provides a more permanent shelter option
- Works well with fire pit nearby
Cons
- Takes longer to construct
- Doesn’t insulate from cold weather
Materials
- Sturdy stick or log for main, center beam
- Several sticks for roof frame
- Large amounts of branches, leaves, grass, or moss for roof sealing
Directions
- Secure main beam stick/log between two trees (can also have one end on ground) preferable so you can sit up inside.
- Lean branches and sticks against both sides of main beam to create a roof structure
- Fill gaps with branches or other debris
- Shingle roof with bark or moss starting from bottom up to waterproof roof
- Remember to create a bed inside shelter to insulate from ground
5) Wickiup Shelter

A wickiup shelter is similar to a teepee but uses debris for roofing and insulation rather than a covering such as a tarp or animal skin seen on a teepee. A wickiup shelter can provide space for a small fire inside for heat and is a great more permanent primitive shelter option.
Pros
- Can have indoor fire pit
- Provides good protection against rain, wind, snow, and sun.
Cons
- Takes a lot of time to construct
- Take more skill to construct
- If improperly constructed, it may collapse on you.
- May be a fire hazard if not careful.
Materials
- 3+ large poles or sturdy sticks for primarily tripod supports
- Several poles or sticks for secondary supports
- Large amount of debris for covering insulation and waterproofing
Directions
- Secure support poles in a tripod with the top securely tied or interlocked
- Arrange secondary supports around the tripod
- Fill gaps in the roof with debris and branches
- Insulate the roof with a thick layer of debris, leaving a hole on top if planning on a fire pit inside
- Weigh down debris with branch to prevent debris from blowing away
- Ensure the shelter is sturdy and won’t collapse
- Line edges inside with bedding material
- Create a small fire pit inside in the center
6) Pit Shelter

A pit shelter works best in locations with minimal rain, such as the desert. Usually, a natural depression is utilized with building a rough wickiup shelter overhead for sun and wind protection. Pit shelters can also provide warmth at night in a more arid region with cold nights. A scout’s pit is an alternative pit shelter where you dig a trench and sleep in it, covering yourself with a tarp or other natural covering.
Pros
- Provides great wind protection
- Can usually provide significant warmth with a fire
Cons
- Doesn’t work well in rainy areas
- Take a lot of time to dig
Materials
- Stick or shovel for digging
- Soft sandy ground
- Materials for covering (see above for wickiup)
Directions
- Dig a shallow pit that you can lie down in comfortably
- Construct a wickiup type cover for the roof to protect from the sun
7) Quinzhee Snow Shelter

A quinzhee snow shelter offers protection from the cold and wind in an emergency survival situation in a snowy area. You basically collect a huge pile of snow and burrow it into the middle.
Pros
- Fairly easy to construct
- Provide wind protection
Cons
- Take a long time to construct
- It is easy to get hot and sweaty when constructing, resulting in cold, wet clothes later
Materials
- Lots of snow
- Several small sticks broken approximately 2 feet long
Directions
- Collect a massive pile of snow. You want the walls to be about 2 feet thick, so consider how much room you need to move around inside.
- Let the snow settle for several hours to stabilize.
- Insert sticks around the outside roof as markers for how thick the wall/roof needs to be
- Burrow a hole at the base of the pile
- Carefully carve out a room inside of the pile, stopping at the sticks
- Create a bed inside that is higher than the entrance.
- Create a small air hole to let some fresh air in.
- Create a plug for the entrance.
8) Snow Cave Shelter

A snow cave resembles a quinzhee but doesn’t require gathering snow. You rather burrow into a large snow drift to create a room.
Pros
- Straight forward construction
- Provides good wind protection
Cons
- Takes a lot of time to construct
- It is easy to get hot and sweaty when constructing
- It’s still pretty cold inside.
- Risk collapsing shelter if someone walks on top
Materials
- Large snow drift
- Shovel if available
Directions
- Burrow a hole at the base of the snow drift
- Carefully carve out a room inside of the pile that is higher than the entrance
- Create a bed inside that is higher than the entrance.
- Create a small air hole to let some fresh air in.
- Create a plug for the entrance.
Remember to follow Leave No Trace principles when out in the wilderness, and practice shelter building only if you’re in an emergency or survival situation.
FAQs
Why is a survival shelter important?
One of the most important things you need to survive in the wilderness is shelter. A shelter can protect you from the cold, rain, sun, and wind. It can also give you a place to rest and plan your next move. Without a shelter, you could die from exposure and hypothermia in a matter of hours.
What should I consider when selecting a location for my survival shelter?
Choosing a survival shelter site is similar to choosing a camping site. When choosing a location, look for an area with natural shelter materials, such as leaves, branches, and trees. Ensure the site is far from potential hazards, offers concealment from threats, and has multiple entry and exit points for safety. Avoid flood-prone areas and be wary of wildlife when considering natural shelters like caves or hollowed-out trees.
What are some common materials used for building a survival shelter?
Common materials include leaves, branches, and trees. If available, rope or paracord is beneficial, but you can also make sturdy rope from vines and roots. Without these, look for natural shelters that require minimal construction, such as caves or overhangs.