Best Bushcraft Backpacks

Bushcraft backpacks are essential gear for outdoor enthusiasts who enjoy hiking, camping, and surviving in the wild. These backpacks must be durable and versatile, with enough space to carry essential items like a knife, fire starter, water, and food. They also work as great bug out bags. Designed to withstand rough conditions, a reliable bushcraft backpack can make all the difference in your adventures.

Consider size, material, weight, and organization when choosing a bushcraft backpack. The backpack should be lightweight enough to carry easily yet roomy enough for all your essentials. Look for strong materials like heavy-duty nylon or canvas, which can endure harsh environments. Good organization features, like multiple compartments and external straps, help keep your gear accessible.

We researched multiple bushcraft backpacks to find the best options that balance durability, functionality, and comfort.

Best Bushcraft Backpacks

Let’s explore the best bushcraft backpacks we’ve found. Our top picks balance rugged durability and practical features to last through your wilderness adventures.

Our Top Pick: Maxpedition Falcon-II Backpack

Photo: maxpedition.com

The Maxpedition Falcon-II Backpack is a must-have for any serious bushcrafter due to its ergonomic design and durable materials. It also makes a great individual bug out bag.

Pros

  • Extremely durable construction
  • Comfortable to wear for long periods
  • Spacious with numerous compartments

Cons

  • A bit pricey
  • Might be too large for casual use
  • Water resistance could be improved

Based on specs and customer reviews, the 1050-Denier nylon is incredibly sturdy and resists both abrasion and water. Reviewers report the padded straps and waist support make a noticeable difference during long hikes, distributing the weight evenly.

Based on customer reviews, the spacious compartments are a standout. The main compartment’s clamshell opening makes packing and finding items easy. There’s enough room for all essential gear and more. Reviewers especially like the extra pouches and PALS attachment points, which are perfect for organizing small items.

On the downside, the price might be steep for some. For casual outings, it might feel too large. Additionally, while it handled light rain well, we think an extra rain cover could be worthwhile.

Overall, the Maxpedition Falcon-II Backpack is an excellent choice for serious outdoor adventurers. It combines functionality, durability, and comfort in one rugged package.

Also Great: Blitz 35 Tactical Pack
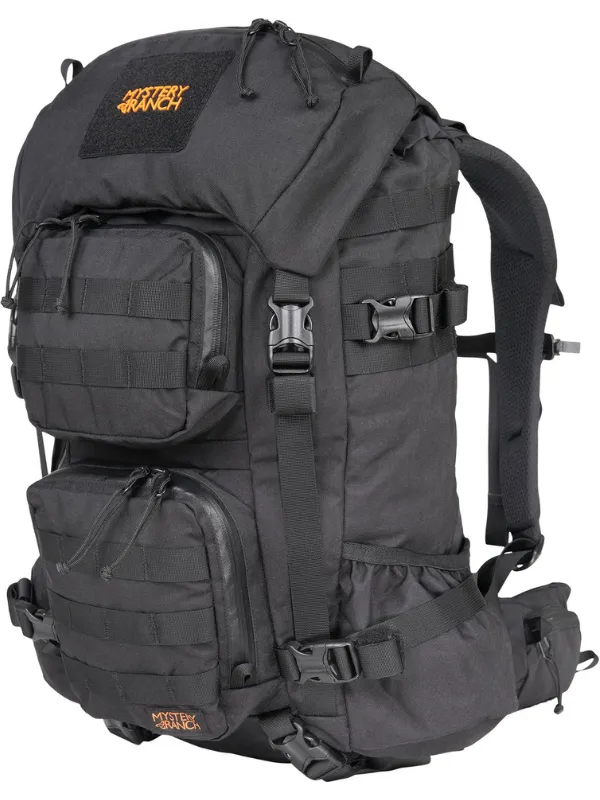
Photo: mysteryranch.com

This pack is perfect for those needing a reliable and versatile backpack for various wilderness situations or as a bug out survival bag.

Pros

  • Extremely durable build
  • Great for carrying heavy loads
  • Multiple compartments for easy organization

Cons

  • Relatively heavy at 4.44 pounds
  • Can be too large for short day trips
  • High price point for some budgets
  • Some might find it uncomfortable to wear

Based on specs and customer reviews, the durability of the construction stands out. It is robust and can handle heavy loads without a problem. The pack has numerous compartments, making it easy to keep gear organized. Reviewers appreciate the multiple access points and the convenient laptop sleeve.

On the downside, this pack is heavier at 4.44 pounds. There might be better choices for shorter trips where every ounce counts. The large size can be overkill if you’re just hiking for a day. Lastly, it’s worth noting that the price might be a bit steep for some.

Despite these cons, the Blitz 35 Tactical Pack is a solid investment if you need something versatile and reliable for more extended adventures. It’s a pack built to last and ready to tackle almost any adventure.

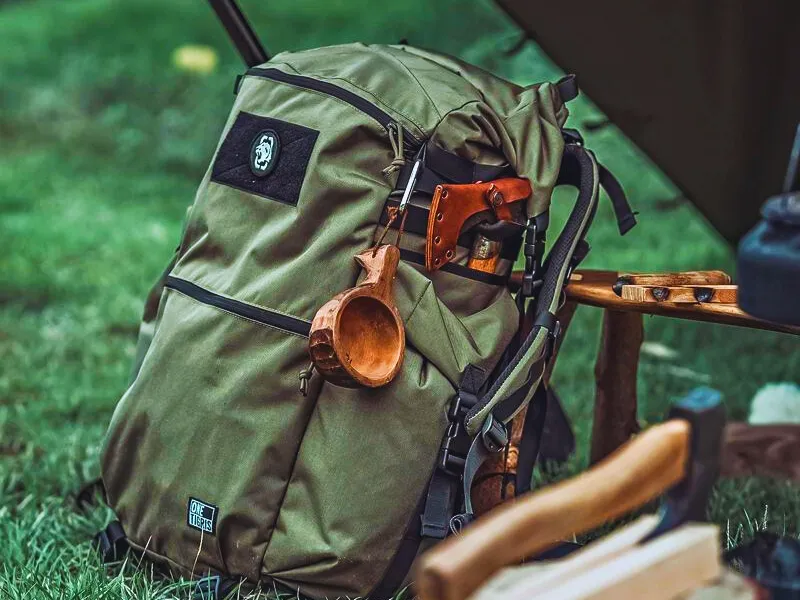
Our Budget Pick: OneTigris WILD ROCKET 45L Backpack

Photo: onetigris.com

This is a solid choice for those needing a rugged and spacious bushcraft backpack.

Pros

  • Sturdy 500D Cordura material
  • Ample storage with 45L capacity
  • Versatile MOLLE webbing

Cons

  • A bit heavy at 4.6 lbs
  • The material doesn’t stretch
  • No included hydration bladder

Based on specs and customer reviews, the OneTigris WILD ROCKET 45L Backpack’s durability stands out. The 500D Cordura nylon is tough and suited for rough bushcraft conditions. Reviewers report it holds up well whether scrambling up ridges or pushing through dense forests.

The storage options are impressive. With a large main compartment, multiple pockets, and specialized axe holders, organizing our gear is a breeze. We appreciated how the roll-top closure kept everything secure, and the 45L capacity ensured we had enough space for all essential items.

On the downside, it’s relatively heavy. At 4.6 lbs, reviewers note it adds noticeable weight when loaded with gear. Despite this, the MOLLE webbing allows customization with add-ons, which reviewers find valuable on extended trips. Note that a hydration bladder must be purchased separately if needed.

The Wild Rocket Bushcraft Pack balances durability, versatility, and storage, making it a reliable choice for any rugged outdoor adventure or as a bug out bag.

Buying Guide

You must consider a few key factors when looking for the best bushcraft backpack.

Capacity: Consider how long you plan to be in the wilderness. A 20-30 liter pack might work for day trips. For longer adventures, opt for 40-60 liters.

Material: Strong, water-resistant materials like nylon or canvas are essential. They can withstand rough use and protect your gear from getting wet.

Comfort: Comfortable straps and a padded back support make a big difference. Look for adjustable and padded shoulder straps. A comfortable, padded hip strap is more important in our opinion, for any long-distance travel.

Key Features

FeatureWhy It Matters
Multiple CompartmentsKeeps everything organized
Reinforced StitchingEnsures the backpack can handle heavy loads
Water Bladder CompatibilityAllows easy access to water
MOLLE WebbingUseful for attaching extra gear
Hip Belt/StrapHelps distribute weight evenly

Weight: Aim for a lightweight backpack. Heavy packs can tire you out quickly, especially when filled with gear.

Durability: Reinforced stitching and robust zippers are signs of a durable pack.

Additional Tips

  1. Try Before Buying: If possible, test the backpack in-store. Load it up and walk around to feel how it feels.
  2. Season: Consider the season you’ll be using it. Winter adventures need more space for extra clothes.

Budget: Set a budget, but remember that investing more in a quality pack can save us money and discomfort in the long run.

TLDR;

After thoroughly researching the top bushcraft backpacks, it’s clear that each has its strengths. However, the Maxpedition Falcon-II Backpack stands out as the best overall choice. Its ergonomic design, durable 1050-Denier nylon construction, and comfortable wear make it ideal for serious outdoor adventurers. Despite its higher price, the Falcon-II offers unmatched functionality and durability, ensuring it can withstand the most demanding conditions.

For those seeking a balance between durability, versatility, and storage, the OneTigris WILD ROCKET 45L Backpack is a solid contender. Its 500D Cordura material and ample storage options make it perfect for extended trips. However, its weight might be a consideration for some.

Ready to elevate your outdoor adventures? Choose the best bushcraft backpackthat suits your needs and embark on your next wilderness journey. Click the links to explore more and make your purchase today!

FAQs

What size backpack should I get for bushcrafting?

The size of your bushcraft backpack depends on the duration of your trip and the amount of gear you need to carry. Here are some general guidelines:

Day trips: 20-30 liters.
Weekend trips: 30-50 liters.
Multi-day trips (3-5 days):50-70 liters.
Extended trips (5+ days): 70-90+ liters.

What materials are best for a bushcraft backpack?

Durability is key for bushcraft backpacks. The best materials include:

Cordura Nylon: Known for its high durability and resistance to abrasions.
High-Density Canvas:Offers toughness and longevity.
Polyester: Lightweight and resistant to water.
First Aid Checklist for Hiking and Camping

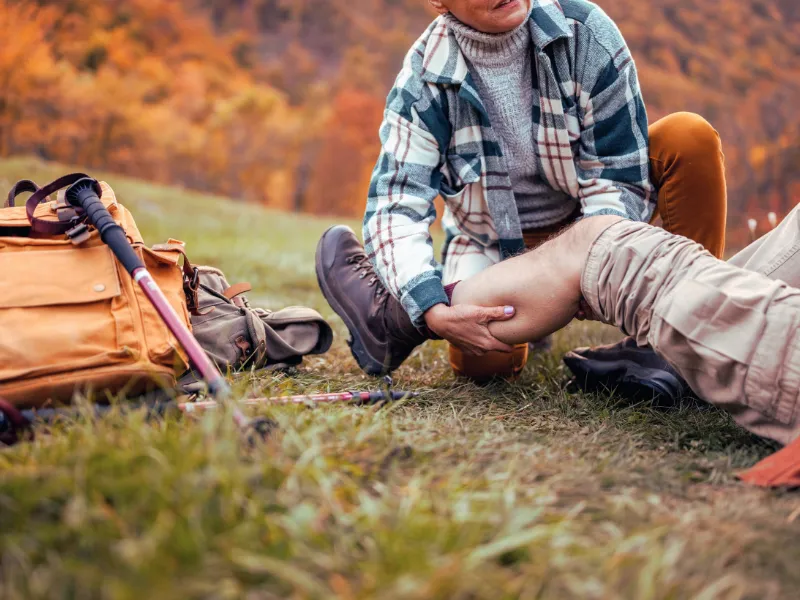
Hiker providing first aid to fellow hiker

Ankle sprains, cuts, and blisters are common hiking and camping ailments that require first aid. A first aid kit is a hiking essential, and you can purchase a pre-made first aid kit relatively inexpensively. There is no such thing as a perfect wilderness first aid kit. You should consider your own situation when choosing or putting together a first aid kit.

In addition to being a medical provider, I’ve hiked and camped for multiple decades and carried many different first aid kits from just bandaids to a more comprehensive first aid kit. I’ve researched the items in the most popular first aid kits in addition to the recommendations by the Red Cross. From this, I’ve created a first aid checklist that should work well if you’re a beginner hiker or an experienced hiker looking to update your hiking essentials. 

6 Pre-Checks for Your First Aid Kit 

Buck Tilton, in his excellent book Wilderness First Responder, suggests several considerations before creating a first aid kit [1]. 

Here are 6 questions to ask yourself before going through this first-aid checklist: 

  1. What will your environment be like, including terrain, weather, and altitude? 
  2. How far away from emergency services will you be? Hiking and camping in a remote location require additional first aid supplies you probably don’t need for a short day hike. 
  3. How many people will be in your group? This helps determine how many supplies you need to bring in your kit. 
  4. What are your physical conditioning and medical needs and those of your group? Many people have medical conditions, such as diabetes or other conditions, that might require additional emergency items in their first aid kit. 
  5. Do you have any medical expertise and skills, and can you use all the items in your first aid kit? Never carry items or medications you don’t know how to properly use. 
  6. Can everyone carry their own first aid kit? Each person should carry their own personalized first aid kit if possible.
Graphic: Daniel Borkert/Canva Pro

First Aid Bandages and Wraps

First Aid Medicines

First Aid Tools and Supplies

First Aid Emergency Info

First Aid Emergency Skills

FAQs

Sources

Book: Wilderness First Responder by Buck Tilton

Book: The Wilderness First Aid Handbook by Grant Lipman

Article: Anatomy of a First Aid Kit by the American Red Cross

Article: Must-Haves for Your First-Aid Kit by the CDC

Article: What to Have in Your Camping First Aid Kit by Aspen Valley Hospital

Article: First-aid kits by the Mayo Clinic

How to Dehydrate Food in 10 steps

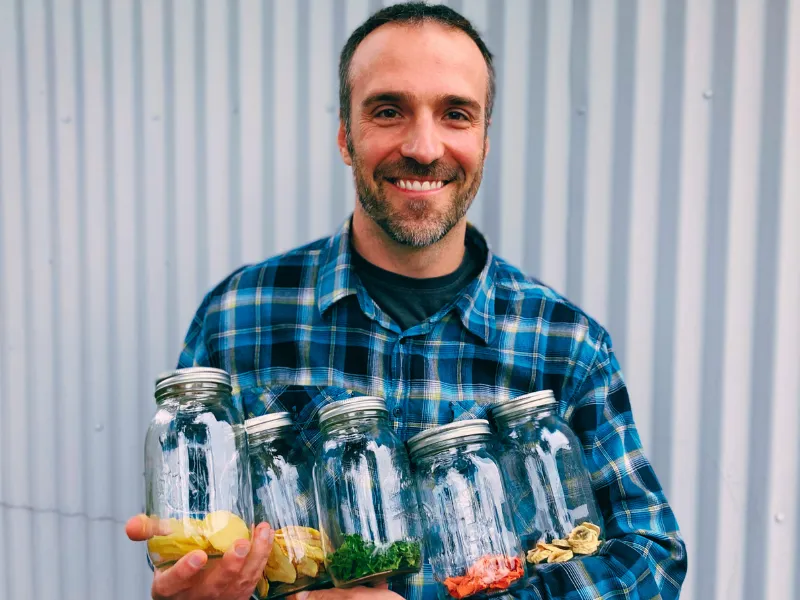
Author holding his dehydrated food in jars

When you learn how to dehydrate food, you can create snacks, meals, and even emergency rations while saving money. Dehydrating food is a great way to preserve fruits, vegetables, herbs, and even meat for long-term storage or lightweight meal options while camping or hiking. 

Over the past several years, I’ve used a dehydrator to dry various foods, primarily fruits, for snacks. I have experience growing up around many dehydrated fruit leathers and wild game jerky.

When researching and writing this article, I dehydrated five fruits and vegetables: apples, bananas, kale, potatoes, and carrots. I didn’t use expensive equipment, and it was easy to do in our compact kitchen. I look forward to dehydrating many camping meals for our next outdoor adventures. 

1) Choose Fresh Food

Photo: ©Daniel Borkert/OutdoorFootprints.com

Choose fresh, ripe fruits, vegetables, and herbs for dehydrating. Ideally, the produce should come fresh from your garden or local farm.

Store-bought produce also works well if it is fresh and ripe.

Frozen vegetables can also be used since they are usually frozen when fresh. 

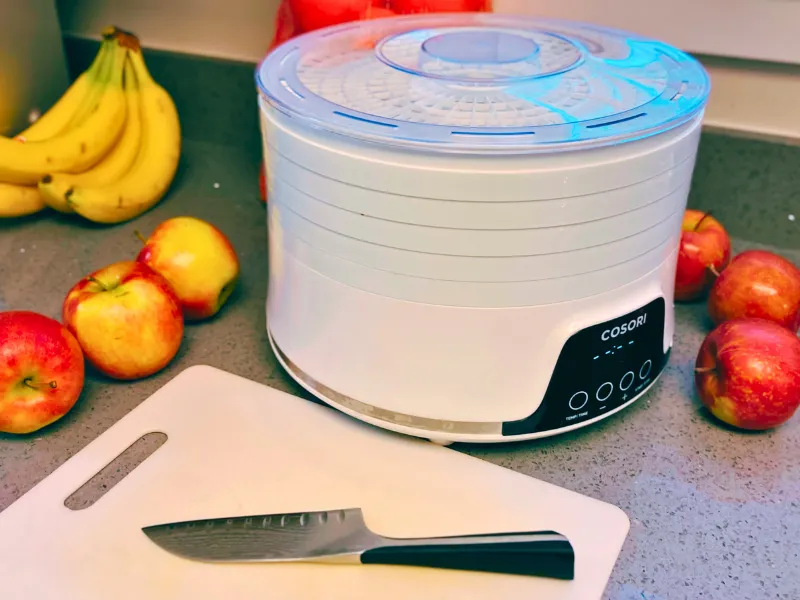
2) Prepare Your Equipment

Photo: ©Daniel Borkert/OutdoorFootprints.com

You don’t need special kitchen tools to start dehydrating, but I strongly recommend acquiring a standalone electric dehydrator.

You can use an oven to dehydrate, but it’s slow and inefficient. 

My basic electric dehydrator works perfectly for most homemade snacks and meals.

Electric Dehydrators

Electric dehydrators are standalone appliances that are best for dehydrating food at home. They usually have a built-in fan and an adjustable heater between 90-150°F (32 and 66°C).

Electric dehydrators are available in two form factors: stackable/vertical and box/horizontal.

Stackable dehydrators are less expensive and expandable, but you will need to cycle the trays in the stack for more even drying.

Box dehydrators dry more evenly and efficiently but are more expensive. Both electric dehydrators will require separate tray liners for drying liquids/mashes such as fruit leather or soups. 

Tips for Electric Dehydrator Use

  1. Use a dehydrator with an adjustable heater between 90-150°F (32 – 66°C)
  2. Check the dehydrator’s temperature about 20 minutes after starting, as temperatures often vary depending on the manufacturer. 
  3. Check the trays every few hours to evaluate how evenly the trays are drying.
  4. Use a nonstick cooking spray with fruits or other food that tends to stick to trays or liners.

Oven-Drying

Oven-drying isn’t recommended unless you’re just learning to dehydrate. It’s hard to keep a consistent temperature, and the drying process usually takes almost twice the time of an electric dehydrator.

Also, there’s the increased risk of a kitchen fire or risk of harm to kids or pets, or even accidentally burning the food.

Electric dehydrators work significantly better and are inexpensive ($50 for a basic electric dehydrator). Some newer ovens with convection features have a dehydrating cycle, which can work well. Most ovens are non-convection ovens.

Follow the manufacturer’s directions for dehydrating with a convection oven that has a dehydrating cycle.

For all other non-convection ovens, here is how to use your oven to dehydrate. 

How to Use an Oven for Dehydrating

  1. Set the oven at the lowest temperature, preferably  <140°F or 60°C.
  2. Place an empty baking sheet to catch any falling drips or food. 
  3. Place food on removable wire racks. 
  4. Leave the oven door cracked open 1-2 inches for airflow. 
  5. Place and use a fan outside the oven, blowing into a slightly cracked oven door. 
  6. Monitor the temperature with an oven thermometer and adjust oven heat accordingly. 
  7. Rotate food pieces as needed until dry.
  8. Do not leave the oven unattended. 

Other Dehydrating Methods

Sun-Drying

For thousands of years, sun-drying food was the traditional method of dehydrating food. Sun-drying food requires an air temperature greater than 90°F and a relative humidity less than 60%. This works best in the Southwest USA.

It is recommended to sun-dry only chile peppers and fruits, including tomatoes. Fish, meats, and other vegetables are not recommended for sun-drying due to a higher risk of spoilage. 

Home-made dehydrators

There are lots of DIY dehydrator ideas if you’re so inclined. These come in all different designs and sizes. The important factors to remember are an adjustable heating of the air and even airflow across the food. 

Cutting tools

Beyond a cutting board and a sharp kitchen knife, you don’t need any special cutting tools. If you want even slices, consider a mandolin slicer with a hand guard. Your food processor can also be used for slicing. 

Clean work surface

Clean hands, tools, and cutting surfaces to reduce the risk of pathogens that can cause food spoilage or food poisoning. 

3) Prepare Food

Photo: ©Daniel Borkert/OutdoorFootprints.com

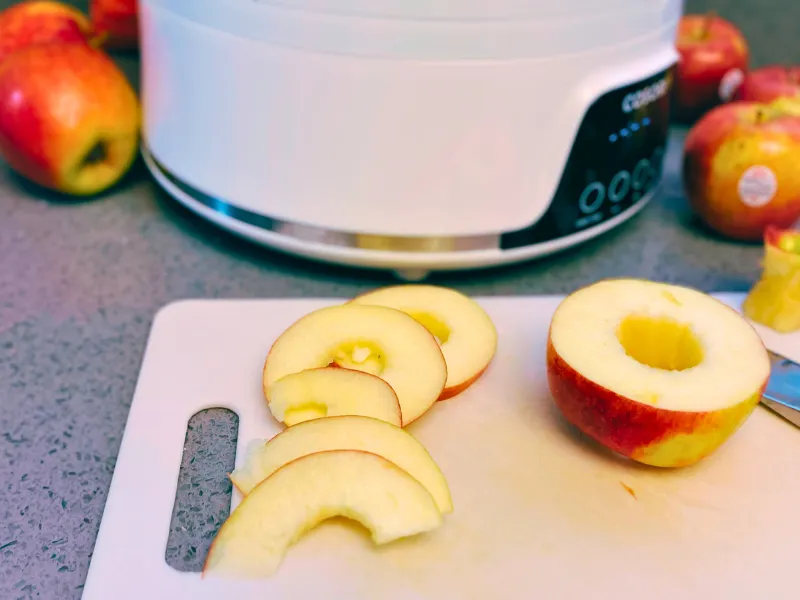
Preparing food before dehydrating consists of evenly dividing it so it can dry consistently. This usually involves slicing fruits and vegetables evenly. I cut my cored apple into 1/4-inch slices.

Slice fruits and vegetables between 1/4-inch and 1/2-inch thick.

Slice meat to less than 1/4-inch.

Pretreat vegetables and fruits if desired. Marinate meat overnight if desired.

Precook food, including veggies and meat, that you would normally cook.

Pretreating

Pretreating vegetables and fruits can help decrease or stop browning, toughness, or spoilage. Some people prefer not to pretreat, arguing that it may destroy nutrients or digestive enzymes.

There are multiple ways to pretreat fruits and vegetables [1]. Most vegetables are best pretreated with steam or water blanching, while fruits and berries are best pretreated with soaks or dips. 

Steam-blanching

Use a steamer pan or basket to steam the food. 

Water-blanching

Photo: ©Daniel Borkert/OutdoorFootprints.com

Dip food into boiling water to water-blanch. I water-blanched my potato slices in boiling water for 5 minutes, then soaked them in acidic water for 10 minutes.

Syrup-blanching

Syrup-blanching is for fruits only and can add softness and retain fruit color. 

  1. Add 1.5 cups of sugar with 2.5 cups of boiling water. 
  2. Add fruit and adjust the heat to a simmer.

Soaking in acidic water 

 Acidic water soaking reduces browning in fruits, potatoes, and turnips. 

  1. Add 1 to 3 cups of lemon or lime juice or 1 to 3 teaspoons of citric acid powder per quart of water. 
  2. Soak food for 5 to 10 minutes in solution. 

Soaking in sulfite solution

Sulfite solution pretreatment comes with risks for people with asthma and allergies to sulfa-based products. I recommend trying other methods first, but sulfite soaking is often discussed in the dehydrating community. 

  1. Add 1 tablespoon of sodium metabisulfite powder in 1 quart of water (NOT sodium bisulfate or sodium sulfite). 
  2. Soak in solution for 5 minutes.

Soaking in fruit juice

Soak fruit in orange or pineapple juice for 5 minutes. 

Dipping in pectin 

A pectin syrup solution can be used to glaze fruits and berries.

  1. Add 1 box of pectin to 1 cup of boiling water
  2. Add ½ cup of sugar
  3. Add an additional cup of cold water
  4. Cool completely and glaze fruit with a thin film

Dipping in honey

  1. Add ½ cup honey with 1 quart of water.
  2. Dip fruit in honey solution.

Commercial fruit protector

Multiple products are available at the grocery store that are designed to decrease fruit browning. 

Spraying with lemon juice

Mist fruit on dehydrator trays with lemon juice.

4) Spread Food Evenly

Photo: ©Daniel Borkert/OutdoorFootprints.com

Keep space between food pieces to allow for airflow. It’s okay to mix and match different fruits and vegetables on the same tray. I mixed my apple slices with my bananas. Just keep in mind that they may dry at different rates.

Also, avoid mixing and matching strong-flavored foods such as garlic with mild foods such as fruit. Spread prepared meals or leathers less than ¼ inches thick on tray liners.  

5) Start Dehydrating

Photo: ©Daniel Borkert/OutdoorFootprints.com

I dehydrated my apples and bananas at 135°F (63°C). Every few hours, I checked the dryness and turned the slices or rotated the trays.

Time

The time to dehydrate varies significantly depending on the relative humidity and size of the pieces. It’s not uncommon for some larger pieces and chunks to take over a day to dry.

Here are several common foods and their general drying times: 

  • Precooked meals vary significantly (usually until crumbling) 
  • Fruit leathers take 6-15 hours.
  • Apple slices take 5-10 hours.
  • Bananas take 7-12 hours.
  • Blueberries take 8-24 hours. 
  • Cherries take 10-20 hours. 
  • Corn takes 6-12 hours. 
  • Cranberries take 14-25 hours.
  • Cucumbers take 4-6 hours. 
  • Grapes take 12-20 hours. 
  • Greens take 3-5 hours. 
  • Herbs take 2-18 hours. 
  • Jerky takes 4-8 hours. 
  • Mangoes take 6-12 hours. 
  • Mushrooms take 3-6 hours. 
  • Onions take 6-10 hours.
  • Oranges and other citrus take 9-13 hours. 
  • Peaches take 6-12 hours. 
  • Pears take 6-15 hours. 
  • Peas take 5-9 hours. 
  • Peppers take 6-10 hours. 
  • Chile peppers take 4-15 hours. 
  • Pineapples take 8-14 hours. 
  • Plums take 8-18 hours. 
  • Potatoes take 7-12 hours. 
  • Raspberries take 12-20 hours. 
  • Strawberries take 7-14 hours. 
  • Tomatoes take 8-12 hours. 
  • Zucchini takes 7-15 hours. 

Temperature 

Dehydrators usually have a temperature setting. However, the temperature of most dehydrators fluctuates by several degrees.

The following are guideline target temperatures for drying food:  

  • Vegetables with a target of 125°F (52°C)
  • Fruits with a target of 135°F (63°C)
  • Prepared foods such as soups with a target of 150°F (66°C)
  • Precooked meat (for jerky) with a target of 140°F (60°C). Per USDA guidance, heat meat to an internal temperature of 160°F (165°F for poultry) before or after dehydrating to kill pathogens.
  • Fruit leathers with a target of 135°F (63°C)

Turning and stirring

You should check the pieces every few hours and turn and stir, if appropriate, to make sure everything dries evenly. 

6) Test for Dryness

Photo: ©Daniel Borkert/OutdoorFootprints.com

I prefer my dried apples a little crisper, so when I bent it, I was looking for a snapping or cracking sound.

Dryness varies depending on the dehydrator, food type, humidity, and temperature. Guidelines for how long to dehydrate a specific food are just recommendations, as the variables, especially relative humidity, are difficult to control completely at home. Testing for dryness is critical to ensure the food is dehydrated properly. 

How to test for dryness of food in 3 steps

  1. Cool a piece of the food to room temperature before testing. 
  2. Compare to the description of finished dehydrated food:
  • Leathery or supple dehydrated food should be dry on the surface and able to bend. 
  • Brittle, dehydrated foods should break or snap when you bend them. 
  • Overdry food is better than underdry foods. 
  • Moisture should not be present in the center. 
  1. If food isn’t done at the end of the day, you can run a dehydrator overnight at a reduced temperature of 90-100°F (32-38°C). 

7) Remove Pieces of Food

Photo: ©Daniel Borkert/OutdoorFootprints.com

I would periodically remove pieces that felt done and let them cool for a few minutes. I would then test for dryness as above. Pieces that passed the dryness test went into a glass jar. The apples took about 8 hours to finish, and the bananas 11 hours.

Food in the dehydrator often dries at different rates, so remove individual pieces as they finish. Remember, overdrying is much better than underdrying [2]. 

8) Condition or Pasteurize Dried Food

Photo: ©Daniel Borkert/OutdoorFootprints.com

Dried fruit especially benefits from conditioning to equalize the moisture content among the pieces. This is usually done on the counter in a glass jar, which you can shake daily for several days.

Conditioning recently dehydrated food, especially dried fruits, is recommended if you plan to store it for more than a few weeks. Conditioning equalizes the moisture throughout the newly dried pieces, reducing the risk of spoilage.

To condition your newly dried food, place it in a glass jar and seal tightly. Remember only to place one food type per jar. Set the jar aside at room temperature away from direct sunlight. Gently shake the jars daily and check for any moisture or haziness on or in the jar (if so, return the food to the dehydrator for a few more hours and try again). 

Pasteurization is recommended for sun-dried foods or optionally for unpeeled fruits or veggies. Sometimes, insects lay eggs in the peels or sun-dried foods that don’t get killed in the drying process.

Pasteurization is achieved in two main methods: heat at 175°F (80°C) for 15 minutes or freezing at 0°F (-18°C) for 48 hours. Pasteurization may change the flavor and nutrients. 

9) Package Dried Food for Storage

Photo: ©Daniel Borkert/OutdoorFootprints.com

The final stage of dehydrating food consists of storing it for future use. The primary idea is to reduce air exposure to the food.

Consider storing foods in smaller containers as moisture will enter the food and container after you open it. Most properly stored fruits and vegetables will stay preserved for several months or more [3]. Homemade jerky lasts up to 2 months at room temperature or longer in the freezer [4]. You can best achieve good dehydrated food storage as follows: 

  • Air-tight containers such as glass jars
  • Vacuum sealed bags
  • Jars or bags with oxygen absorber packets 
  • Jars or bags with Silica gel packets for moisture protection 

Dehydrated food needs airtight containers, such as glass jars, to prevent absorbing moisture and spoiling. Then, store your dehydrated food in their containers in a dark, cool, dry place.

10) Rehydrate Food when Ready to Use

Of course, the whole purpose of dehydrating food is to use it at some point. Most dehydrated foods, such as dried apples, banana chips, or jerky, are consumed dry.

Some foods, such as dehydrated soups or many veggies, require rehydration before you can enjoy eating them. 

Two Methods to Rehydrate Food

  1. Hot-soaking –takes approximately 15 min to hours to rehydrate.
    • Pour boiling water to cover the dehydrated food in a container. 
    • Let stand with occasional stirring. 
  1. Cold-soaking – takes overnight or several hours to rehydrate. Food-safety note: perishable ingredients should not sit unrefrigerated for extended periods — keep cold-soak times limited and be cautious with meat, dairy, and eggs.
    • Pour room-temperature purified water to cover the dehydrated food.
    • Refrigerate overnight.

You can create dehydrated food at home with simple preparation, equipment, and testing. Follow the 10 steps in this article to get started and experiment with different ingredients and recipes. Check out our camp meals for inspiration.

Don’t forget to start your camping checklist before your next outdoor adventure. If you’re just getting started exploring the outdoors, look at our hiking for beginners while making some homemade dried snacks.

Please leave any comments or ideas below! 

FAQs

Why dehydrate my own food for camping and hiking?

I find dehydrating food interesting because it’s a great way to preserve food for camping and hiking.

Dehydrated food is lighter and more compact and doesn’t require refrigeration, making it perfect for hiking and backpacking trips.

You can also dehydrate many premade meals, such as soups, then rehydrate them on the trail or at camp.

You can also save lots of money when dehydrating your own food compared to the expensive freeze-dried food you get at the store.

Sources

How to Purify Water 6 Different Ways

You need clean drinking water in an emergency survival situation. Here are 6 ways to purify water in an emergency survival situation: boiling, filtering, disinfection, UV light, solar disinfection, and a sip well.

I’ve been hiking and camping for decades and successfully used several methods to purify water without ever getting sick. My favorite method is using UV light to purify my water when hiking or backpacking. I’ve also spent many years using various water filters with success. You, too, can learn how to purify water successfully in any situation.   

1) Purify Water by Boiling

Photo: ©Valeriya Turkova via Canva.com

If you have built a fire or have a stove, boiling water for 1 minute is an easy and efficient way to purify water from germs [2]. You might need a rough sand or debris filter to remove silt from the raw water.
Boiling doesn’t eliminate chemicals or other toxins in the water, but most water in a wilderness survival situation just needs the bacteria, viruses, and parasites neutralized.
How to purify water by boiling in 3 steps: 

  1. Filter cloudy water with paper towels, coffee filters, gravel, or clean debris like pine needles. 
  2. Bring water to a boil for 1 minute (at elevations above about 6,500 feet, boil for 3 minutes, per CDC guidance).
  3. Let the water cool before drinking. 

2) Purify Water by a Filter

Photo: ©Kelly vanDellen via Canva.com

Water filters are designed to remove germs. They also can work well for removing some toxins, but note that common backpacking filters (0.1–0.2 micron) remove bacteria and protozoa without reliably removing viruses — true water ‘purifiers’ are a separate category. The Centers for Disease Control (CDC) recommends a filter that is <1 µm pore size, which should remove bacteria and parasites [3].Also, filters usually have a carbon part to the filter, which can improve the taste.

Don’t assume the common pitcher or refrigerator filters can also filter out germs, as they aren’t intended for this.

There are multiple filter types to choose from, including simple straw filters, water bottle filters, gravity filters, pump filters, and other filter types [4].  For directions on how to purify water with a filter, see the manufacturer’s guidelines, as each filter works differently. 

3) Purify Water by Disinfection

Photo: ©blyjak via Canva.com

Disinfect Water with Bleach

Disinfection water purification generally means using chemicals to kill germs.

Small quantities of common household chlorine bleach can disinfect water, making it safe to drink. Hikers and campers can carry chlorine dioxide or iodine tablets for wilderness water purification. 

How to purify water by bleach in 3 steps: 

  1. Gather a medicine dropper from an emergency kit and fresh liquid chlorine bleach (the active ingredient of 6% or 8.25% sodium hypochlorite). 
  2. Use 2 drops of regular unscented household bleach (6–8.25% sodium hypochlorite) per 1 quart or 1 liter of water — double to 4 drops only if the water is cloudy.
  3. Stir and let stand for at least 30 minutes [5].
Chart: Washington State Department of Health

Disinfect Water with Iodine

Common household iodine can also purify water, although pregnant women, people with thyroid disorders, and people with iodine allergies should avoid this method. It is also not recommended to drink iodine-treated water for more than a few weeks.  

How to purify water by iodine tincture in 2 steps: 

  1. Use 5 drops of 2% tincture of iodine per 1 quart or 1 liter of water.
  2. Stir and let stand for at least 30 minutes [6]. 

Don’t use pool tablets to purify water.

Silver is used by Europeans for disinfection but is not approved for safe water purification in the US.

Other commonly recommended household products, such as hydrogen peroxide and citrus juice, are not recommended for water purification, per the CDC [7].

4) Purify Water by a UV Light

Photo: ©Ryo Chijiiwa CC BY 2.0 Deed

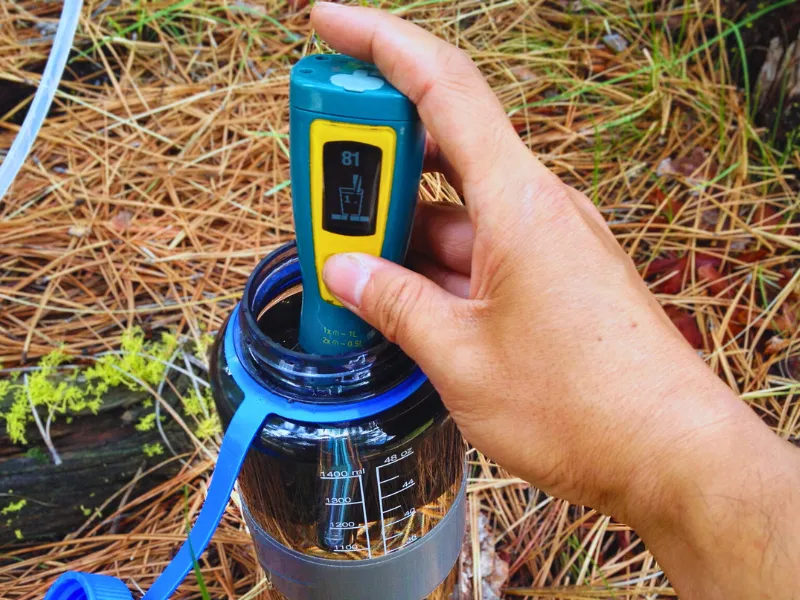
Ultraviolet light can quickly and easily kill most germs in water. Handheld UV light water purification devices are affordable and available for hikers and backpackers.

UV water purification is my preferred method of purifying water as it is quick, easy, and lightweight. Unfortunately, my UV light has failed multiple times, resulting in having to boil water as a backup.

For directions on how to purify water by UV light, see the manufacturer guidelines, as each device works slightly differently.   

5) Purify Water by Sunlight

Photo: ©Xurzon via Canva.com

Sunlight essentially acts as a UV source for purifying water. This is also called solar disinfection or SODIS [8].

How to purify water by solar disinfection in 3 steps: 

  1. Filter cloudy water with paper towels, coffee filter, gravel, or clean debris like pine needles. You may let the water settle and then use the clear water on top.  
  2. Fill clear PET bottles (ideally under 3 liters) with clear water.
  3. Lay bottles on their side on a dark surface in direct sunlight for at least 6 hours [9]. Allow up to 2 days in cloudy weather.

6) Purify Water with a Sip Well

AI Photo: Daniel Borkert/Canva Magic Media™

A sip well, also known as a coyote well or gypsy well, can work as a last resort if you don’t have access to a heat source for boiling or any other way to purify water.

The basic premise is that the water will filter through the dirt and debris in the ground from a nearby water source into a small hole you dig.

I didn’t find any research that this was effective in purifying water from the germs that make you sick (such as Giardia, Cryptosporidium, and E. coli) [10].

Use this method cautiously. If possible, I always recommend disinfecting water from a sip well with another method, such as boiling.

How to purify water by a sip well in 4 steps:

  1. Find a source of standing water (pond, large puddle, lake, spring) or stream. 
  2. Dig a small hole at least 3 feet or more from the water source that goes down below the level of the water source.
  3. Let water seep into your hole until filled.
  4. Process water from your sip well if possible (recommend further boiling or disinfection). 

You have learned how to purify water in six ways: boiling, filtering, disinfection, UV light, solar disinfection, and sip well. Each method has advantages and disadvantages, depending on your situation and available resources.

In addition to obtaining safe drinking water, you will also need to build an emergency shelter in a survival situation.

Stay prepared with the hiking essentials on your next camping or hiking trip, and avoid a wilderness survival situation altogether. 

FAQs

Why bother with purifying my water when hiking or camping?

There are over 100 germs (bacteria, viruses, parasites) in the US surface water. Water purification is essential in avoiding waterborne illness. In a survival situation, you need water to live, but you also want to avoid getting seriously ill from contaminated water.

Sources

How to Build 8 Practical Wilderness Survival Shelters

How do you build a practical survival shelter in the wilderness? What materials do you need? How do you choose the best design for your survival shelter? How do you make it effective? These are survival shelters that you could most realistically build without any extra tools.

I have built several survival shelters for fun throughout the years, but thankfully, I have never had to use one in a wilderness survival situation. I have also studied and watched many articles and videos on various types of survival shelters and bushcraft. I have selected the 8 most popular and practical ones for you in a wilderness survival situation. You could most realistically build these survival shelters without any extra tools beyond what you find in nature.

Key Takeaways

1) Natural Shelter

Photo: ©ipsimus via Canva.com

Natural shelter includes rock overhangs, caves, tree roots, hollow logs, or sturdy fallen trees. When lost, this is often the quickest way to establish a shelter and camp. Often, natural shelters can be modified to reduce wind and rain exposure. They also often let you focus on laying down bedding and getting a fire going before nightfall. 

Pros

  • Quick modify
  • Require less energy

Cons

  • May not be as safe due to logs or rocks falling 
  • May also be home to other animals or pests 
  • May not provide adequate weather protection without modification 

Materials

  • Natural shelter
  • Bedding materials such as vegetation or branches
  • Sticks or rocks to modify the entrance 

Directions

  • Look for rock overhangs, large exposed tree roots, or whatever naturally might provide a temporary shelter
  • Add a thick layer of bedding material
  • Add a fire pit outside of the shelter with plenty of firewood for the night
  • Modify entrance as needed 

2) Debris Cocoon or Nest Shelter

AI Photo: Daniel Borkert/Canva Magic Media™

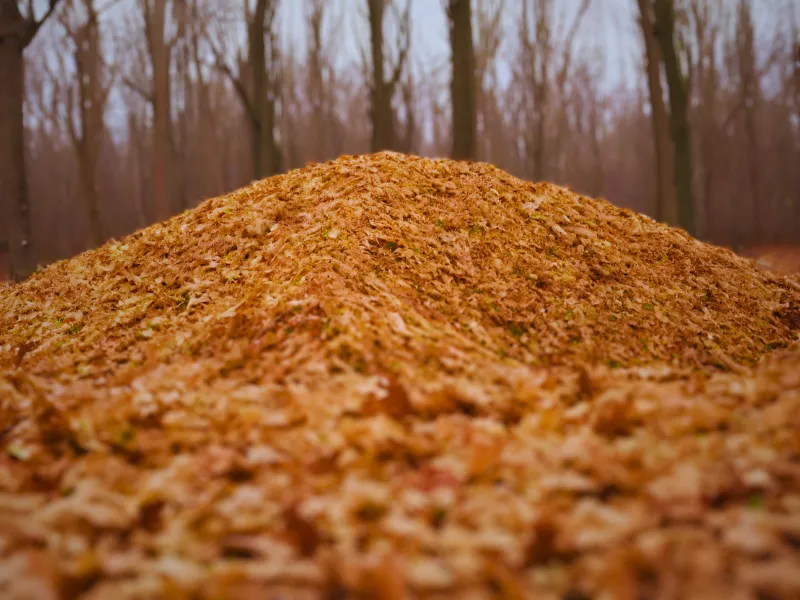
Cocoon or nest shelters are temporary emergency shelters that provide insulation protection from the elements. They are constructed by gathering as much debris as possible and crawling in the middle to sleep. 

Pros

  • Easy to construct with minimal tools
  • Adaptable to various situations and terrains
  • Helps maintain body heat

Cons

  • Can take time to gather a large enough pile 
  • Dirty and sometimes difficult to get in and out.
  • Not always waterproof in downpours
  • Fire hazard if using a fire pit nearby. 

Materials

  • Piles of leaves or dried grass or other vegetation

Directions

  • Find a location, preferably under a tree with lots of leaves or dried grass nearby
  • Gather a massive pile of debris, providing at least a few feet of padding off the ground and 3-4 feet around you in depth. 
  • Bore a small tunnel in the middle where you will sleep
  • Plug the entrance with a bundle of debris to reduce drafts 

3) Lean-To Shelter

Photo: ©James Mahan via Canva.com

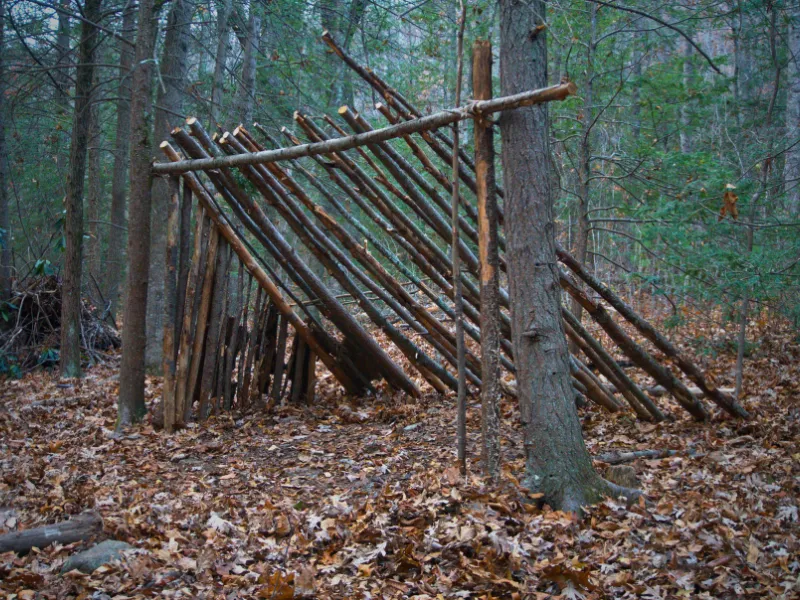
Lean-to shelters provide a fairly quick way to get out of the rain or sun. They are often paired with a good fire as they provide little protection from the cold. 

Pros

  • Simple to construct 
  • Provides shade and basic rain protection
  • Works well with a fire

Cons

  • It doesn’t provide any insulation from the cold
  • Exposed if the wind changes direction

Materials

  • Sturdy log/stick several feet long for main beam
  • Several sticks for frame
  • Large amounts of branches, leaves, grass, moss for roofing

Directions

  • Secure main beam stick/log between two trees (can also have one end on ground)
  • Lean branches and sticks against one side of main beam to create a roof structure
  • Fill gaps with branches or other debris
  • Shingle roof with bark or moss starting from bottom up to waterproof roof
  • Remember to create a bed inside shelter to insulate from ground

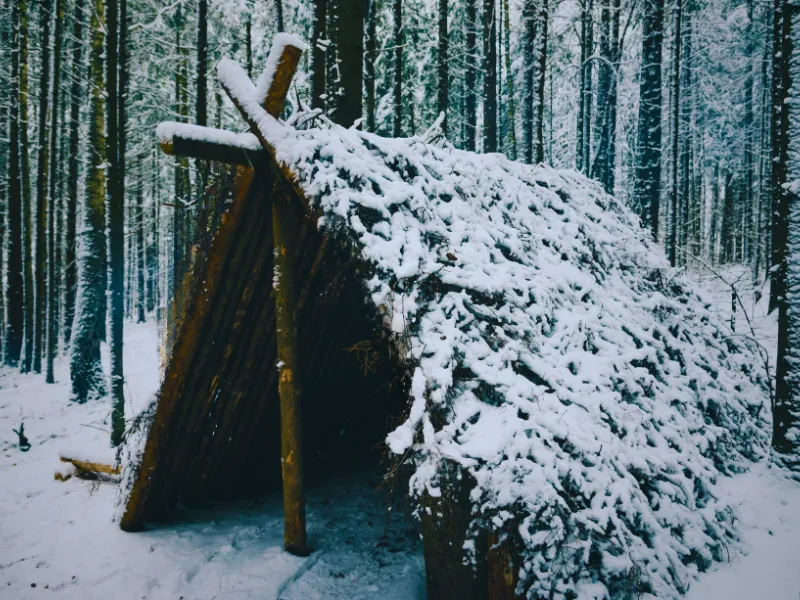
4) A-Frame Shelter

Photo: ©Sergey Razbitnov via Canva.com

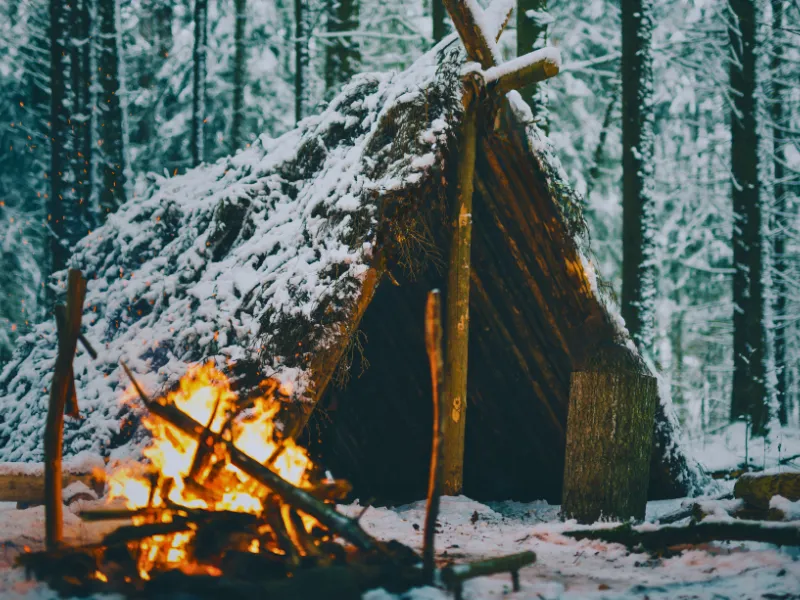
An A-frame shelter is an upgraded lean-to shelter with a roof constructed on both sides. A-frame shelters provide more protection from the elements. They also require more time and skill in the construction process. 

Pros

  • Protects well from wind, rain, and sun. 
  • Provides a more permanent shelter option
  • Works well with fire pit nearby

Cons

  • Takes longer to construct
  • Doesn’t insulate from cold weather

Materials

  • Sturdy stick or log for main, center beam
  • Several sticks for roof frame
  • Large amounts of branches, leaves, grass, or moss for roof sealing

Directions

  • Secure main beam stick/log between two trees (can also have one end on ground) preferable so you can sit up inside. 
  • Lean branches and sticks against both sides of main beam to create a roof structure
  • Fill gaps with branches or other debris
  • Shingle roof with bark or moss starting from bottom up to waterproof roof
  • Remember to create a bed inside shelter to insulate from ground

5) Wickiup Shelter

Photo: ©James Mahan via Canva.com

A wickiup shelter is similar to a teepee but uses debris for roofing and insulation rather than a covering such as a tarp or animal skin seen on a teepee. For warmth, build a fire at the shelter entrance or just outside — never burn a fire inside the enclosed wickiup, where smoke can fill the space with carbon monoxide and sparks can ignite the dry debris. It is a great more permanent primitive shelter option.

Pros

  • Works well with a fire pit built at the shelter entrance or just outside — never inside
  • Provides good protection against rain, wind, snow, and sun.

Cons

  • Takes a lot of time to construct
  • Take more skill to construct
  • If improperly constructed, it may collapse on you. 
  • Fire and carbon-monoxide hazard: a fire inside this enclosed debris shelter can ignite the dry walls and roof, and smoke can fill the space with carbon monoxide — an odorless gas that can kill within minutes. Never burn a fire fully inside the wickiup

Materials

  • 3+ large poles or sturdy sticks for primarily tripod supports
  • Several poles or sticks for secondary supports
  • Large amount of debris for covering insulation and waterproofing

Directions

  • Secure support poles in a tripod with the top securely tied or interlocked
  • Arrange secondary supports around the tripod
  • Fill gaps in the roof with debris and branches
  • Insulate the roof with a thick layer of debris. If you plan a fire, build it at the shelter entrance or just outside — never fully inside the wickiup
  • Weigh down debris with branch to prevent debris from blowing away
  • Ensure the shelter is sturdy and won’t collapse 
  • Line edges inside with bedding material
  • Build a small fire pit at the shelter entrance or just outside — never fully inside the wickiup

6) Pit Shelter

Photo: ©wanderluster via Canva.com

A pit shelter works best in locations with minimal rain, such as the desert. Usually, a natural depression is utilized with building a rough wickiup shelter overhead for sun and wind protection. Pit shelters can also provide warmth at night in a more arid region with cold nights. A scout’s pit is an alternative pit shelter where you dig a trench and sleep in it, covering yourself with a tarp or other natural covering. 

Pros

  • Provides great wind protection
  • Can usually provide significant warmth with a fire

Cons

  • Doesn’t work well in rainy areas
  • Take a lot of time to dig

Materials

  • Stick or shovel for digging
  • Soft sandy ground
  • Materials for covering (see above for wickiup)

Directions

  • Dig a shallow pit that you can lie down in comfortably 
  • Construct a wickiup type cover for the roof to protect from the sun

7) Quinzhee Snow Shelter

Photo: ©Jupiterimages via Canva.com

A quinzhee snow shelter offers protection from the cold and wind in an emergency survival situation in a snowy area. You basically collect a huge pile of snow and burrow it into the middle. 

Pros

  • Fairly easy to construct
  • Provide wind protection

Cons

  • Take a long time to construct
  • It is easy to get hot and sweaty when constructing, resulting in cold, wet clothes later

Materials

  • Lots of snow
  • Several small sticks broken approximately 2 feet long

Directions

  • Collect a massive pile of snow. You want the walls to be about 2 feet thick, so consider how much room you need to move around inside. 
  • Let the snow settle for several hours to stabilize.
  • Insert sticks around the outside roof as markers for how thick the wall/roof needs to be
  • Burrow a hole at the base of the pile 
  • Carefully carve out a room inside of the pile, stopping at the sticks 
  • Create a bed inside that is higher than the entrance.
  • Create a small air hole to let some fresh air in.
  • Create a plug for the entrance. 

8) Snow Cave Shelter

Photo: ©panaramka via Canva.com

A snow cave resembles a quinzhee but doesn’t require gathering snow. You rather burrow into a large snow drift to create a room. 

Pros

  • Straight forward construction
  • Provides good wind protection

Cons

  • Takes a lot of time to construct
  • It is easy to get hot and sweaty when constructing
  • It’s still pretty cold inside.
  • Risk collapsing shelter if someone walks on top 

Materials

  • Large snow drift
  • Shovel if available

Directions

  • Burrow a hole at the base of the snow drift
  • Carefully carve out a room inside of the pile that is higher than the entrance
  • Create a bed inside that is higher than the entrance.
  • Create a small air hole to let some fresh air in.
  • Create a plug for the entrance. 

Remember to follow Leave No Trace principles when out in the wilderness, and practice shelter building only if you’re in an emergency or survival situation. 

FAQs

Why is a survival shelter important?

One of the most important things you need to survive in the wilderness is shelter. A shelter can protect you from the cold, rain, sun, and wind. It can also give you a place to rest and plan your next move. Without a shelter, you could die from exposure and hypothermia in a matter of hours.

What should I consider when selecting a location for my survival shelter?

Choosing a survival shelter site is similar to choosing a camping site. When choosing a location, look for an area with natural shelter materials, such as leaves, branches, and trees. Ensure the site is far from potential hazards, offers concealment from threats, and has multiple entry and exit points for safety. Avoid flood-prone areas and be wary of wildlife when considering natural shelters like caves or hollowed-out trees.

What are some common materials used for building a survival shelter?

Common materials include leaves, branches, and trees. If available, rope or paracord is beneficial, but you can also make sturdy rope from vines and roots. Without these, look for natural shelters that require minimal construction, such as caves or overhangs.

How to Use a Compass: Steps for Compass and Map Navigation

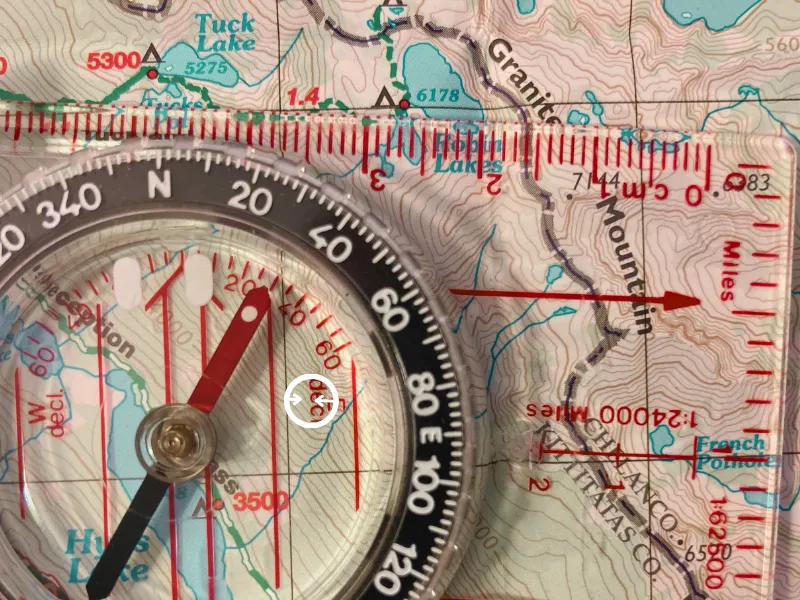
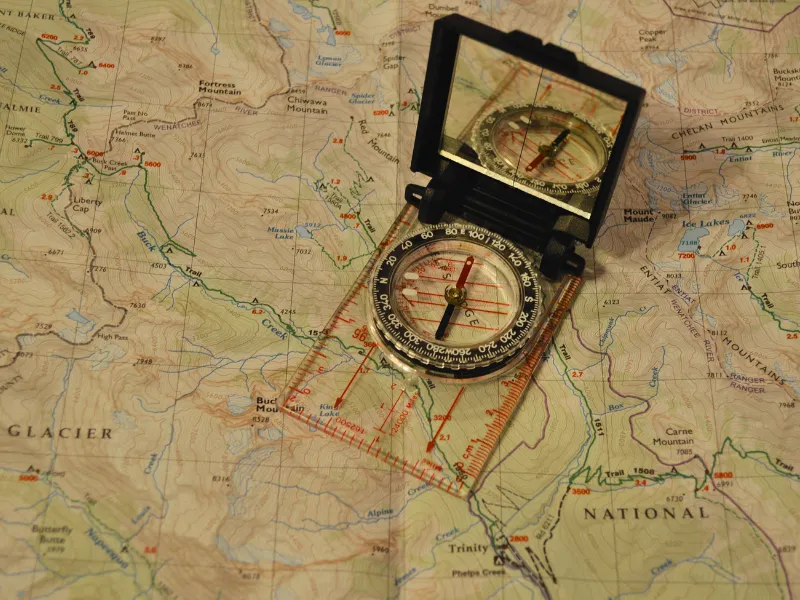
Compass on a topo map

A compass and map greatly reduce the chance of staying lost outdoors, but they are not a guarantee — always carry a map, tell someone your plan, and practice before you need them. Most outdoors experts recommend carrying a compass as part of your essential hiking gear. However, using a compass is a lost science, as most hikers and backpackers use a phone or GPS for navigation. This guide helps you learn how to use a compass for navigation, so your compass isn’t just dead weight in your pack.

I’ve put together a step-by-step guide to learning the science of using a compass based on my experience hiking with a compass and map. I’ve also researched the best outdoor navigation resources to help you learn to use your compass effectively.

Why Use a Compass?

You will probably navigate most of your hikes with your phone using something like Gaia, Google Maps, or even a separate GPS device. This is not only easy but also often more accurate. But there a 2 reasons to bring and use a compass on your hike:

  1. A compass can quickly orient your map.If you have a paper map (which you should on a longer hike), using a compass to orient the map in the correct position is quick and easy with a compass.
  2. A compass provides backup. If your phone or GPS fails, you need a backup, especially on a longer or remote area hike. Also, dense canopy and deep canyons can degrade GPS accuracy and slow satellite fixes, though they rarely eliminate reception entirely. Having and knowing how to use a compass is a worthwhile skill to reduce getting lost in the woods.

Compass Basics

Types of Compasses

Baseplate or orienteering compass

Open baseplate compass
Photo: ©Daniel Borkert/OutdoorFootprints.com

A baseplate, also called an orienteering compass, is the most common type of hiking and backpacking compass. It usually is made of a flat piece of transparent plastic with an adjustable dial or bezel. Some baseplate compasses come with a mirror that allows sighting capabilities. Baseplate compasses work well either by themselves or with a map.

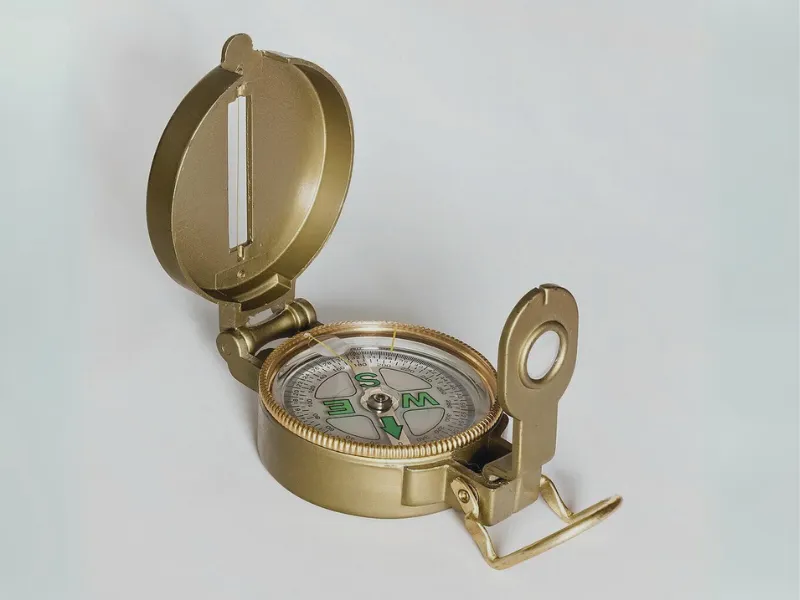
Lensatic compass

Open lensatic compass
Photo: ©Jacek Halicki/CC BY-SA 4.0 via Wikimedia Commons

Lensatic compasses are commonly seen in military and action movies. They are usually round with a sighting wire and lid. They can work in a pinch both in the field and using a map. However, for hiking and backpacking, you will generally want to get and use a baseplate compass rather than a lensatic compass.

Parts of a Baseplate Compass

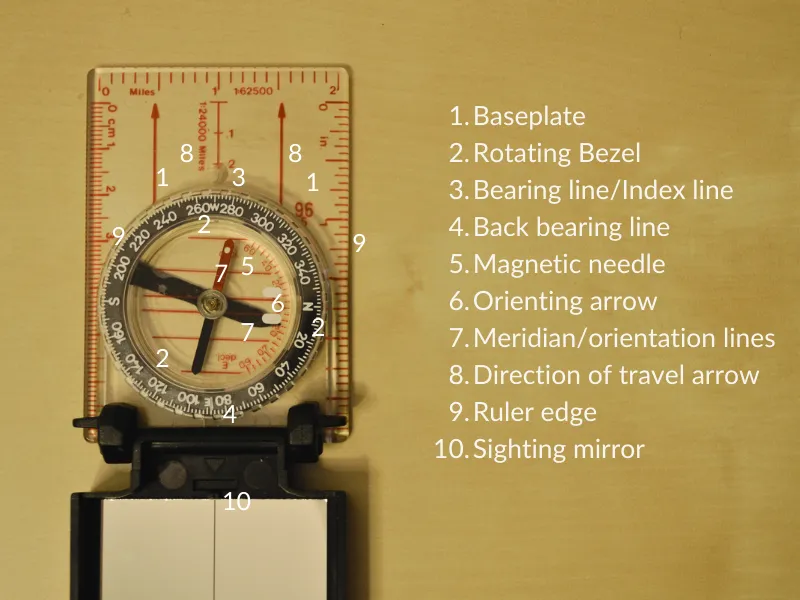
Numbered parts of a compass
Photo: ©Daniel Borkert/OutdoorFootprints.com
  1. Baseplate: The large flat rectangular plastic piece that has the ruler edges, bezel, index line, and direction of travel arrow
  2. Rotating Bezel: The dial with numbers 0-359 representing degrees (the angles as measured from North, which is 0°)
  3. Bearing Line/Index Line: The marker of the current direction the bezel is set at in degrees
  4. Back Bearing Line: The marker that is always 180° from the index line or bearing
  5. Magnetic Needle: The marker in the middle always points towards the magnetic north (usually, the north part of the needle is red/colored while the south part of the needle is usually black)
  6. Orienting Arrow: This is how you will line up the bezel with the magnetic needle so your compass reads accurately
  7. Meridian/Orientation Lines: Run North/South and help you line up the compass correctly on a map
  8. Direction of Travel Arrow:Points away from you in the direction you want to travel or take a bearing
  9. Ruler Edge: The long edge of the baseplate, usually marked in inches and centimeters, helps you measure distances on a map.
  10. Sighting Mirror (optional): A mirror can help you more accurately shoot a bearing (mirror usage not covered in this guide)
  11. Declination Adjustment (optional): Some compasses have a key or tool you can use to adjust for declination, as discussed further below in this guide.

How to do Basic Compass Navigation

  1. Hold the compass flat at waist height with both hands and elbows tucked in for support, with the direction arrow facing away from you towards your intended destination.
Photo: ©Daniel Borkert/OutdoorFootprints.com
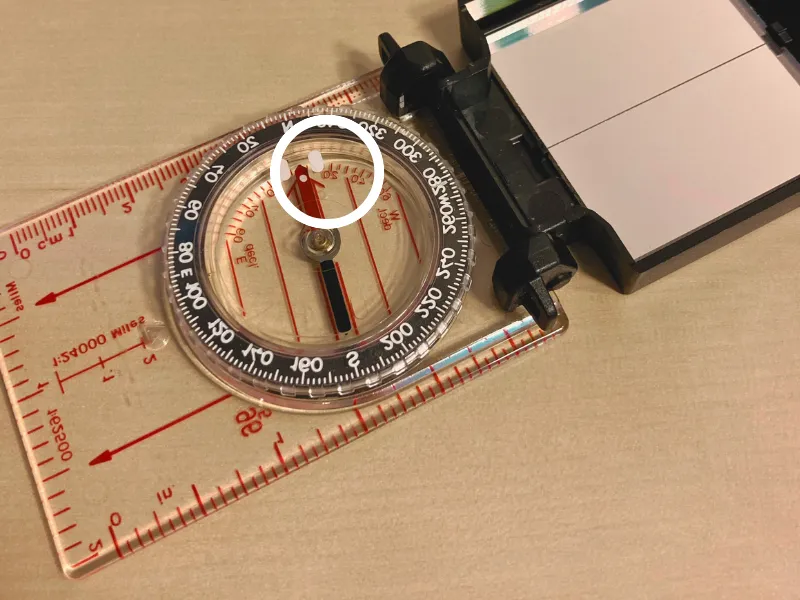
  1. Rotate the bezel dial until the orienting arrow is aligned with the red magnetic arrow. Remember the phrase, “Put Red in the Shed.”
Photo: ©Daniel Borkert/OutdoorFootprints.com
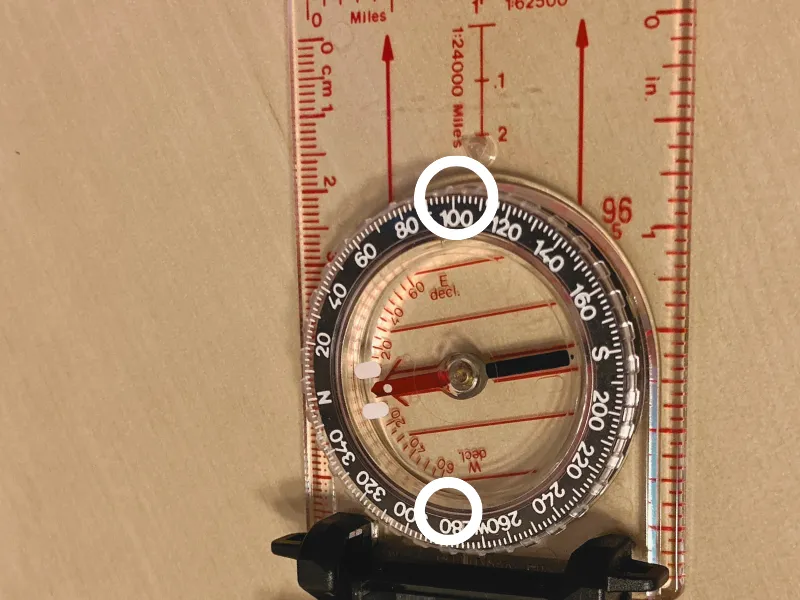
  1. Read the number on the index line/bearing line. This is the direction you’re currently facing expressed in degrees (an angle clockwise from North is considered 0 degrees). The back-bearing is 180 degrees behind you and should be on your back-bearing line.
Photo: ©Daniel Borkert/OutdoorFootprints.com
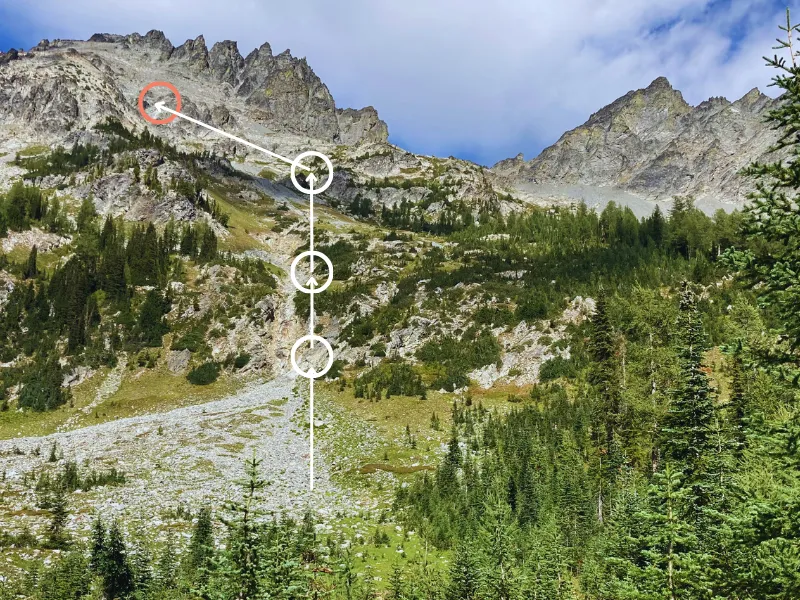
  1. If possible, note a landscape feature directly aheadwithin the next hundreds of feet on your bearing and a point behindyou on your back bearing.
Shooting a bearing course with intermediate points going up Five Finger Jack | Photo: ©Daniel Borkert/OutdoorFootprints.com
  1. Draw an imaginary line in your mind. Your compass bearing should match this imaginary line.
  2. Don’t change anything on the compass until you want to go in a different direction.
  3. Put the compass away and walk/hike toward the landscape feature you identified ahead of you. If you lose sight of the feature ahead, look behind for the back-bearing feature you identified.
  4. Once you’re at the landscape feature you identified, take your compass out and, without adjusting anything on the compass, rotate your body until the magnetic needle lines up with the orienting needle. “Put red in the shed”.
  5. Repeat steps 5-8 until you reach your intended destination.

How to Use a Compass with a Map

Photo: ©Daniel Borkert/OutdoorFootprints.com

Using a compass with a map is a powerful, reliable navigation tool for lost-proofing yourself. Most hikers and backpackers should have some basic skill with reading and using a map with a compass. You can download and print USGS topo maps for free, so there’s no excuse for not always having a good topo map when hiking or backpacking. Here are a few common scenarios when using a map and compass together with the basic steps.

Always Adjust for Declination

Chart: USGS Educational ResourcesPublic Domain

Your compass’s magnetic needle always points to the “magnetic north.” However, the magnetic north is actually slightly different from “true north” or the north pole. This difference is called declination and varies depending on where you are in the world. 

We care about declination because most maps are oriented for “True North.” If you’re not using a map, you can skip adjusting your compass for declination. 

Chart: ©Cavit, CC BY 4.0 via Wikimedia Commons

Declination adjustment for your compass can be confusing, but I have found two easy methods for adjusting your compass for declination that help you avoid doing too much math and calculations. If at all possible, plan ahead for declination before your trip and avoid trying to do any declination addition/subtraction in the field.  

Find the declination offset for your current area

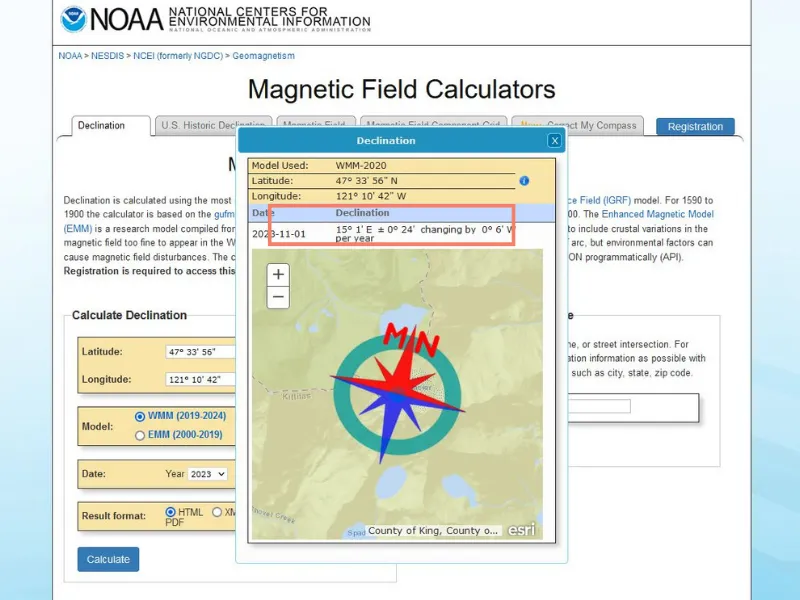
You first have to know the declination offset for your particular area. Generally, you can search by zip code using the Magnetic Field Calculator. This will give you a declination of either East or West by degrees. The USGS topo maps also have a declination offset on the bottom. The declination changes slightly yearly, so an older map might not have an accurate declination offset number. 

Example using the Magnetic Field Calculator in my area in Washington State | Screenshot: Daniel Borkert accessing NOAA Declination Calculator website

Adjust your compass for the declination

After you know your declination offset in East or West degrees, you must adjust your compass to account for the declination. There are multiple ways to do this, but here are the 2 easiest ways to adjust for declination on your compass. 

Method #1– With an adjustable orienting arrow built into the compass.

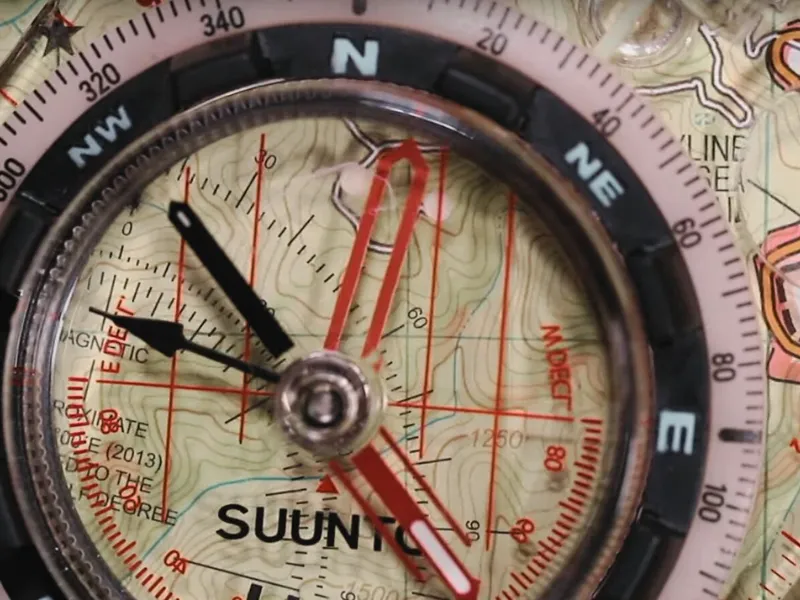
Some compasses come with a way to adjust the orienting arrow to account for your decline. I recommend looking up the user guide for how to do this, but usually, it’s just a simple screw you turn to adjust the orienting arrow to the specified declination degree, either East or West. With this method, you will still “Put red in the shed.”

Suunto Compass with Declination Adjusted | Screenshot: Summit Sparrow via Youtube
Method #2– With tape as the new orienting arrow on non-adjustable compasses.

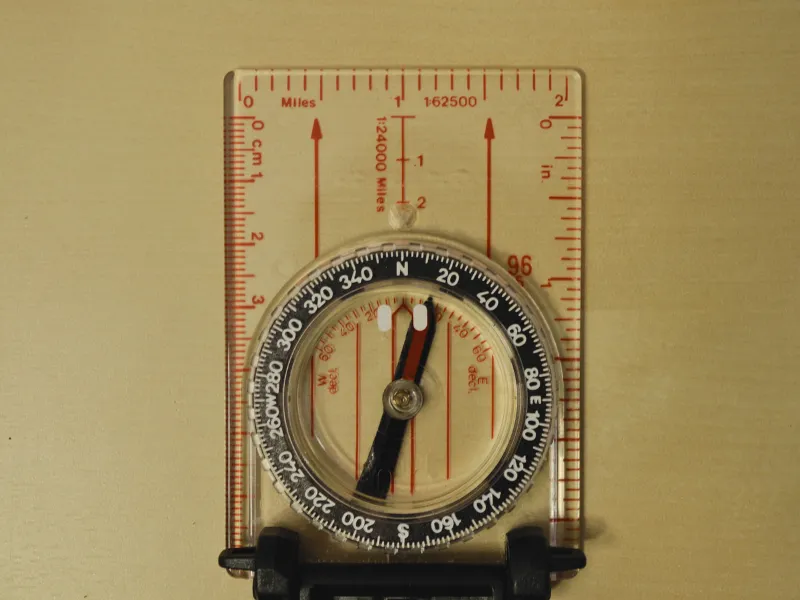
Some baseplate compasses do not have an adjustable orienting arrow for declination. You can either add/subtract on the fly, which can get confusing, or you can use a strip of tape to mark the declination and use the tape as the new orienting arrow. With this method, you will now “Put red on the tape.”

Compass now adjusted for declination with black tape as a new orientation arrow. | Photo: ©Daniel Borkert/OutdoorFootprints.com

When you know your location on the map

  1. Adjust the compass for declination as above.
  2. Orient the map using landscape features (optional step). You are basically using your compass as a protractor to find an angle from north on the map, so you can ignore the magnetic needle while it’s on the map.
  3. Place the compass on the map with the back ruler edge on your current location.
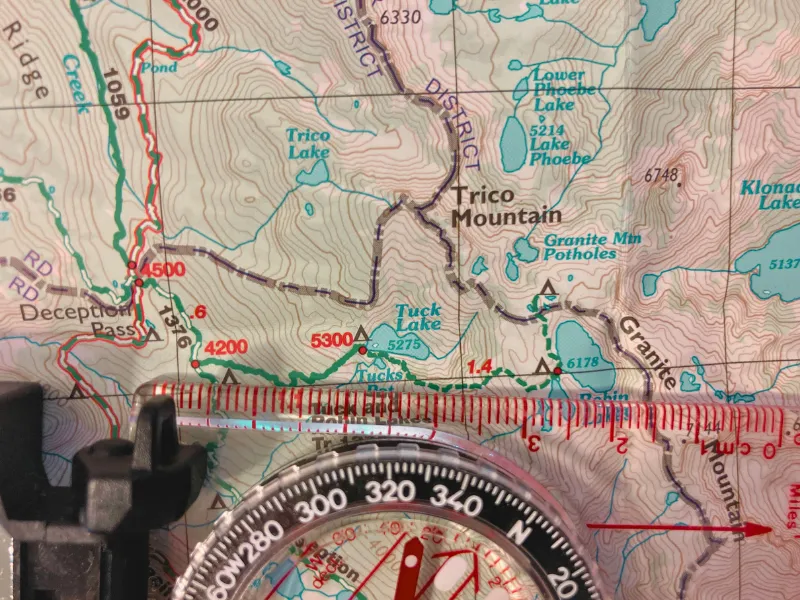
  4. Place the front ruler edge on your intended destination. Direction arrows should be facing toward the intended destination. 
Turn off (current location) towards Robin Lakes (intended destination) using the ruler edge on my compass. | Photo: ©Daniel Borkert/OutdoorFootprints.com
  1. Rotate the bezel so the meridian/orienting lines are pointed north on the map and parallel with the North/South lines on the map. Remember to ignore the magnetic lines/needle at this point. Also, ignore the adjusted declination orienting arrow or taped declination. 
Ignore the magnetic needle. The compass meridian lines must align with the map’s north/south lines. | Photo: ©Daniel Borkert/OutdoorFootprints.com
  1. Read the bearing number at the index line once the meridian/orienting lines parallel the map’s North/South lines. This is the bearing you need to reach your intended destination.
The compass edge is set on the turnoff, aligning with my destination (Robin Lakes), ANDthe compass meridian lines are set parallel. Bearing 93° at the index line is the bearing I need to take to get from the turnoff toward Robin Lakes. | Photo: ©Daniel Borkert/OutdoorFootprints.com
  1. Remove the compass from the map without rotating the bezel (keep it at 93°).
  2. Now rotate your body with the compass and align the magnetic needle with the adjusted declination orienting arrow or taped declination line (“Put red in the shed” or “Put red on the tape”).
  3. Once lined up, you should be facing the direction and bearing of your intended destination.
  4. Use the basic navigation steps above to work your way to your destination.
  5. In more extreme terrain, you may need to plot multiple bearing lines to avoid obstacles.

When you don’t know your location on the map

When you don’t know where you are on a map, but you’re on the trail.

  1. Orient map to true north using the compass.
Orient the map to true North by lining up compass meridian lines parallel to map lines with the direction arrows facing the top of the map. Then rotate the map to put “Red in the shed” or “Red on Tape,” depending on how you adjusted the compass for declination. | Photo: ©Daniel Borkert/OutdoorFootprints.com
  1. Attempt to identify a landscape feature that matches the map and take a bearing of that feature.
  2. Line up the front ruler edge with the landscape feature.
Photo: ©Daniel Borkert/OutdoorFootprints.com
  1. Rotate the entire compass baseplate until meridian/orienting North/South lines parallel the map’s North /South lines. Don’t rotate the bezel to do this.
Photo: ©Daniel Borkert/OutdoorFootprints.com
  1. The front rule edge should still be a landscape feature on the map, and the back edge should be towards your current location on the trail. You may need to use a straight edge to extend the line backward until it hits your trail.
An additional bearing of a landscape feature seen on the map should help confirm your location on the trail. This is a recommended but optional step. | Photo: ©Daniel Borkert/OutdoorFootprints.com
  1. Look for additional features near the trail to double-check your work.

When you don’t know where you are on a map, and you’re not on a trail. 

  1. Orient map to true north using the compass as demonstrated above.
  2. Attempt to identify a landscape feature that matches the map and take a bearing of that feature.
  3. Line up the front ruler edge with the landscape feature shown above.
  4. Rotate the entire compass baseplate until the meridian and orienting lines parallel the map’s North and South lines. Don’t rotate the bezel to do this.
  5. Mark this line on your map.
  6. Repeat steps 1-5, at least 1-2x more with different landscape features, preferably 90 degrees or more from each other.
  7. The intersection of lines should form a small area where you are approximately on the map.
If you’re not on a trail, use your compass to take 3+ bearings, which can help you “triangulate” your position on the map. The three bearings above form a triangle that approximates the area I’m currently standing on the map. | Photo: ©Daniel Borkert/OutdoorFootprints.com

Tips for Using Compass

  1. Rotate the bezel only when necessary. 
  2. Rotate your body with the compass, keeping the front arrow straight in front of you. Do not rotate the compass only with your hands.
  3. Keep the compass flat when using it.
  4. Avoid using a compass around metal objects such as phones, keys, cars, or power lines.
  5. If you use a map, always plan to account for declination on your compass before you get outside (doing math on the fly increases the chance of error).

Practice, Practice, Practice

Learning how to use a compass is primarily a hands-on experience. The best way to get good at using a compass is to go outside and practice. Here are some exercises for getting comfortable with your compass for basic navigation. 

Bearing/back-bearing exercise

  1. Mark your starting location. 
  2. Look for an object or landscape feature several yards away and take a bearing from your current location. 
  3. Make a note of the back bearing. 
  4. Put your compass away and walk towards the identified landscape feature. 
  5. When you reach your intended destination, adjust your compass to the back bearing.
  6. Make your way back to where you started. 
  7. Repeat the exercise but increase the distance.

You should arrive at your starting location if you identified a landscape feature in line with your back bearing. If you didn’t identify a landscape feature in line with your back bearing, you might end up slightly off to the right or left of your starting location. This is called “lateral drift” and can easily happen, especially over long distances, so always having an object or landscape feature identified on your bearing line helps keep your course. 

The Square exercise

  1. Mark your starting location. 
  2. Adjust the compass index line pointing to the North or 0 degrees.
  3. Rotate your body to align the orienting arrow with a red magnetic needle. “Put red in the shed.”
  4. Walk 10 steps, then stop and mark your spot.
  5. Adjust the compass index line pointing to the East or 90 degrees.
  6. Rotate your body to align the orienting arrow with a red magnetic needle. “Put red in the shed.”
  7. Walk 10 steps, then stop and mark your spot.
  8. Adjust the compass index line pointing to the South or 180 degrees.
  9. Rotate your body again to align the orienting arrow with a red magnetic needle. “Put red in the shed.”
  10. Walk 10 steps, then stop and mark your spot.
  11. Adjust the compass index line pointing to the West or 270 degrees.
  12. Rotate your body one last time to line up the orienting arrow with a red magnetic needle. “Put red in the shed.”
  13. Walk 10 steps, then stop. You should be at your starting location, having completed a square. 

Map and compass exercise

  1. Get or print a topo map of your area
  2. Adjust your compass for magnetic declination using one of the two methods for declination adjustment as above.
  3. Orient your map north with a compass. 
  4. Mark your current location on the map and find an intended destination. 
  5. Use your compass on the map to plot a course, taking note of the bearings. 
  6. Use your compass with the bearing to reach your intended destination, remembering to use intermediate landscape features to keep your line from drifting. 
  7. For a further challenge, use your compass and map to pinpoint your location on the map.

Knowing how to use a compass is a powerful tool for safely navigating hikes, especially for beginners. Having and using a compass and map together significantly decreases your risk of getting lost in the great outdoors. Check out our essential hiking gear guide for other ways to plan your upcoming hiking trips, including packing a good first aid kit.

FAQs

How do I read a compass for beginners?

Reading a compass starts with understanding its main components: the base plate, the direction of travel arrow, the rotating bezel (or compass ring), and the magnetic needle. The needle typically has a red end, which points toward magnetic north. To read a compass:

1. Place it flat on your palm or a level surface.

2. Rotate the bezel so the orienting lines match the compass needle’s direction.

3. The direction of travel arrow now points to your desired direction.

What is the correct way to hold a compass?

Hold the compass level in front of you. Ensure the direction of travel arrow points straight away from you. Keep the compass away from metal objects or electromagnetic fields to avoid interference. This position ensures accurate readings.

How do I set a bearing on a compass?

1. Identify your current location and destination on a map.

2. Place the compass edge between these two points.

3. Rotate the bezel until the orienting lines parallel the map’s meridians, ensuring the north

4. indicator points to map north.

5. The direction of travel arrow now points to your destination, with the bearing number at the index line.

Does a compass always point to true north?

No, a compass points to magnetic north, not true north, due to the Earth’s magnetic fields. The difference between these is known as magnetic declination, which varies depending on your location.

How can I adjust for declination on a compass?

Some compasses have a built-in declination adjustment. For these, refer to a local map for the declination angle, adjust the declination scale accordingly, and your compass will now align with true north. If your compass lacks this feature, you’ll need to calculate the adjustment when setting your bearing manually.

Can I use a compass without a map?

Yes, a compass can be used independently to maintain a straight path or find a general direction. However, combining it with a map provides precise navigation and location tracking.

How do I find north using a compass?

1. Hold the compass level.
2. Turn yourself and the compass until the red end of the needle aligns with the orienting arrow.
3. The direction of travel arrow now points to magnetic north.

What are some common mistakes when using a compass?

– Not holding the compass level, causing inaccurate readings.

– Allowing the compass to be near metal or electronic devices.

– Forgetting to adjust for magnetic declination, leading to off-course navigation.

– Misreading the bearing or confusing the north on the compass with the map’s north.

How do I use a compass for orienteering?

Orienteering involves using a compass and map to navigate from point to point in diverse and usually unfamiliar terrain:

1. Understand the map’s scale, symbols, and contours.

2. Set bearings between checkpoints.

3. Use the compass to orient the map and yourself to the north.

4. Navigate using both the compass for direction and the map for terrain recognition.

Remember, practice makes perfect. Start with simple exercises in familiar areas to build your skills before venturing into unfamiliar territory.

Leave No Trace and Beyond

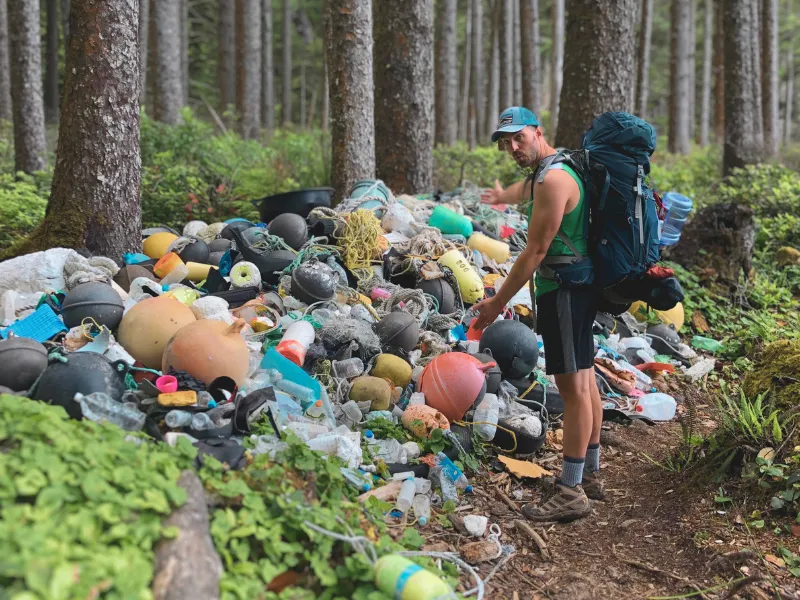
Heaps of trash on WA trail hike

A record 181.1 million Americans (58.6%) participated in outdoor recreation, according to the Outdoor Foundation’s 2025 Outdoor Participation Report [1]. Leave No Trace guides responsibly enjoy and protect the outdoors, whether hiking, car camping, backpacking, or even at home.

I am an outdoor enthusiast who took the Leave No Trace course [2], read multiple research articles, blogs, and books, and spent well over 15+ hours researching not only Leave No Trace but also general environmental philosophy, wilderness management theory, and various outdoor ethic recommendations that extend beyond the Leave No Trace seven principles. 

Leave No Trace Seven Principles

#1 Plan Ahead And Prepare

  • Keep your group small to reduce impact.
  • Know the rules and get a permit if needed.
  • Check the weather forecast.
  • Bring appropriate gear and clothing.
  • Test gear at home.
  • Schedule arrival 2 hours before sunset to set up camp.

#2 Travel And Camp On Durable Surfaces

  • Hike on designated trails.
  • Hiking in the middle of the trail, including walking through mud puddles to reduce trail widening.
  • Walk spread out on barren dirt, gravel, sand, rock, snow, or leaf litter in low or no-trail areas.
  • Avoid stepping on living soil or cryptobiotic crusts found especially in desert areas.
  • Avoid trail shortcuts.
  • Find a great campsite,preferably at an established site.

#3 Dispose Of Waste Properly

  • Biodegradable soap doesn’t mean it’s good for fish or plants.
  • Wash dishes in a large container rather than directly in streams or lakes.
  • Strain out food bits from dishwater or gray water and dispose of them in the trash rather than on the ground or in the water.
  • If disposal facilities aren’t available, scatter gray water widely >200 ft from the camp and water sources. This includes using your camp shower.
  • Pee on durable surfaces such as rocks or pine duff >200ft from trails, campsites, high-traffic areas, and water sources [3].
  • Poop in an outhouse if available; otherwise, dig a hole and bury at least 200ft from the trail, camp, or water sources.
  • Always pack out or bury dog poop.
  • Pack out all trash, including peels, diapers, and eggshells. 

#4 Leave What You Find

  • Take a picture instead of taking it or carving it.
  • Leave all rocks, flowers, and other natural objects.
  • Leave archaeological objects, including arrowheads, as these are federally protected [4].
  • Follow all foraging guidelines [5].
  • Leave areas as you find them, including avoiding digging trenches or building forts.
  • Clean outdoor gear before and after your trip to reduce invasive species.

#5 Minimize Campfire Impacts

  • Use stoves for cooking.
  • Check regulations before starting a campfire.
  • Never leave a fire unattended.
  • Supervise young children around the fire.
  • Only use sticks that are dead, down, and can be broken by hand without tools.
  • Put out fires safely by letting it burn down, drowning it with water, stirring it up, and checking it for heat.

#6 Respect Wildlife

  • Observe wildlife from a distance.
  • Never feed wildlife.
  • Store food and trash securely using a bear canister.
  • Take binoculars or zoom lenses for maximum wildlife enjoyment.
  • Avoid wildlife during sensitive times: mating, nesting, raising young, or winter.

#7 Be Considerate Of Others

  • Share the trail with uphill hikers with the right of way and use caution when passing.
  • Reduce noise, both your voice and music, while camping and hiking.
  • Limit entertainment and communication tech while outdoors.
  • Show respect and care for all – No shaming/bullying. 
  • Be a responsible pet owner who knows the rules, picks up poop, and keeps your pet on a leash.
  • Make outdoors welcoming, especially for minority communities.
    • Often with a fear of outdoor spaces due to historical reasons
    • Often with a lack of knowledge of how to get to and enjoy the outdoors
    • Often experience a lack of an invitation to get outdoors (but they don’t need permission either)
    • For more info, check out Black Folks CampToo.

Beyond Leave No Trace 

Photo: ©Kamchatka via Canva.com

Leaving no trace is truly impossible. The Leave No Trace Center, the US Forest Service, and various other groups have advocated for going beyond Leave No Trace by moving towards a sustainable lifestyle every day [6,7,8,9]. Here are several tips recommended by various experts to go beyond Leave No Trace towards a better, more sustainable outdoor lifestyle: 

#8 Beyond Leave Not Trace Starts at Home

  • Reuse equipment and clothing if possible.
  • Buy only the necessary equipment and clothing you need.
  • Minimize single-use items.
  • Take care of your equipment and clothing, including properly caring for your sleeping bag, boots, tent, backpack, and other outdoor gear.
  • Use responsible geo-tagging on social media.
  • Make responsible food and lifestyle consumption choices.
  • Decrease overall energy consumption, including the use of alternative transportation. 
  • Get involved in outdoor communities advocating for sustainability.
  • Start today in your green space areas.

#9 Beyond Leave No Trace Continues with a Broader Awareness

  • Learn about the ecological processes and conditions in the areas you both live and enjoy outdoors,such as the prior indigenous cultures, local weather patterns, geology, native plants, trees, and animals.
  • Learn basic primitive woodcraft skills such as reading animal tracks, foraging, building a survival shelter, and other basic survival skills.
  • Learn about the manufacturing process of your outdoor gear and clothing.
  • Seek and find hidden, local outdoor opportunities, reducing travel while increasing your opportunities for outdoor enjoyment.

Enjoy your connection to the outdoors in a responsible, sustainable way. Take your first step and look at our guide on finding a great campsite.

FAQs

Are there any additional educational resources or programs for ‘Leave No Trace’?

There are tons of educational resources and programs available for those interested in learning more about ‘Leave No Trace,’ including:

– The Sourcesbelow are a great start.
– Workshops and training courses offered by the Leave No Trace Center for Outdoor Ethics.
– Educational materials provided by the National Parks Service and other outdoor organizations.

What does ‘Beyond Leave No Trace’ mean?

‘Beyond Leave No Trace’ refers to practices that minimize your impact and contribute positively to the environment. This includes:

– Picking up litter left by others.
– Participating in conservation efforts.
– Educating yourself and others about sustainable practices

Can ‘Leave No Trace’ principles be applied in everyday life?

Yes, ‘Leave No Trace’ principles can be applied daily by:

– Reducing waste and recycling.
– Conserving water and energy.
– Supporting conservation efforts and organizations

Sources

  1. 2022 Outdoor Participation Trends Report by the Outdoor Foundation
  2. Leave No Trace 101 Course
  3. How to Pee Outside Leave No Trace Center via Youtube
  4. Archeological Resources Protection by U.S. Forest Service
  5. How to Leave No Trace When Foraging by Leave No Trace Center
  6. Beyond Leave No Trace by Gregory Simon and Peter Alagona
  7. Managing for Wilderness Experiences in the 21st Century by Joseph Roggenbuck
  8. Leaving ‘Leave No Trace’ Behind by Green Teacher
  9. ASAP 2.0: As Sustainable as Possible by multiple authors at Northland College