Bushcraft backpacks are essential gear for outdoor enthusiasts who enjoy hiking, camping, and surviving in the wild. These backpacks must be durable and versatile, with enough space to carry essential items like a knife, fire starter, water, and food. They also work as great bug out bags. Designed to withstand rough conditions, a reliable bushcraft backpack can make all the difference in your adventures.
Consider size, material, weight, and organization when choosing a bushcraft backpack. The backpack should be lightweight enough to carry easily yet roomy enough for all your essentials. Look for strong materials like heavy-duty nylon or canvas, which can endure harsh environments. Good organization features, like multiple compartments and external straps, help keep your gear accessible.
We researched multiple bushcraft backpacks to find the best options that balance durability, functionality, and comfort.
Best Bushcraft Backpacks
Let’s explore the best bushcraft backpacks we’ve found. Our top picks balance rugged durability and practical features to last through your wilderness adventures.
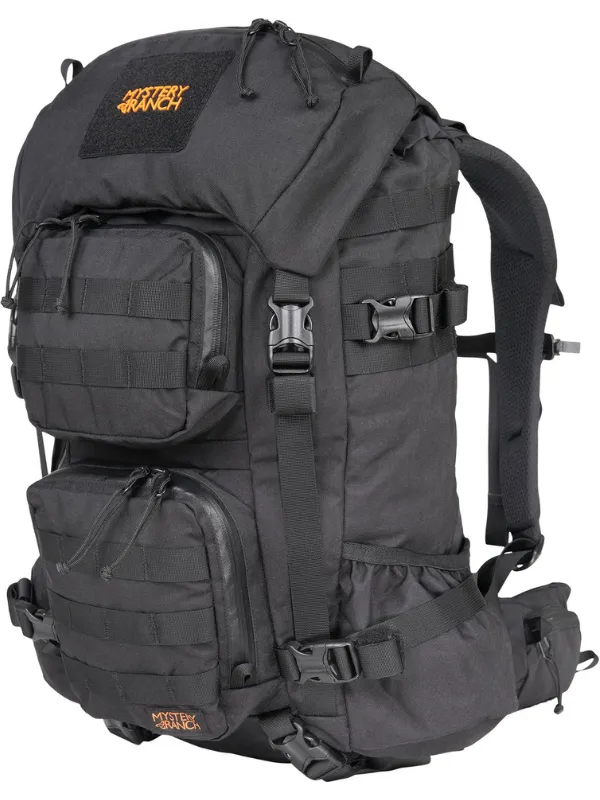
The Maxpedition Falcon-II Backpack is a must-have for any serious bushcrafter due to its ergonomic design and durable materials. It also makes a great individual bug out bag.
Pros
Extremely durable construction
Comfortable to wear for long periods
Spacious with numerous compartments
Cons
A bit pricey
Might be too large for casual use
Water resistance could be improved
Based on specs and customer reviews, the 1050-Denier nylon is incredibly sturdy and resists both abrasion and water. Reviewers report the padded straps and waist support make a noticeable difference during long hikes, distributing the weight evenly.
Based on customer reviews, the spacious compartments are a standout. The main compartment’s clamshell opening makes packing and finding items easy. There’s enough room for all essential gear and more. Reviewers especially like the extra pouches and PALS attachment points, which are perfect for organizing small items.
On the downside, the price might be steep for some. For casual outings, it might feel too large. Additionally, while it handled light rain well, we think an extra rain cover could be worthwhile.
Overall, the Maxpedition Falcon-II Backpack is an excellent choice for serious outdoor adventurers. It combines functionality, durability, and comfort in one rugged package.
This pack is perfect for those needing a reliable and versatile backpack for various wilderness situations or as a bug out survival bag.
Pros
Extremely durable build
Great for carrying heavy loads
Multiple compartments for easy organization
Cons
Relatively heavy at 4.44 pounds
Can be too large for short day trips
High price point for some budgets
Some might find it uncomfortable to wear
Based on specs and customer reviews, the durability of the construction stands out. It is robust and can handle heavy loads without a problem. The pack has numerous compartments, making it easy to keep gear organized. Reviewers appreciate the multiple access points and the convenient laptop sleeve.
On the downside, this pack is heavier at 4.44 pounds. There might be better choices for shorter trips where every ounce counts. The large size can be overkill if you’re just hiking for a day. Lastly, it’s worth noting that the price might be a bit steep for some.
Despite these cons, the Blitz 35 Tactical Pack is a solid investment if you need something versatile and reliable for more extended adventures. It’s a pack built to last and ready to tackle almost any adventure.
This is a solid choice for those needing a rugged and spacious bushcraft backpack.
Pros
Sturdy 500D Cordura material
Ample storage with 45L capacity
Versatile MOLLE webbing
Cons
A bit heavy at 4.6 lbs
The material doesn’t stretch
No included hydration bladder
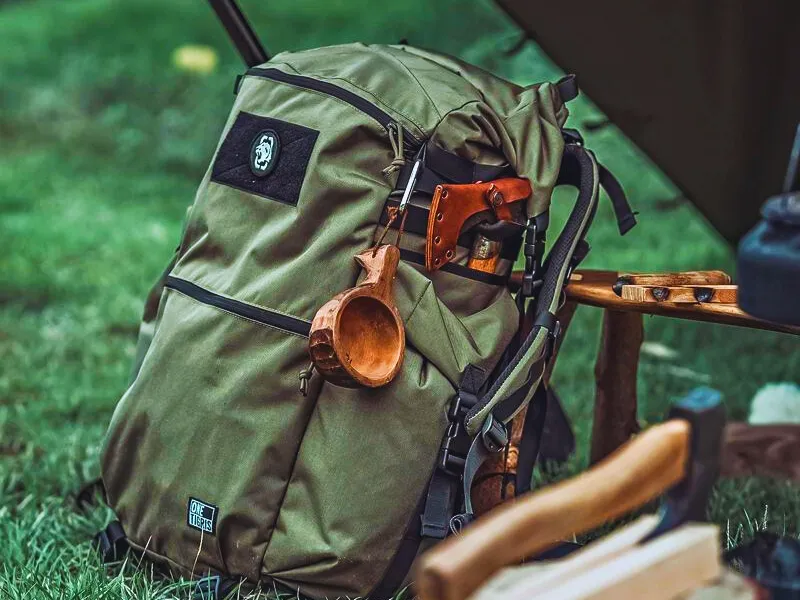
Based on specs and customer reviews, the OneTigris WILD ROCKET 45L Backpack’s durability stands out. The 500D Cordura nylon is tough and suited for rough bushcraft conditions. Reviewers report it holds up well whether scrambling up ridges or pushing through dense forests.
The storage options are impressive. With a large main compartment, multiple pockets, and specialized axe holders, organizing our gear is a breeze. We appreciated how the roll-top closure kept everything secure, and the 45L capacity ensured we had enough space for all essential items.
On the downside, it’s relatively heavy. At 4.6 lbs, reviewers note it adds noticeable weight when loaded with gear. Despite this, the MOLLE webbing allows customization with add-ons, which reviewers find valuable on extended trips. Note that a hydration bladder must be purchased separately if needed.
The Wild Rocket Bushcraft Pack balances durability, versatility, and storage, making it a reliable choice for any rugged outdoor adventure or as a bug out bag.
Buying Guide
You must consider a few key factors when looking for the best bushcraft backpack.
Capacity: Consider how long you plan to be in the wilderness. A 20-30 liter pack might work for day trips. For longer adventures, opt for 40-60 liters.
Material: Strong, water-resistant materials like nylon or canvas are essential. They can withstand rough use and protect your gear from getting wet.
Comfort: Comfortable straps and a padded back support make a big difference. Look for adjustable and padded shoulder straps. A comfortable, padded hip strap is more important in our opinion, for any long-distance travel.
Key Features
Feature
Why It Matters
Multiple Compartments
Keeps everything organized
Reinforced Stitching
Ensures the backpack can handle heavy loads
Water Bladder Compatibility
Allows easy access to water
MOLLE Webbing
Useful for attaching extra gear
Hip Belt/Strap
Helps distribute weight evenly
Weight: Aim for a lightweight backpack. Heavy packs can tire you out quickly, especially when filled with gear.
Durability: Reinforced stitching and robust zippers are signs of a durable pack.
Additional Tips
Try Before Buying: If possible, test the backpack in-store. Load it up and walk around to feel how it feels.
Season: Consider the season you’ll be using it. Winter adventures need more space for extra clothes.
Budget: Set a budget, but remember that investing more in a quality pack can save us money and discomfort in the long run.
TLDR;
After thoroughly researching the top bushcraft backpacks, it’s clear that each has its strengths. However, the Maxpedition Falcon-II Backpack stands out as the best overall choice. Its ergonomic design, durable 1050-Denier nylon construction, and comfortable wear make it ideal for serious outdoor adventurers. Despite its higher price, the Falcon-II offers unmatched functionality and durability, ensuring it can withstand the most demanding conditions.
For those seeking a balance between durability, versatility, and storage, the OneTigris WILD ROCKET 45L Backpack is a solid contender. Its 500D Cordura material and ample storage options make it perfect for extended trips. However, its weight might be a consideration for some.
Ready to elevate your outdoor adventures? Choose the best bushcraft backpackthat suits your needs and embark on your next wilderness journey. Click the links to explore more and make your purchase today!
FAQs
What size backpack should I get for bushcrafting?
The size of your bushcraft backpack depends on the duration of your trip and the amount of gear you need to carry. Here are some general guidelines:
Durability is key for bushcraft backpacks. The best materials include:
Cordura Nylon: Known for its high durability and resistance to abrasions. High-Density Canvas:Offers toughness and longevity. Polyester: Lightweight and resistant to water.
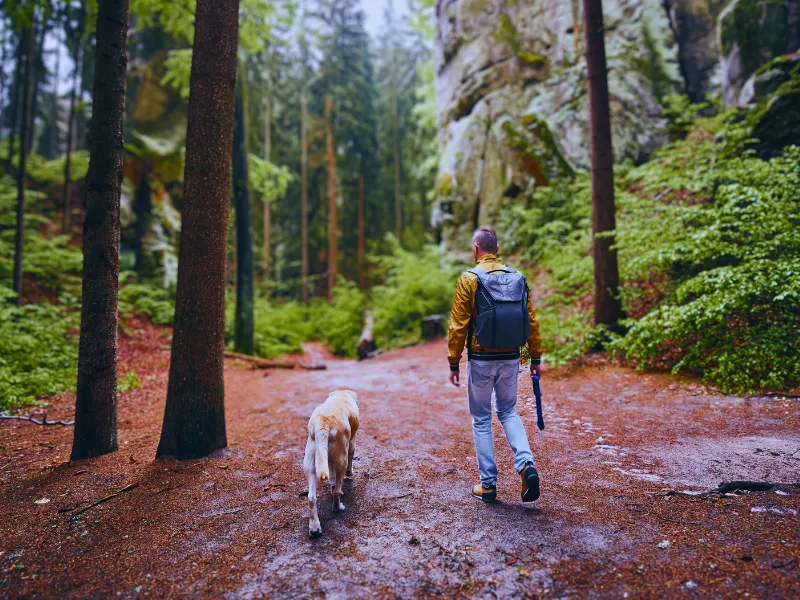
Hiking with dogs brings additional challenges and factors to consider and is more than just a walk in the park. Weather unpredictability, varying terrain, potential wildlife encounters, and park regulations are vital in how you and your dog will navigate the trails.
As an owner, you’re not just a hiker but a caretaker responsible for your pup’s safety and behavior. It’s not merely about having the right breed; it’s about proper training, the right hiking gear, and understanding trail etiquette.
Key Takeaways
Responsible dog hiking revolves around proper training, gear, and adherence to trail etiquette.
Most hikes require your dog to remain on a leash at all times.
Most national parks and wilderness areas do not allow dogs to be on the trails.
Distance: Not all dogs are marathon-ready. Choose a mileage your dog can handle.
Elevation: Steep climbs can be challenging on dogs, especially ones with shorter legs.
Terrain: Look for trails your dog can navigate easily; rocky paths may require dog booties.
Water sources: Trails with natural water sources are great for splashing, but don’t let your dog drink untreated stream or lake water — it can harbor pathogens like giardia, harmful algal blooms, and agricultural or industrial runoff. Carry treated water for your dog as the routine practice, and always bring extra.
Shade: Forested routes can help keep your buddy cool on hot days.
Leash rules: Some trails require leashes for safety; others offer off-leash fun within specific boundaries.
Be a considerate hiker by following leave no trace ethics, like disposing of waste properly and minimizing off-trail treks.
Microchip:A unique identifier for your dog that can help if it gets lost. It is not a GPS tracking device but similar to a social security card for your dog.
Leash: Your leash is your most important safety tool. It helps you control your dog around potential dangers.
Training your dog for hiking can tremendously improve your shared outdoor experiences. An obedient, well-trained dog ensures better behavior, clear communication, and heightened safety in the wilderness. Focus on fundamental skills before hitting the trails to maximize your adventure.
Essential Skills
Recall (Come): When you need your dog to return to you promptly.
Sit & Stay: To maintain control in varied situations.
Heel: To keep your dog close on narrow or busy paths.
Leave It & Drop It: To prevent your dog from picking up or eating dangerous objects.
Training Tips
Employ positive reinforcement; reward good behavior to encourage repetition.
Maintain consistency in command use to avoid confusing your dog.
Implement repetition to cement skills as second nature.
Begin training at home and transition to short local trails
Breed Considerations for Training
As you develop a training plan, consider the breed’s natural characteristics. A Siberian Husky might need extra recall work. At the same time, a German Shorthaired Pointer, given its hunting instincts, can benefit from honed leash skills. Similarly, a Rhodesian Ridgeback, originally bred to hunt lions in Africa, requires early socialization and obedience to ensure focus on hikes.
While teaching these skills, remember that puppies might grasp them quicker than older dogs. Still, dogs of all ages can learn through patience and perseverance. For specialized breeds like Australian Shepherds or other herding dogs, integrate agility work to tap into their natural inclinations.
Collar & Harness: Ensure these are well-fitted to your dog. A secure collar with an ID tag is vital for identification. A comfortable harness is recommended to provide better control and relieve neck strain.
Leash: A sturdy leash keeps your dog close and is essential for navigating busy trails or encountering wildlife.
Water Supply: Carry enough water for both you and your dog. A collapsible bowl or a water bottle designed for dogs makes hydration on the go easier.
Food & Treats: Pack sufficient food, especially if you’re planning an extended hike and some treats for energy boosts and good behavior rewards.
Dog First Aid Kit: A dog-tailored kit should include wound care, tick removal, and paw protection.
Optional Dog Hiking Gear
Dog Booties provide paw protection from rough terrain and hot or cold ground.
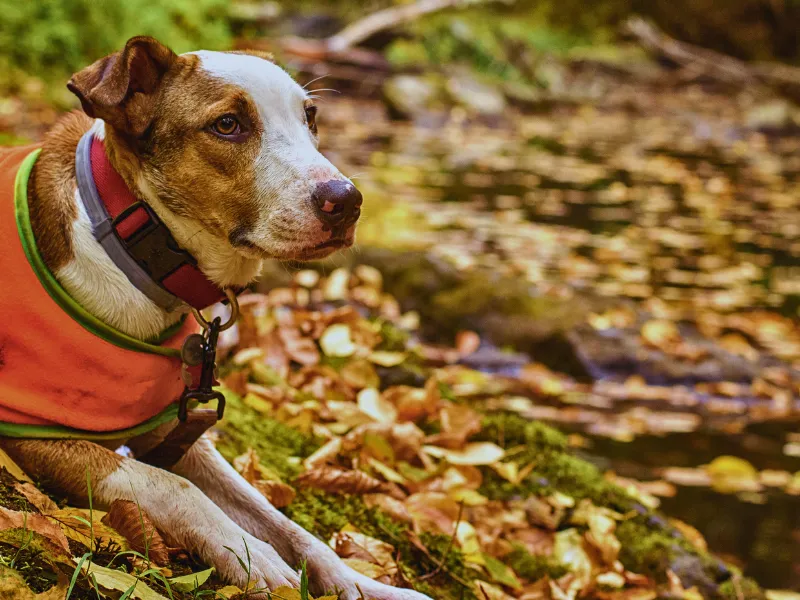
Dog Vests provide warmth in cooler weather.
Doggy Packslet your dog carry most of their gear.
Dog Gear Tips
Test gear like harnesses and booties before an actual hike to ensure comfort.
Clean your doggy gear after hikes to maintain durability and function.
Always Follow Trail Rules: Most trails require dogs to always be on a leash. Please don’t be that person.
Keep Dogs on Leash or Under Voice Control: Some trails allow dogs off-leash, but it requires excellent voice control. Your dog should reliably respond to commands and be non-aggressive.
Yield the Right of Way: Have your dog heel by your side when encountering other hikers or animals. This demonstrates respect for others’ space and safety.
Greet Others Politely: Not everyone is comfortable around dogs. When passing other hikers, maintain control of your dog and allow everyone to pass by undisturbed.
Encounter Tips
Meeting Other Dogs: Always ask if dogs are okay to greet each other. Keep the encounter short and sweet to avoid overstimulation.
Encountering Wildlife: Keep your dog close and move away calmly if you spot wildlife. Let wild animals have their space without disruption.
Crowded Areas: In busy areas, keeping your pet leashed and close to you is essential to avoid obstructing or stressing other hikers.
Your furry friend should be fully grown before engaging in strenuous hiking activity. Puppies’ joints and bones are still developing, so it’s best to wait until they are at least a year old, although this can vary depending on the breed.
How far can my dog hike?
Every dog is unique, and its hiking ability depends on breed, size, and fitness level. A healthy dog that hikes regularly might cover up to 25-30 miles daily, but always start with shorter distances and gradually increase.
How much water and food does my dog need?
Plan on roughly 0.5–1 ounce of water per pound of your dog’s weight per day at rest, and more with exertion and heat. Plan for water stops at the waterholes if available. Otherwise, you will need to plan to pack water for your dog. As for food, bring extra—about 50% more than their usual daily intake—as they’ll burn more calories on the trail.
How do I know if my dog is enjoying the hike?
Look for a wagging tail and a perky attitude. If your dog is lagging, panting excessively, or hesitating, these may be signs they’re not enjoying the hike.
What should I do if my dog gets lost or injured?
Keep a tag with your contact information on your dog’s collar. If your dog gets injured, carry it to safety and have a vet examine it immediately.
What are essential items to pack when hiking with my dog?
– Collapsible water bowl – Extra water – Your dog’s regular food plus treats – First aid kit – Waste bags – Leash and a harness
Which dog breeds are best for long hiking trips?
Breeds like Labrador Retrievers, Border Collies, and Bernese Mountain Dogs are well-suited for long hikes. However, the most energetic, medium- to large-sized dogs in good health can be great hiking companions.
How can I find dog-friendly hiking trails in my area?
Check out local trail guides, websites, or apps specifically designed for outdoor activities with dogs such as Alltrails. Always look for information that confirms dogs are allowed on the trails.
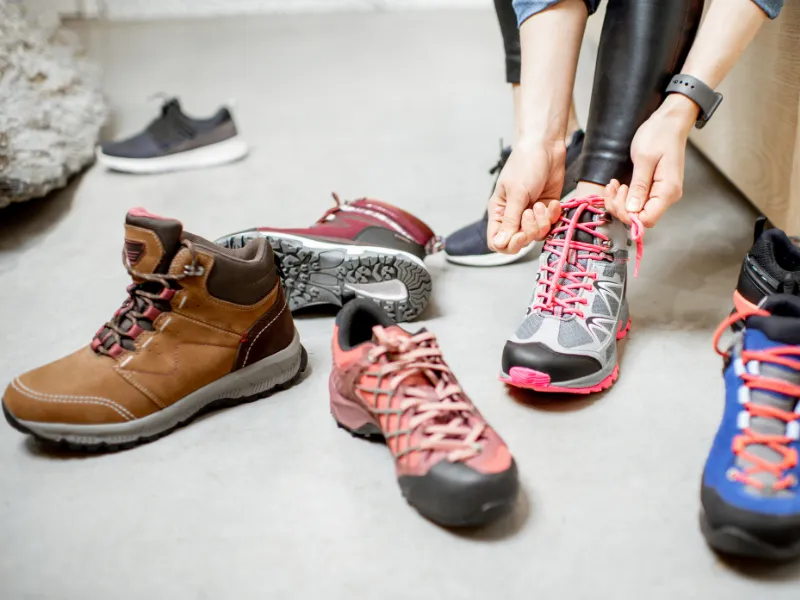
If you’re debating between hiking shoes and boots, you’re likely seeking comfort and protection without compromising agility. As someone who loves the outdoors, I know firsthand that the terrain and type of hike can dictate the most suitable option.
I prefer hiking boots, but there’s an excellent argument for hiking shoes or even trail runners for short and multi-day hikes.
When picking your essential hiking footwear, no single choice fits all. It’s all about the specific needs of your adventure and personal comfort.
Key Takeaways
Footwear choice between hiking shoes and boots impacts comfort and performance on trails.
Hiking shoes are lighter and more flexible, and boots offer more support and protection.
Choosing hiking boots vs. shoes depends on trail difficulty, load weight, and personal preference.
Hiking shoes, distinct from regular sneakers, are designed explicitly for trails and constructed with a construction prioritizing grip, comfort, and durability.
They typically feature a low-cut design with flexible midsoles, ideal for day hikes or moderate terrains. Unlike boots, hiking shoes are lighter and offer a closer feel to everyday footwear, helping you enjoy the benefits of being outdoors more easily.
Hiking shoes might be your best bet for a casual day hike, but consider the trail conditions before choosing your footwear. If you expect rocky, uneven paths or will be carrying a heavy pack, consider a boot for extra support and durability.
Hiking Shoe Pros
Lightweight: You’ll appreciate that hiking shoes won’t weigh you down. This can save energy over long distances.
Breathable: With upper parts often made from mesh or other breathable fabrics, your feet will stay cooler.
Comfort: Hiking shoes are almost ready to wear right out of the box, and they are also easier to break in than boots.
Cost-effective: They are generally less expensive than boots.
Hiking Shoe Cons
Ankle Support: Shoes are low-cut and potentially less stable than boots.
Durability and Protection: Their lighter build means reduced durability and protection against rough terrain or bad weather.
Traction: While they have a good grip, boots tend to have superior traction for slipperier or steeper paths.
Weather Suitability: Hiking shoes may leave you wanting in cold, wet conditions.
Examples of popular hiking shoes
Merrell Moab 3 Ventilator: Notable for its cushioning and breathability.
Salomon X Ultra 5 GTX: Praised for their mesh upper and aggressive grip.
Keen Targhee III: Offers good protection and moisture management.
Flexibility: More agile and adaptable to varied surfaces
Comfort: Often feel comfortable right out of the box
Durability: Less than boots, suited for well-maintained trails
Protection: Minimal, offering less defense against harsh terrain
Traction: Adequate for established paths
Grip: Sufficient for dry conditions
Suitability: Ideal for day hikes or shorter trips with lighter packs
Price: Typically less expensive than boots
Hiking Boots
Weight: Heavier, offering robust construction
Ankle Support: Enhanced, crucial for unstable terrain
Breathability: Less than shoes can lead to warmer feet
Comfort: May require breaking in, but provide long-term support
Durability: Built to withstand harsh conditions and heavy use
Protection: Superior, safeguarding against rocks, roots, and moisture
Traction: Advanced, designed for challenging environments
Grip: More aggressive, maintaining hold in various weather
Suitability: Preferred for multi-day treks, rugged landscapes, and heavy loads
Price: A higher investment reflecting their rugged build
Steps to choose the proper footwear
Assess the trail’s difficulty and conditions—go for boots on rough, rocky, slippery, or uneven ground.
Consider the weather—waterproof boots for wet conditions and breathable shoes for dry climates.
Match your footwear to your load—a heavier backpack pairs better with boots.
Ensure proper fit for your foot’s shape and size—a misfit can lead to discomfort.
Remember any injury history—ankle support in boots might be a deciding factor.
Reflect on your experience level—beginners might benefit from the added stability of boots.
Tips for fitting and care
Try on with hiking socks
Test on an incline to assess heel lift
Clean and dry after use to extend life
Hikers’ testimonials reveal a mix of preferences based on these factors, with some swearing by shoes’ lightweight freedom and others relying on boots’ steadfast support.
As you venture into the hiking world, you’ll find that trail runners are unique compared to traditional hiking shoes and boots.
Trail runners are designed to combine running shoes’ comfort and lightweight feel with features suitable for off-road terrain. The Trek’s 2025 Appalachian Trail thru-hiker survey found that 87% of hikers wore trail runners for the majority of their hike.
Pros
Lightweight: They won’t weigh you down, which can conserve energy over long trail miles.
Breathability: Often crafted with mesh and other moisture-wicking materials like merino wool, they keep your feet from overheating.
Cushioning: With a focus on comfort, they lend themselves to a plush step.
Ease of Use: These shoes are flexible, quick to break in, and easy to pack, making them a solid choice for multi-day outings.
Cons
Stability: They generally provide less ankle support, which can be a downside for treacherous trails.
Durability: While trail runners are great for many conditions, hiking boots or hiking shoes are more rugged and protective.
Traction: They might offer different grip, especially on slippery or steep terrain.
Protection: Your feet might be more vulnerable to cold and wet conditions.
Examples of Trail Runners
Altra Lone Peak 9
Saucony Peregrine 16
Hoka Speedgoat 7
Fitting Tips for Trail Runners
Ensure ample toe room.
Look for suitable arch support.
Consider synthetics for faster drying.
The choice between shoes and boots depends on your adventure style. Opt for hiking shoes for lightweight agility on easy-to-moderate trails. For rugged terrain and extra ankle support, go with hiking boots.
You’ll find me wearing my hiking boots because I’m always hiking on rocky, rough trails, so I need the extra protection. There’s no one-size-fits-all, so pick what suits your trail and personal comfort.
What is the difference between hiking shoes and regular shoes?
Hiking shoes are specifically designed for the rigors of the trail and have features like superior traction, sturdier construction, and increased support.
Can I use hiking shoes or boots for other activities?
Absolutely! Your hiking footwear can double for outdoor activities like casual walks or light yard work.
How often should I replace my hiking shoes or boots?
Look for the signs of wear and tear—like loss of tread or support—and usually aim to replace your hiking footwear every 300-500 miles.
How can I prevent blisters and injuries when hiking with shoes or boots?
Ensure your footwear fits properly, and break them in before hitting the trails. Moisture-wicking socks are also your friends here. Don’t forget to bring a first aid kit with you while hiking.
What are some features to look for when buying hiking shoes or boots?
Consider grip, waterproofing, weight, and breathability. The right mix ensures comfort and safety on your hikes.
What are some brands or models of hiking shoes or boots that experts or users recommend?
Brands like Salomon, Merrell, and Keen are often praised for their quality. Look for models with positive reviews from fellow hikers and reputable outdoor publications.
Breaking in new hiking boots is crucial to ensure your outdoor adventures are comfortable and enjoyable. When you first purchase your boots, they may be stiff and unyielding, leading to blisters and discomfort on the trail.
Key Takeaways
Properly breaking in hiking boots is vital for comfort and prevents blisters.
Material and fit influence break-in time; leather takes longer than synthetic.
The process involves wearing the boots in gradual steps, beginning at home.
New boots must fit comfortably at the store before you purchase them. No amount of breaking in a poorly fitting new boot will significantly improve their comfort.
Contents
How to Break in Hiking Boots in 3 Steps
Step 1 – Wear Around the House
AI Photo: Daniel Borkert/Canva Magic Media™
#1 Tip:Make sure your new boots fit comfortably at the store before you purchase them.
Choose the right size. Your boots should feel secure but not too tight.
Select the right socks and insoles. These can significantly affect the fit of your boots, so wear the same ones you plan to hike in.
Walk around your house. Wear your boots for short periods while going about your daily activities.
Adjust the lacing. Find a snugness that’s comfortable for your feet. Tighten or loosen as needed to know your boots’ true feel.
Why indoors first? Your boots will stretch and mold to your feet indoors without being subjected to dirt and rough outdoor conditions. Any initial discomfort can be quickly addressed, and you can take them off without hassle.
Avoid quick fixes like soaking or heating your boots, as these can cause irreversible damage to the soles and materials.
Before scaling peaks or trekking rugged trails, walk around a week on pavement or other flat terrain. Start with a walk around the block, gradually extend the distance each day, and enjoy the benefits of being outside.
Here’s a possible schedule to help you out:
Day 1: Begin with a 10-minute tour around your block.
Day 2: Stretch it to 20 minutes – maybe wear them on town errands.
Day 3 & Beyond: Increase incrementally; listen to your feet.
Synthetic or classic leather boots need time to mold to your unique foot contours. Don’t rush it. Your aim is not just breaking in the materials but also ensuring the fitting’s just right for maximal comfort.
While enjoying these urban excursions, be aware of how your feet feel:
Hot Spots and Pain Points: If you feel a rub or pinch, it’s a sign a hot spot or blister might develop.
Also, consider slinging a light backpack over your shoulders. Adding a bit of weight, such as including your hiking essentials, can significantly dial in the realistic feel of the trail without overdoing it.
Take it Easy: Start with an easy trail. Give your boots and feet a chance to get to know each other under actual conditions. Try a short day hike, covering a few miles. Keep the terrain simple; avoid steep or overly rocky paths.
Watch the Pack Weight: Carry a lighter pack first with your day hiking essentials. Gradually add weight over a week or two to simulate the conditions of a more strenuous hike. This incremental approach helps your boots stretch and flex where needed without overdoing it.
Build Your Endurance: Just as your boots adjust, your feet are too.
Assess the Fit & Comfort: Pay attention to fit. A good fit means snug but not tight, with room to wiggle your toes. If any discomfort arises, take note—these could be the spots that need more time to break in.
Sometimes, an uncomfortable boot never fits quite right, and you might need to exchange it for a different model.
Prepare for Wet Conditions: If possible, include some walking in moist conditions. It’s good to know how your boots handle water and how to dry them correctly—this is crucial for maintaining their lifespan and your comfort. Also, consider waterproofing your boots if they’re not already.
Throughout this process, you aim for a well-fitted boot to walk comfortably over various terrains and distances.
After taking short hikes without significant pain points or hot spots, your boots should be broken in and ready for longer hikes or a backpacking trip. Don’t forget to bring your hiking essentials, including a good customized first aid kit.
FAQs
How long does it take to break in hiking boots?
Breaking in hiking boots varies; expect 2-3 weeks for synthetic, nubuck, or suede materials. Leather boots can take 4-8 weeks. Take several short hikes to break them in gradually.
The break-in period for hiking boots varies depending on the boot’s construction and material. Leather hiking boots, for example, tend to require a more extended break-in period than synthetic ones. The fit of your boots also plays a significant role; a well-fitting pair will naturally break in more quickly and comfortably, as it aligns better with the contours of your feet from the start. Having patience during this period is critical.
How do I know if my hiking boots are too tight or loose?
Your boots should fit snugly but not constrict. You should be able to wiggle your toes but not have so much space that your heel slips. Ensure there are no pinching or pressure points. Your socks and insoles will affect the fit, so wear them when trying on your boots.
How do I prevent blisters when breaking in hiking boots?
To fend off blisters, wear your boots frequently for short periods and gradually increase usage. Wear proper socks, and ensure your boots are snug but not tight. Pay attention to hotspots; apply moleskin or bandaids to the hotspots early to prevent blisters.
How do I care for my hiking boots after breaking them in?
Keep your boots clean and dry. Brush off dirt and rinse if needed. Air dry them always but avoid direct heat. Treat them with a conditioner or waterproofing agent appropriate for the material of your boots. Store them in a cool, dry place to maintain their shape and function.
Waterproofing your hiking boots isn’t just a good practice; it’s a fundamental step to ensure your feet remain comfortable and dry. When you know how to waterproof hiking boots properly, you’re investing in your footwear’s performance and durability. If you’re still deciding between boots and trail runners, see our hiking shoes vs boots guide.
Key Takeaways
Waterproofing your boots is crucial for comfort and durability during hikes.
Cleaning and preparing boots is a vital preparatory step before applying waterproof treatment.
You should always choose the correct waterproofing treatment product for your boot material.
Contents
How to Waterproof Hiking Boots
Step 1 – Choose an Appropriate Waterproof Treatment Type
It’s crucial to match the right waterproofing product to the type of boot material to avoid damage and maintain breathability.
Full-grain leather boots are robust and durable. For these, you’ll want to stick with:
Wax-based treatments like Sno-Seal
Cream-based options like those provided by Nikwax for Leather
Suede or nubuck leather boots require a gentler touch due to their softer texture and need:
Spray-based treatments, which provide a light, even coat
Sponge-based applications also work well. Examples include Grangers Footwear + Gear Cleaner or Nikwax Nubuck & Suede Proof.
For fabric or synthetic boots, which are usually lighter and more flexible, you can use:
Spray-based treatments that won’t compromise the fabric structure
Sponge applications that allow for precise application without oversaturating the material. Suitable products may be Grangers Performance Repel or Nikwax Fabric and Leather Proof.
If you’ve got boots with Gore-Tex or other waterproof membranes, they generally only require cleaning to maintain their waterproofing.
A note on DWR for membrane boots: Gore-Tex and similar waterproof-breathable membranes depend on a durable water repellent (DWR) coating on the outer fabric to keep water beading. DWR wears off with use — when water stops beading and soaks in instead, wash the boots, then revive the DWR with a tumble dry on low (or a low iron with a cloth between iron and boot). When beading no longer returns, reapply a spray-on DWR treatment made for waterproof-breathable footwear.
Remove Laces and Insoles: Take out the laces and insoles to ensure no nooks or crannies are left uncleaned.
Dust Off: Gently brush away loose soil or dust from your boots. If you’re working with leather hiking boots, a soft brush is ideal to avoid scratches.
Washing Up: Dampen your boots with clean water. Apply a small amount of mild soap or a cleaner specifically for boots, then softly scrub away any stubborn dirt.
Rinse Well: Rinse thoroughly with clean water to remove soap residue.
Prep for Waterproofing: Your boots should be damp but not drenched. This is the sweet spot for applying waterproofing treatments—they adhere better and penetrate deeply on a damp surface.
Step 3 – Apply the Waterproof Treatment
Be mindful that the application process varieswith the type of treatment and the material of your boots.
Whether your boots are made of leather, nubuck, or synthetic fabric, the key is to cover all areas evenly without oversaturating.
How to apply Wax-Based Treatments
Start by dabbing a cloth or a brush into the wax.
Rub it firmly into the boot, paying particular attention to the seams and the tongue where water can sneak in.
A gentle blast of heat from a hair dryer can help the wax penetrate better. Keep the dryer at a safe distance to avoid damage.
How to apply Spray-On Treatments
Shake the bottle as instructed, then spray evenly from about 6 inches away.
Apply with light, even strokes, to avoid pooling.
Allow each coat to dry before applying the next.
Step 4 – Dry Boots after the Treatment Application
AI Photo: Daniel Borkert/Canva Magic Media™
It’s essential to avoid the temptation to speed up the process, which could damage your boots.
Drying them incorrectly could lead to cracking, shrinking, or deforming them, rendering your efforts for naught.
Here’s how to ensure your boots dry properly, maintaining their shape and effectiveness:
Room Temperature: Always let your boots dry at room temperature.
Ventilation: Choose a well-ventilated area to foster a steady drying process. Avoid direct sunlight, and do not place boots near a heat source like a radiator or fireplace.
Steady Air Flow: A gentle breeze from a fan can help moisture evaporate more swiftly from the boots’ exterior.
To help your boots absorb residual moisture inside:
Newspaper or Paper Towels: Stuff the inside of each boot with these materials. They’re excellent for soaking up moisture.
Cedar Shoe Trees: They absorb moisture, maintain the shape of your boots, and add a fresh scent.
Change It Up: Whether it’s newspaper or paper towels, replace them periodically until the boots are dry.
Tips for Waterproofing Your Boots
Preparing the Boots
If your boots are leather, particularly full-grain leather, consider using a conditioner after cleaning to maintain the leather’s suppleness.
Testing
Always test the product on a small, inconspicuous area to check for discoloration or damage.
Remember to stick to the manufacturer’s guidelines for the best results.
Application
Apply a waterproofing agent appropriate for your boot material, avoiding products with silicone or oil to retain breathability.
Pay special attention to seams, as these are potential leak points. Consider using a seam sealerdesigned explicitly for boots withleather uppers.
Maintenance
Repeat the waterproofing process regularly, depending on how frequently you use your boots and the conditions they’re subjected to.
Consider adding gaiters to your setup for those long hikes where you need extended ankle support and protection. These will provide an extra layer of water resistance and protection from debris.
FAQs
How do I know if my boots need waterproofing?
Your boots likely need waterproofing if: – Water no longer beads off their surface. – The material has started to absorb water rather than repel it, leading to a darker crease or color. – You’ve begun to notice decreased comfort due to dampness, or blisters are becoming more frequent.
How often should I waterproof my boots?
You should re-waterproof your boots when: – After roughly every 15-20 hikes, or when you notice water resistance waning. – More frequently if you frequently hike in wet conditions or have noticeable wear and tear.
Can I use household items to waterproof my boots, such as beeswax, candle wax, or petroleum jelly?
While some hikers use alternative methods like beeswax, for optimal results and to maintain the integrity of your boots, it is recommended to use: – Products specifically designed for hiking boot materials, such as waterproofing sprays and pastes tailored for leather or synthetic fabrics. – Follow manufacturer guidelines to ensure compatibility with materials like GORE-TEX or other breathable membranes.
Many outdoor camping activities can make your trip more fun, adventurous, and rewarding. Whether you’re looking for physical challenges, mental stimulation, or relaxation, there’s an outdoor activity for you.
Here are 27 outdoor camping activities you can enjoy on your next trip. I’ll also give you some tips and popular places for most activities so you should better know how to plan your outdoor recreational activities and make the most of your camping experience.
There are many outdoor camping activities, such as hiking, biking, fishing, kayaking, geocaching, and more.
To choose the best outdoor camping activities for your trip, consider your goals, preferences, abilities,and the available resources and facilities at your campsite.
When you hit the trails for a hike, you’re not just treating yourself to an adventure but also engaging in a potent fitness activity that revitalizes your connection with nature. Hiking allows you to explore the great outdoors at your own pace.
Planning is vital before setting out. Start by selecting a trail suited to your hiking skill level. You’ll want to check out local maps and understand the terrain. Pack hiking essentials like water, snacks, a map, and a compass—or a GPS device—to ensure you’re prepared for your journey. Wear comfortable, sturdy footwear and dress in layers to adapt to changing weather conditions.
Remember, safety is paramount:
Inform someone about your hiking plan and expected return time.
Check the weather forecast before heading out.
Be wildlife aware and know what to do in an encounter.
While on the trail, keep a moderate pace and take regular breaks. This is not just a physical activity; it’s a chance to breathe in the scents of the forest, hear the sounds of wildlife, and feel the earth beneath your feet.
Lastly, practice Leave No Trace principles. This means packing out what you pack in, staying on marked trails to protect the surroundings, and being considerate of nature and fellow hikers.
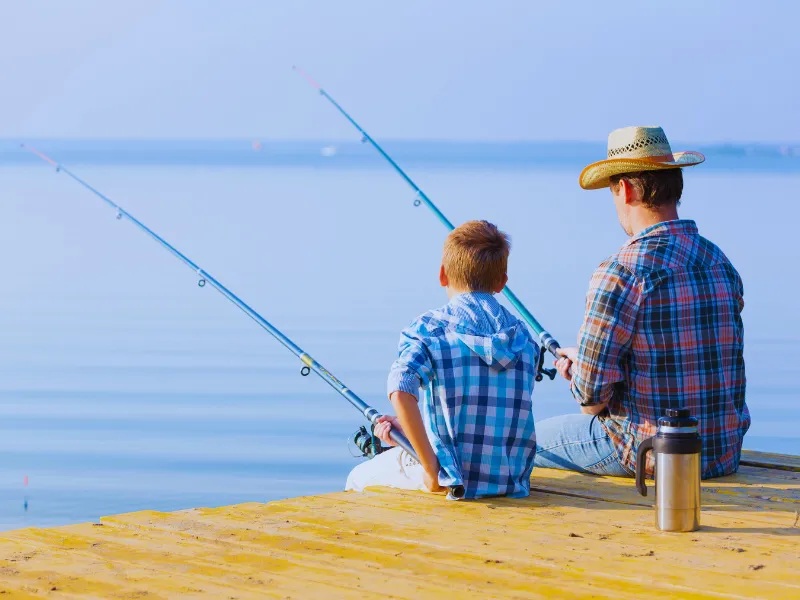
Picture yourself by a tranquil lake at sunrise; there’s something exceptional about being surrounded by nature, rod in hand, waiting for that gentle tug. It’s both a peaceful and exhilarating way to start your day.
For the most enjoyable experience, you’ll want to gear up appropriately. Choosing a rod and selecting the right bait is essential. Live bait, such as worms, often works wonders, but artificial bait can be just as effective depending on the fish and conditions.
When camping with family or friends, swimming is a quintessential activity that works wonders for fun, fitness, and cooling off. Your kids will splish-splash their way to joy, and it’s a great way for everyone to bond.
Swimming Safety Tips:
Swim in designated areas.
Buddy up, even if you’re a strong swimmer.
Wear life jackets for weaker swimmers, especially the young ones.
Keep a close eye on the weather and water conditions.
Be mindful of local wildlife and water currents
Avoid diving unless you know for sure it’s safe.
For the ultimate swimming experience during your trip, seek pristine lakes, gentle rivers, or coastal campgrounds known for their clear waters. However, remember that not all water bodies are safe and clean – make informed choices before jumping in.
Birdwatching, or birding, is more than just a pastime; it’s a way to connect with nature while sharpening your observational skills. As you tune into the diverse world of birds, you deepen your appreciation for wildlife and contribute to its conservation. Spotting a flash of color in the treetops or listening for a distinctive call can be unexpectedly thrilling and deeply satisfying.
When embarking on a birdwatching adventure during your camping trips, keep these pointers in mind:
Equip yourself with a reliable field guide to help identify various bird species.
Bring binoculars for a closer look at birds without disturbing them.
Keep a birding journal and note behaviors and characteristics like plumage, size, and sounds.
Discovering the best spots and the right season can drastically enhance your birdwatching experience:
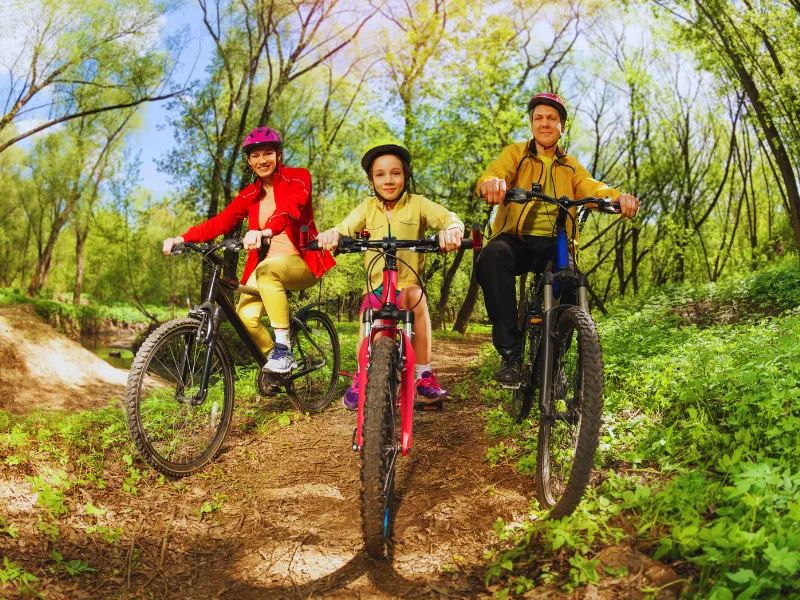
Biking as an outdoor activity offers you the perfect blend of transportation, exercise, and the thrill of adventure. On two wheels, you can explore diverse terrains and soak in nature’s splendor at your own pace, from casual trail riding to adrenaline-pumping mountain biking.
Always bring essential gear like helmets and repair kits. Here’s a quick guide:
Mountain Bikes: Ideal for rough terrain
Hybrid Bikes: For a bit of everything, roads and light trails
Road Bikes: Best on pavement for speed and distance
While exploring, remember to ride responsibly and store your bike securely at night to prevent damage or theft.
Venturing into the wilderness calls for preparedness. Here are some top trails to consider that promise both beauty and challenge:
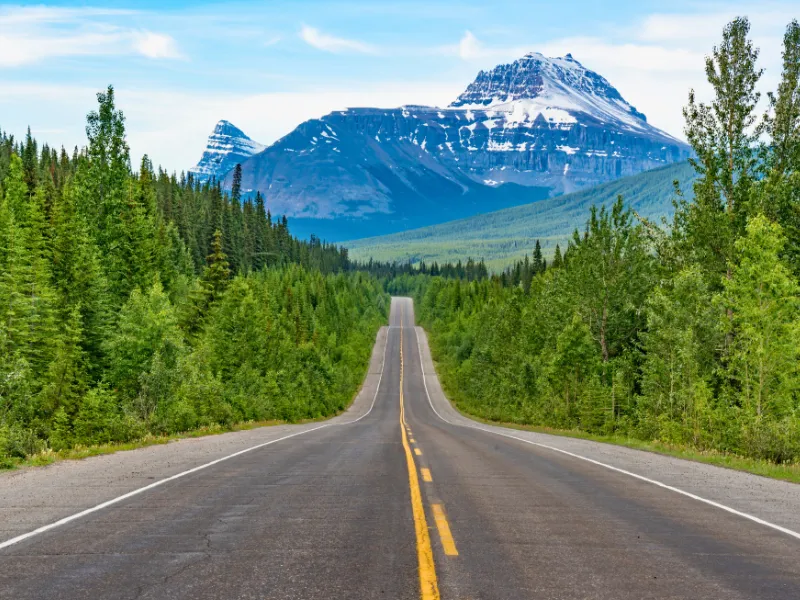
Consider incorporating a scenic drive into the journey when planning your next camping trip. There’s something extraordinary about cruising through the mountains or a national park, where every turn in the road offers a new and breathtaking view.
Before you head out, make sure your route is mapped and your vehicle is ready for the road. Here’s what I always do before I venture out:
Check the weather conditions: Always be prepared for what Mother Nature might throw at you.
Plan your stops: Identify campgrounds and lookouts ahead of time, especially if you have kids in tow.
Consider daylight: Aim to drive for the most vivid scenery during the day.
If you’re looking to put rubber to the road on some of the most striking drives, then here are a few you absolutely shouldn’t miss:
Icefields Parkway, Canada: Connecting Banff to Jasper, this 150-mile journey is filled with majestic mountain vistas and pristine lakes, perfect for an RV adventure.
Shenandoah National Park, VA: Enjoy the 105-mile scenic road through Shenandoah National Park, which has over 75 scenic overlooks.
A scenic drive isn’t just a means to get to your camping destination; it’s an integral part of the adventure, beckoning you to slow down, breathe in the fresh air, and soak up the ever-changing canvas of the natural world.
Have you ever wondered how you can combine learning with your love for the outdoors? Agrotourism is the answer, blending agriculture and tourism into a family-friendly and educational experience. It’s all about farm-based fun, where you engage with the local way of life, dive into nature’s beauty, and support sustainable practices while having a blast exploring the fields and forests.
Research is vital to find a local farm to visit during your camping trip. Stop by a regional visitor center or search online for “agrotourism near me.” Here’s a quick list of various agrotourism ideas:
Orchard Trails: Wander and taste nature’s sweets
Farm Markets: Shop for fresh, local produce
Petting Zoos: Get up close with farm animals
Workshops: Learn traditional farming skills
Wagon Rides: Bounce along scenic trails
Farm-based Camping: Sleep under the stars within earshot of the countryside
Cycling Tours: Pedal through verdant fields
By visiting and supporting local farms, you create memories, contribute to the local economy, and promote environmental stewardship.
Horseback riding is an incredible way to soak in the grandeur of nature.
Your best bet is to seek out local stables or tour operators near your camping destination. They’ll set you up with a horse that matches your riding ability and often guide you through trails tailored to your experience level. Always wear a helmet, follow the guide’s instructions, and treat your horse with the respect it deserves.
Here are a few practical tips for your equestrian adventure:
Booking: Reserve your riding slot in advance, especially during peak camping seasons.
Riding Gear: Wear comfortable clothes and sturdy footwear; avoid loose, fluttering garments that might spook your horse.
Approach: If you’re new to this, don’t worry! The guides will show you the ropes, from mounting to steering.
Looking for an unforgettable horseback trail? Check out the scenic vistas of Yosemite National Park or embrace the historical paths of Gettysburg. You’ll be trotting along routes etched into the history books.
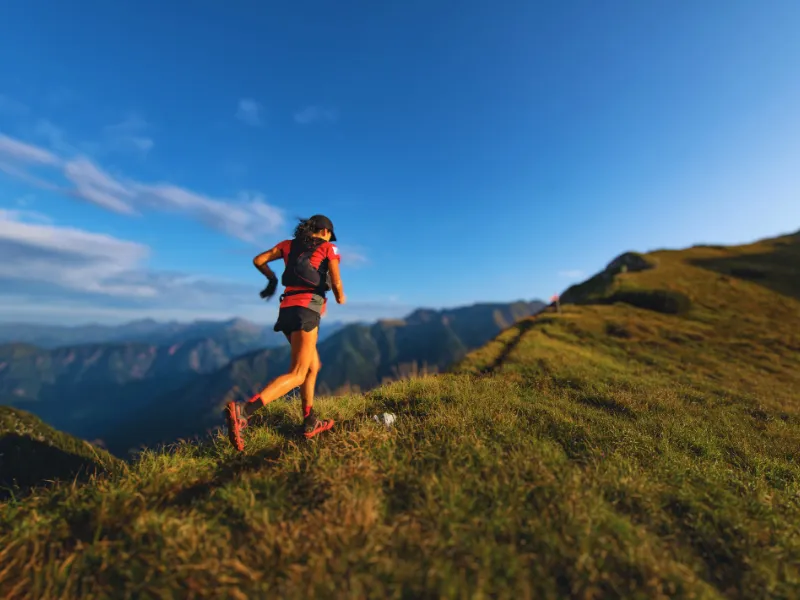
Trail running takes your fitness to nature’s domain, turning routine jogs into adventures. Imagine bounding over roots, weaving through trees, and taking in fresh oxygen while pushing your limits. You’ll get a blend of aerobic exercise and mental stimulation as you navigate diverse terrains, from gentle dirt paths to challenging mountain ascents.
Here’s how to gear up and hit those trails:
Start with proper footwear: Invest in trail running shoes with good grip and support.
Stay safe: Bring your GPS, snacks, and water. Always tell someone your route.
Build your stamina: Begin with short trails, gradually increasing distance and elevation.
Training for trail running is different from training for the streets. Uncertain terrain makes flexibility and balance crucial. Include exercises like lunging and side-stepping to avoid tripping over nature’s hurdles. Don’t forget to rehydrate yourself properlyafter a great trail run!
Rock climbing is a formidable test of strength and skill, often described as a vertical dance with nature. As you grip and search for footholds, you engage in a full-body workout that builds muscle, enhances coordination, and provides an adrenaline rush. Bouldering, its less height-focused sibling, offers similar benefits without needing ropes or harnesses.
If you’re keen to integrate rock climbing into your camping escapades:
Start Small: Find a local climbing gym or attend a beginner’s class. It’s vital to grasp the basics of technique and safety first.
Gear Up: Essential equipment includes a sturdy climbing harness, reliable shoes, a safety helmet, and a belay device.
Safety is Paramount: Always climb with a partner and check your gear before each ascent.
The United States has a bounty of rock climbing sites in its natural landscapes, offering climbers of all levels a chance to connect with nature while challenging their bodies. Some of the top destinations include:
Moab, UT, has multiple desert towers and canoyeering opportunities.
Whether you’re guiding a sailboat across a gentle breeze or throttling a powerboat over waves, boating offers a fantastic mode for appreciating and exploring nature. The rhythmic sounds of water lapping against the hull can be incredibly soothing, making these experiences ideal for families looking to bond in the great outdoors.
When you’re planning a camping trip that includes boating, remember these tips:
Select a Suitable Watercraft: Marinas often provide rentals. Choose one that fits your group’s size and experience level.
Safety First: Always wear life jackets, and if you need clarification on operating a boat, feel free to ask for a quick tutorial.
Minimize Impact: If you opt for powerboating, be conscious that it utilizes fossil fuels, which can have environmental drawbacks. Whenever possible, consider eco-friendly alternatives such as sailing.
Here’s some quick guidance for your boating-themed camping escapade:
Family Fun: Look for calm lakes where water sports like tubing and waterskiing are popular.
Nature Immersion: For a tranquil retreat, paddle quietly in a canoe or kayak to observe wildlife.
Top Spots: Seek out renowned boating destinations like Lake Powell or the Finger Lakes, where
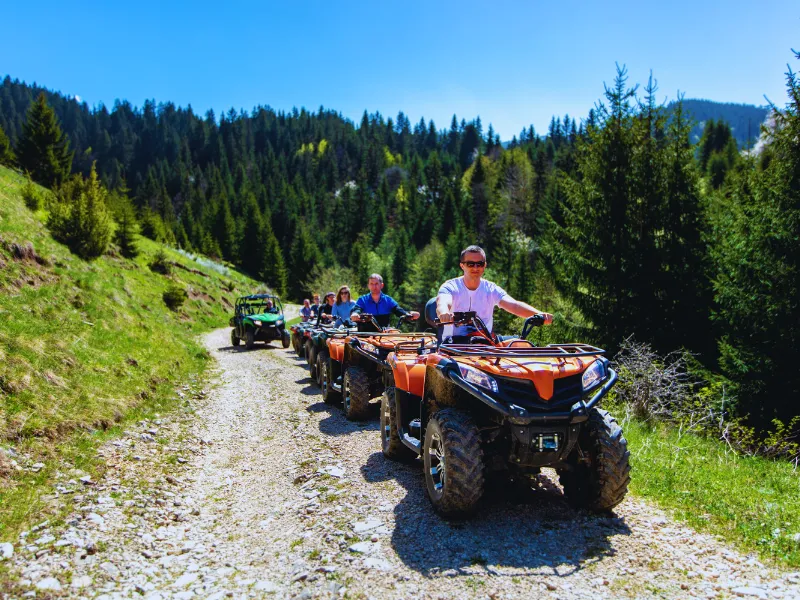
Off-highway vehicles (OHVs), such as ATVs, motorcycles, and UTVs, bring unparalleled adventure to outdoor enthusiasts like yourself. Imagine the thrill of exploring rugged terrains, accessing remote campgrounds, or simply basking in the freedom of the wide-open trails.
Before you ride:
Safety first: Gear up with helmets, eye protection, and appropriate clothing.
Get trained: Educate yourself on OHV operation, trail etiquette, and environmental respect.
Rent smartly: Look for reputable rental programs, like Polaris Adventures, for high-quality equipment.
Despite the adrenaline rush, OHVs can be loud and disrupt wildlife. Always ride responsibly, stick to the trails, and minimize your environmental impact to preserve the great outdoors we love. Learn about Tread Lightly!
When camping with OHVs, balance the rush of adrenaline with moments of tranquility. Enjoy activities like fishing or hiking to appreciate nature fully. While OHVs can add adrenaline to your outdoor adventures, they’re not for everyone. Judge the risks, rent if you’re a newbie, and always put safety and nature care at the forefront. Happy trail riding!
Kayaking is a marvelous way to engage in outdoor activities near a lake. It can grant you access to areas off the beaten path. Consider kayak or canoe camping.
Choosing the right kayak is critical when gearing up for kayak camping. You want stability, storage space, and comfort for those long stretches on the water. Opt for kayaks designed for touring if you’re planning longer trips—these typically have ample storage for camping gear. Clean, drain, and dry your kayak thoroughly after your day on the water.
Here are a few tips to enhance your kayaking outings:
For Families: Opt for tandem kayaks, which are great for bonding and sharing the paddling.
For Solo Paddlers: A single kayak offers agility and the chance to connect with nature one-on-one.
Paddleboarding: If you’re looking for a full-body workout, try stand-up paddleboarding, another fantastic way to explore the waterways.
As for the best spots for kayak camping, consider the calm waters of a nearby lake for a serene getaway or the meandering paths of a gentle river for a bit of exploration. Look for established campsites along the shores that cater to water adventurers. The Boundary Watersoffers an epic adventure for kayak and canoe camping.
Imagine yourself drifting down a serene river, surrounded by nature, as you bask in the sun with your family and friends. Not only is it a fantastic way to cool off, but it also offers an opportunity for socialization as you float along.
When you select a tube, consider the size and durability suited to your needs. It should comfortably support your weight and withstand the river’s challenges. Before hitting the water, properly inflate your tube to the manufacturer’s recommendations to ensure safety and performance.
Here’s a pro tip: learn the basics of riding a tube, such as steering with your hands and feet or linking up with other tubers to create a flotilla. Always wear a life jacket, regardless of your swimming skills, and watch river conditions for a safe experience.
For a memorable tubing outing, consider rivers known for their gentle flow and picturesque surroundings. Some favorite spots among campers include the Guadalupe Riverin Texas, the Saco River in Maine, and the Shenandoah River in Virginia. These locations are renowned for their clear waters and family-friendly atmospheres.
Treasure hunting isn’t just for the kids; it’s an all-ages, engaging activity that encourages creativity, fosters teamwork, and injects excitement into your camping experience.
Designing a treasure hunt might seem daunting, but it’s all about themed clues and hiding spots reflective of your natural surroundings. Start by crafting a narrative—maybe you’re pirates searching for buried gold or explorers on the trail of a lost artifact. Your clues can be riddles tied to the environment, leading campers from an ancient tree to a hidden stream.
Tips for Organizing Your Treasure Hunt:
Create a Map: Sketch out your campsite and mark potential hiding spots.
Safety First: Ensure all locations are safe, especially for kids.
Be Resourceful: Use natural elements like rocks or leaves to mark spots.
For the best themes, blend the location’s features with imaginative tales. A forest, for example, is ripe for an enchanted woodland quest or a Robin Hood-style caper. Here’s a simple clue to get you started: “Walk to where the water bends. The next clue hides where the river ends.”
Remember, the real treasure is the fun and bonding along the way. So grab your map and compass, round up your crew, and set off on a camping treasure hunt.
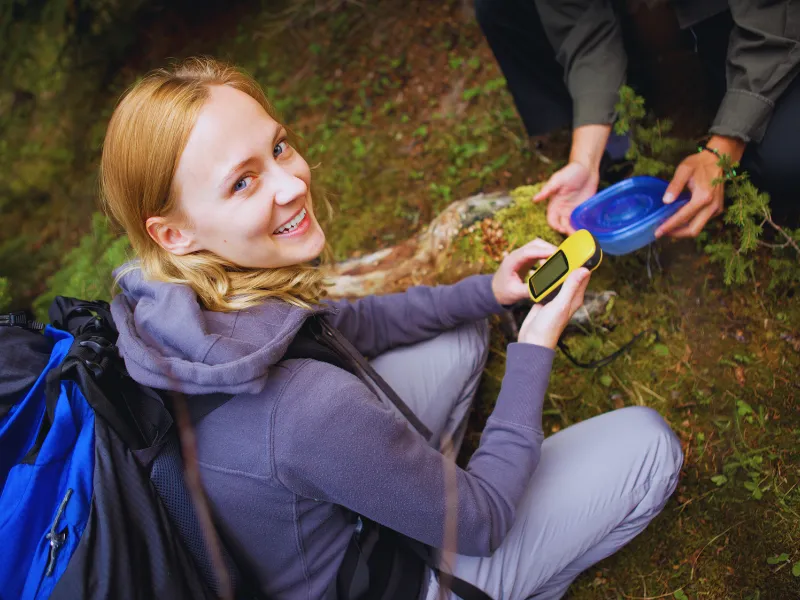
Geocaching is a game that leads you through nature’s nooks, encourages learning through navigation, and fosters a sense of community as you share experiences with fellow geocachers.
Here’s how to get started:
Find a Geocache: Use your GPS or a smartphone with a geocaching app to locate hidden caches. You’ll find these by following specific coordinates.
Hide a Geocache: After finding a few, you might want to hide one. Choose a durable container and a non-invasive spot that won’t disturb the local wildlife or environment.
Log Your Experience: Inside each cache, there’s a logbook. Write down your geocaching handle and the date. Share your experience online and a cleaver hint or two for the next adventurer.
Tips for Successful Geocaching:
Respect nature: Leave no trace and be mindful of the environment.
Be prepared: Carry essentials like water, snacks, and a first aid kit.
Stay safe: Inform someone about your geocaching plans and location.
Letterboxing is an intriguing fusion of art, adventure, and collection, perfect for those who enjoy exploring the great outdoors with a creative twist. As you set up camp amid nature’s tranquility, consider adding a dash of mystery and treasure hunting to your experience. You’ll imbibe the wonders of your natural surroundings and connect with an age-old pastime that sparks creativity and a sense of discovery.
To begin your letterboxing quest, you’ll need to carve a personal stamp—it reflects your identity in this adventurous hobby. Once equipped, you must seek out hidden letterboxes by following clues that often lead you through scenic trails and seldom-visited wilderness corners. Here’s the crux of it:
Prepare: Craft your unique stamp and secure an inkpad and a notepad, which will serve as your logbook.
Discover: Use resources like Atlas Quest to find clues for letterbox locations in your camping area.
Collect: Upon discovering a box, stamp your logbook with the letterbox’s stamp and imprint your stamp in the letterbox’s logbook, a record of your presence there.
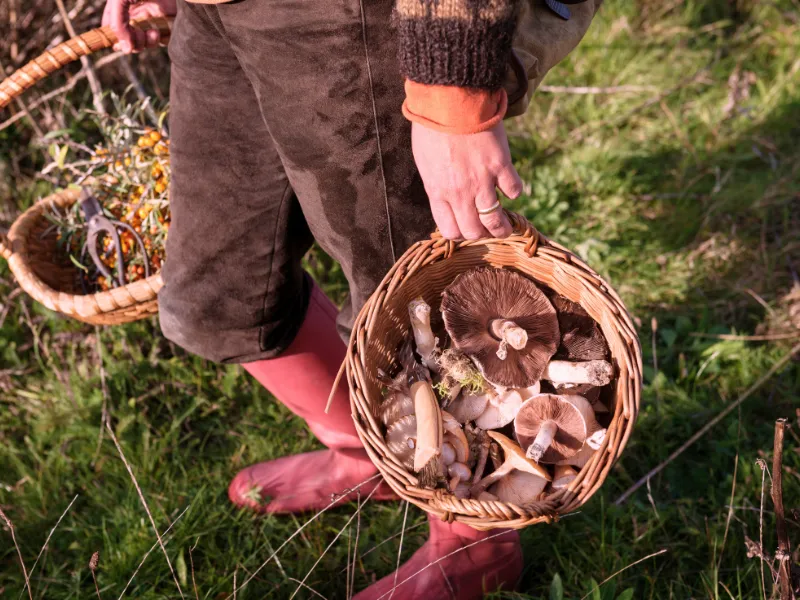
When surrounded by nature’s bounty, foraging is a delightful activity that taps into your primal survival skills and offers a nutritious boost to your camping meals. I’m talking about the art of identifying and gathering wild foods—think of it as a treasure hunt, where the bounty is deliciously edible plants and mushrooms.
If you’re gearing up to forage, remember these essentials:
Safety First: Always carry a reliable guide to edible plants and mushrooms specific to your region. Some plants and mushrooms can be toxic, and mistakes can be dangerous.
Respect the Environment: Take only what you need without harming the ecosystem. For example, when harvesting berries, leave enough for wildlife and the continued health of the plant.
Here’s a simple way to get started on your foraging adventure:
Identify: Start with easily recognizable foods like wild berries or dandelion greens.
Gather: Use a gentle touch to avoid damaging the plant or its surroundings.
Prepare: Wash your finds and prepare them as you would store-bought equivalents—many wild greens can be added to salads, while certain mushrooms are great in stir-fries.
Grab your bag and head to locales known for their abundance, like forest floors for mushrooms or riverbanks for wild herbs. Also, consider dehydrating your foraged foodfor other meals over the next few months. Try these quick recipes next time you camp:
Pine needle tea: Rich in vitamin C, it’s as simple as steeping cleaned needles in hot water. Identification warning: some evergreens (notably yew) are toxic and ponderosa pine is contraindicated in pregnancy — only harvest pine needles when you are certain of the species.
Wildberry compote: Heat berries over a fire with honey for a sweet treat.
Stargazing, the simple act of looking up at the stars, offers a blend of wonder, knowledge, and a timeless romantic backdrop to any camping trip. From a family bonding experience to a serene moment of self-reflection, there’s something truly magnificent about the tranquility of the stars.
When you’re planning for a night of stargazing, keep these tips in mind:
Find a Dark Spot: Steer clear of light pollution. Nature reserves or national parks often offer the clearest views. Death Valley and the area just south of Grand Canyon National Park are prime examples.
Know When to Go: New moon phases and clear skies provide optimal conditions. Aim for times when the Milky Way’s glow is at its peak.
Gear Up: A telescope or binoculars can enhance the experience, but even the naked eye can catch constellations and shooting stars.
Capture the Moment: For photography enthusiasts, a tripod and a camera with manual settings can help you photograph the night sky. Use long exposures to capture the stars’ trails.
When we talk about photography in the great outdoors, it’s not just about clicking the shutter—it’s about capturing the essence of those spontaneous family adventures and the beauty of nature surrounding us. It’s the art of holding onto those fleeting moments, whether basking in the golden hour or witnessing wildlife in action. Let’s take a journey through the lens.
Choosing Your Subjects
Landscapes: Find a vantage point that offers a vast perspective of nature’s splendor.
Wildlife: Be patient and consider a telephoto lens.
Family and Friends: Capture candid and posed moments while exploring the wilderness.
Photography Techniques
Steady your camera with a tripod for sharp, high-quality images, especially in low light.
Master your camera’s manual settings to adapt to dynamic outdoor conditions.
Enhancing Your Photos
Edit photos to highlight the beauty you’ve captured but keep it authentic to the moment.
Share your experiences online or create a photo album to keep those memories alive.
Sketching in the great outdoors can be a remarkable way to connect with nature and unleash your creativity. You’re not just capturing the scene before you but interpreting the vibrant hues and dynamic light that only the wilderness can provide. It’s a practice that offers serenity and hones your artistic skills – all you need is a pencil and paper.
Begin by selecting a focal point in the natural landscape. Let this be the heart of your sketch: the rugged mountain outline, the intricate pattern of leaves, or a flowing stream. Here are a few pointers to guide your hand:
Outline your subject with gentle, loose strokes to capture the basic shape.
Shade lightly at first, building up layers to create depth.
Add color sparingly; sometimes, a touch of hues can bring a sketch to life.
Invest in a sturdy sketchbook and drawing pencils for your toolkit. A foldable stool and a lightweight easel can also enhance your comfort and stability as you draw.
Look for scenes that speak to you, those little moments of wilderness that stand out. The dappled light through a canopy of leaves, for example, or the way the sun sets the horizon ablaze, can be magic for your sketchpad. And remember, it’s about the experience, not just the outcome. So find your spot, take a deep breath of fresh air, and let nature guide your hand. It’s all about the fun of creating something unique and personal as you relish the tranquility of the outdoors.
Whittling is more than just slicing away at a piece of wood; it’s a craft that requires concentration and precision, often leading to a meditative state. When camping, having a knife and a simple block of wood can transform idle time into a session of creative expression. Here are a few tips to get you started:
Choose your tools wisely: A sharp pocket knife with a locking blade for safety or a specialized whittling knife will do. Keeping your blade sharp is crucial, as a dull knife is unsafe and makes for rough work.
Selecting your wood: Softwoods like pine or basswood are ideal for beginners due to their softer composition. Ensure the wood is dry; though fresh green wood is smoother and easier to cut, it’s prone to cracking as it dries.
Here’s a couple of whittling ideas that are perfect for the campsite:
Whittle a cooking utensil, like a simple spatula or spoon. They’re not just handy but also a fantastic reminder of your trip.
Craft an animal that makes a great camping souvenir.
Remember always to carve away from your body and use a glove to protect your holding hand. Whittling isn’t a race; take your time and enjoy the process. It’s a rewarding craft where the journey is just as enjoyable as the destination—a carved piece you can call your own.
Slacklining, an activity that tests balance and agility, is a fantastic addition to camping activities. Initially conjured up by climbers in Yosemite to sharpen their balancing skills on rest days, it has since evolved into a fun pastime perfect for outdoor enthusiasts like you. You only need flat webbing, two sturdy points like trees or posts, and a sense of adventure.
Here’s how to get started:
Find the perfect spot: Look for two strong trees about 20 to 30 feet apart and with no obstacles in between.
Set up your slackline: Tie the webbing around each tree at a comfortable height. Use a ratchet or similar tensioning system to get the right amount of slack – not too tight or loose.
Walk the line: Begin by stepping onto the slackline with one foot while holding onto a friend or a tree for support. Focus your gaze on a fixed point ahead and walk slowly, placing one foot in front of the other.
Perform tricks: Once you’re comfortable walking, try sitting, turning, and even jumping on the line to add some fun tricks to your balance work.
Slacklines vary in length and tension, and they are suitable for different difficulty levels and fun. For beginners, a shorter and more low-lying line would be ideal. At the same time, seasoned slackliners might enjoy a longer and higher setup. Beyond the physical benefits, slacklining at a camp is a delightful way to bond with friends and family and share a few laughs — you’ll be surprised at how quickly you can progress from wobbly steps to confident strides.
When camping with family and friends, there’s no better way to add excitement to your day than with a good old-fashioned Water War. Picture this: you’re armed with water balloons in one hand and a water gun in the other. Laughter echos around you as everyone dashes and dodges, soaking wet but cool from the heat, the competition as intense as the midday sun.
Here are a few tips to get your Water War battle-ready:
Prepare Your Arsenal: Stock up on water balloons and reliable water guns. Aim for easy-to-fill balloons and guns with a good range and capacity.
Safety First: To avoid accidents, choose a spacious outdoor area away from camping gear and ensure the ground isn’t slippery.
Keep It Friendly: Remember, it’s all about fun. Set some basic rules to ensure no one gets hurt and everyone enjoys the game.
Outdoor games are a great way to add excitement and camaraderie to any camping trip. They’re not just for kids; games can also foster a sense of family and togetherness, making your outdoor experience memorable.
When selecting games, consider your group’s age range and interests. Look for games that require minimal equipment and setup. Classics like Tag need nothing but open space and are perfect for getting everyone moving.
Here are some all-time favorites perfect for campers of all stripes:
Tag: Always a hit, it’s simple and lively, and you can add variations to keep it fresh.
Capture the Flag: This team game combines stealth and strategy and is a hit with kids and adults alike.
Cornhole: Toss the bean bag into the hole, which is popular with teens and adults.
Horseshoes: Popular game with older adults, although kids and young adults enjoy the challenge.
Volleyball: Hang a net and mark the boundaries; you’ve got the recipe for a fun time.
Bocce Ball: Classic beach game that is just as fun while camping.
Spike ball: Combine volleyball with four square and a circular net for a fast-paced game for teens and young adults.
Yoga is a practice that combines physical postures, breathing techniques, and meditation to foster harmony between your mind, body, and nature. When you’re camping, incorporating yoga can enhance your outdoor experience, promising relaxation and a chance to meditate amidst the tranquility of the natural world.
When considering yoga styles for camping, opt for Hatha or Yin yoga. These styles focus on longer-held poses and are perfect for practicing with the serene backdrop of the outdoors. Yoga while camping isn’t about perfection; it’s about embracing the moment and your unique setting.
Picnicking is a delightful way to combine your love for the outdoors with the simple pleasure of dining al fresco. There’s something inherently comforting about spreading a blanket and unpacking a food basket amidst nature. It’s a casual yet intimate setting that invites relaxation and provides a scenic backdrop for your meal. Whether with family or friends, picnicking enhances your connection with nature and each other.
For the best experience, prepare by choosing foods that are easy to pack and serve. Items like sandwiches, fruits, salads, and cold cuts are perfect for a picnic. Pack utensils, napkins, and trash bags for an easy cleanup. Keep your food fresh and safe using a cooler with ice packs, especially if your picnic includes perishables.
When you’re camping, seek spots known for their views and tranquility. Lakeshores, streams, park meadows, and forest clearings are prime picnicking locations.
My favorite picnic was beside a beautiful river in Yellowstone National Park. Remember to respect the wildlife and environment; leave no trace after your meal.
Key Tips for Your Next Picnic:
Prepare: Opt for portable, non-perishable food items when possible.
Pack: Use a cooler to keep your food at a safe temperature.
Pick a Spot: Choose locations with beautiful views and minimal disturbance.
Protect Nature: Always clean up after yourself to preserve the outdoors.
Whether you’re a seasoned camper or a beginner, there’s always something new to try and discover in the great outdoors. Outdoor camping activities can enrich your trip and make it more memorable and satisfying.
What outdoor camping activities do you enjoy? Leave a comment below!
FAQ
What are outdoor camping activities?
Outdoor camping activities are any recreational or educational activities that can be done outside while staying in a tent, cabin, or RV. Some outdoor camping activities include hiking, fishing, biking, kayaking, birdwatching, and stargazing.
What are the benefits of outdoor camping activities?
Outdoor camping activities can provide many benefits for physical and mental health, such as reducing stress, improving mood, boosting immunity, enhancing creativity, and strengthening relationships. Outdoor camping activities can also help you appreciate nature and learn new skills. They also help your kids get all that energy out in a creative and fun way.
What are some fun camping activities for kids and families?
There are many fun camping activities for kids and families that can keep them entertained and engaged. Some examples are nature scavenger hunts, attending outdoor programs, completing junior ranger activities, playing games like tag, swimming, biking around camp, hiking, and making s’mores.
What are some camping activities for couples?
Camping can be a romantic and adventurous way to spend time with your partner. Some camping activities for couples are cooking a special meal, watching the sunset or sunrise, cuddling by the fire, reading or listening to music together, and playing card or board games. If you and your partner are feeling adventurous, you can also try some more challenging activities like rock climbing, kayaking, or zip-lining.
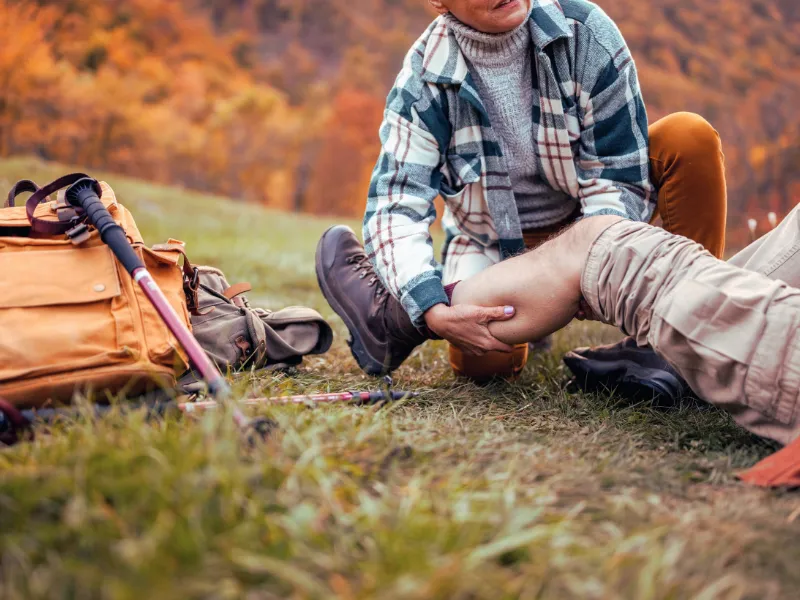
Ankle sprains, cuts, and blisters are common hiking and camping ailments that require first aid. A first aid kit is a hiking essential, and you can purchase a pre-made first aid kit relatively inexpensively. There is no such thing as a perfect wilderness first aid kit. You should consider your own situation when choosing or putting together a first aid kit.
In addition to being a medical provider, I’ve hiked and camped for multiple decades and carried many different first aid kits from just bandaids to a more comprehensive first aid kit. I’ve researched the items in the most popular first aid kits in addition to the recommendations by the Red Cross. From this, I’ve created a first aid checklist that should work well if you’re a beginner hiker or an experienced hiker looking to update your hiking essentials.
Contents
First Aid Checklist
6 Pre-Checks for Your First Aid Kit
Buck Tilton, in his excellent book Wilderness First Responder, suggests several considerations before creating a first aid kit [1].
Here are 6 questions to ask yourself before going through this first-aid checklist:
What will your environment be like, including terrain, weather, and altitude?
How far away from emergency services will you be? Hiking and camping in a remote location require additional first aid supplies you probably don’t need for a short day hike.
How many people will be in your group? This helps determine how many supplies you need to bring in your kit.
What are your physical conditioning and medical needs and those of your group? Many people have medical conditions, such as diabetes or other conditions, that might require additional emergency items in their first aid kit.
Do you have any medical expertise and skills, and can you use all the items in your first aid kit? Never carry items or medications you don’t know how to properly use.
Can everyone carry their own first aid kit? Each person should carry their own personalized first aid kit if possible.
Drinking frequent sips of plain water is good for dehydration. Sports drinks and water-rich food are also good for dehydration.
If you are severely dehydrated, you need to seek a medical professional immediately, as you may need IV fluids or other medical support.
Chronic dehydration may also increase the risk of developing other chronic diseases [1]. Carrying adequate water is essential for day hikingto prevent dehydration.
I’ve spent multiple hours researching the recommended foods and drinks for rehydration when dehydrated. I’m also a medical provider who has seen and treated many dehydrated patients.
If you are mildly dehydrated, such as during a hike or after vigorous exercise, these 10 foods and beverages are good for dehydration.
Regular water without anything added is generally the best antidote for dehydration from hiking or vigorous activity.
If you’re exercising or hiking longer than an hour, a snack might also help you continue your activity without sudden energy loss. This is primarily related to blood glucose and tissue glycogen depletion rather than water loss or sweating during activity.
Our bodies are efficient at conserving sodium and other electrolytes, so we usually only need regular plain water to rehydrate us during and after hiking or vigorous exercise. If you’re outdoors, you must drink clean purified water to avoid water-borne illness.
2) Sports Drinks
Sports drinks such as Gatorade also help with rehydration primarily through their high water content. They usually contain lots of extra sugar, which isn’t usually necessary unless you’re vigorously exercising for more than an hour.
The extra electrolytes are probably not necessary unless you have extensive fluid loss from diarrhea or vomiting or if you sweat profusely for multiple hours on end, such as during a marathon or other athletic event.
3) Coconut Water
Coconut water can also rehydrate you as it has electrolytes, sugars, and high water content. Studieshave shown that coconut water rehydrates just as well as sports drinks, although it may cause more bloating and an upset stomach.
Coconut water also requires refrigeration several hours after opening to prevent spoilage.
4) Oral Rehydration Solution
Oral rehydration solution or oral rehydration salts (ORS) is a glucose-electrolyte solution formulated by the World Health Organization (WHO) to reduce dehydration in people with severe diarrhea.
ORS is usually available in powder packets that you dissolve in clean purified water and then consume. Pedialyte is a common premixed ORS similar to the WHO formulation.
Generally, ORS therapy is done under the supervision of your medical provider, primarily in the setting of dehydration due to severe diarrhea. Most hikers and athletes do not need ORS rehydration unless they’re in the backwoods with severe diarrhea.
5) Milk
Milk also contains carbohydrates and electrolytes, lots of water, and the bonus of additional protein. Research studiessuggest that milk may be a great post-exercise rehydration drink.
Not everyone can tolerate the lactose in milk, which can cause bloating and loose stools. Because milk is calorie-rich, it is probably not an ideal beverage for rehydration during exercise as it may upset your stomach during your activity.
6) Soups
Soup is another ideal rehydrating food post-physical activity. It usually contains significant water and nutrition to replenish your energy. While broth is often recommended, there is no reason to stick with only broth unless you’re on a calorie-restricted diet.
As a caution, many soups, including broth, contain lots of sodium, which may make you feel even more thirsty and swollen.
7) Melons
Melons are a great way to rehydrate, as they usually have about 90% water content. They also provide fiber to help the natural sugars absorb more evenly.
8) Cucumbers
Cucumbers are also a good rehydrating food, with a 96% water content. They can also be added to water for a taste benefit. However, they do cause some people to burp and have stomach aches, so keep this in mind before consuming them.
9) Berries
Strawberries, blueberries, raspberries, and many other berries contain rehydrating water, fiber, and sugar that can help you recover after hiking or vigorous exercise.
Remember that you’ll need to eat a bunch to rehydrate yourself completely. Berries work well as a supplement to the other rehydrating methods.
10) Tomatoes
Tomatoes contain 95% water and can help increase your water intake to avoid dehydration or rehydrate after hiking or other sweaty activities. Tomatoes are a low-calorie food that can supplement your other water intake.
Dehydration commonly occurs from water loss, usually from sweat or diarrhea. During vigorous exercise in a hot, dry environment, one can lose more than 1-2 L/hr.
If you get diarrhea, you can lose several liters of fluid with electrolytes daily. A sports drink or coconut water might better replenish your body when you have diarrhea. Medical help is recommended for guidance.
Otherwise, if you’re hiking or participating in other vigorous activities, plain water works best, as our daily diets usually make up for the loss of electrolytes such as sodium.
What are Common Signs and Symptoms of Dehydration?
Most people will get a natural sense of thirst when their water levels are decreased. A common sign of dehydration is dark urine. Your urine should usually be clear to yellow when you’re hydrated. Other common symptoms of dehydration include headaches, dizziness, or muscle cramps. Here are some common signs and symptoms that may indicate dehydration (usually, you will have more than one if you’re dehydrated): – Dry tongue – Headaches – Confusion – Tiredness – Dizziness – Craving sugar – Muscle cramps – Chills – Dark urine
How to Prevent Dehydration?
Dehydration sometimes can’t be prevented, such as during severe diarrhea, but most dehydration CAN be prevented with a little planning.
– Drink 0.5L (16 oz) of water around 1 hour before your activity. – Drink small sips of water every 10-15 minutes or approximately 0.5L/hr during your hike or other activity (more per hour if you’re profusely sweating). – Drink another 0.5L (16 oz) after you finish your activity to rehydrate.
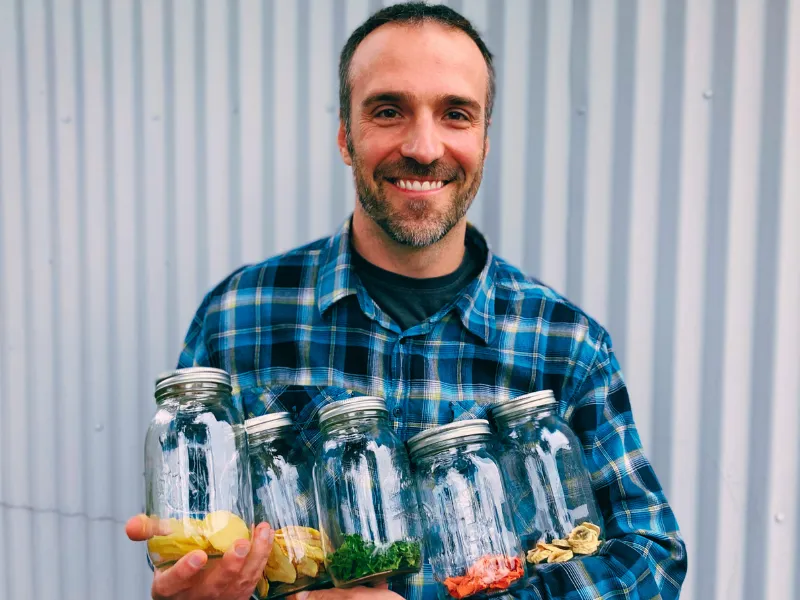
When you learn how to dehydrate food, you can create snacks, meals, and even emergency rations while saving money. Dehydrating food is a great way to preserve fruits, vegetables, herbs, and even meat for long-term storage or lightweight meal options while camping or hiking.
Over the past several years, I’ve used a dehydrator to dry various foods, primarily fruits, for snacks. I have experience growing up around many dehydrated fruit leathers and wild game jerky.
When researching and writing this article, I dehydrated five fruits and vegetables: apples, bananas, kale, potatoes, and carrots. I didn’t use expensive equipment, and it was easy to do in our compact kitchen. I look forward to dehydrating many camping meals for our next outdoor adventures.
You don’t need special kitchen tools to start dehydrating, but I strongly recommend acquiring a standalone electric dehydrator.
You can use an oven to dehydrate, but it’s slow and inefficient.
My basic electric dehydrator works perfectly for most homemade snacks and meals.
Electric Dehydrators
Electric dehydrators are standalone appliances that are best for dehydrating food at home. They usually have a built-in fan and an adjustable heater between 90-150°F (32 and 66°C).
Electric dehydrators are available in two form factors: stackable/vertical and box/horizontal.
Stackable dehydrators are less expensive and expandable, but you will need to cycle the trays in the stack for more even drying.
Box dehydrators dry more evenly and efficiently but are more expensive. Both electric dehydrators will require separate tray liners for drying liquids/mashes such as fruit leather or soups.
Tips for Electric Dehydrator Use
Use a dehydrator with an adjustable heater between 90-150°F (32 – 66°C)
Check the dehydrator’s temperature about 20 minutes after starting, as temperatures often vary depending on the manufacturer.
Check the trays every few hours to evaluate how evenly the trays are drying.
Use a nonstick cooking spray with fruits or other food that tends to stick to trays or liners.
Oven-Drying
Oven-drying isn’t recommended unless you’re just learning to dehydrate. It’s hard to keep a consistent temperature, and the drying process usually takes almost twice the time of an electric dehydrator.
Also, there’s the increased risk of a kitchen fire or risk of harm to kids or pets, or even accidentally burning the food.
Electric dehydrators work significantly better and are inexpensive ($50 for a basic electric dehydrator). Some newer ovens with convection features have a dehydrating cycle, which can work well. Most ovens are non-convection ovens.
Follow the manufacturer’s directions for dehydrating with a convection oven that has a dehydrating cycle.
For all other non-convection ovens, here is how to use your oven to dehydrate.
How to Use an Oven for Dehydrating
Set the oven at the lowest temperature, preferably <140°F or 60°C.
Place an empty baking sheet to catch any falling drips or food.
Place food on removable wire racks.
Leave the oven door cracked open 1-2 inches for airflow.
Place and use a fan outside the oven, blowing into a slightly cracked oven door.
Monitor the temperature with an oven thermometer and adjust oven heat accordingly.
For thousands of years, sun-drying food was the traditional method of dehydrating food. Sun-drying food requires an air temperature greater than 90°F and a relative humidity less than 60%. This works best in the Southwest USA.
It is recommended to sun-dry only chile peppers and fruits, including tomatoes. Fish, meats, and other vegetables are not recommended for sun-drying due to a higher risk of spoilage.
Home-made dehydrators
There are lots of DIY dehydrator ideas if you’re so inclined. These come in all different designs and sizes. The important factors to remember are an adjustable heating of the air and even airflow across the food.
Cutting tools
Beyond a cutting board and a sharp kitchen knife, you don’t need any special cutting tools. If you want even slices, consider a mandolin slicer with a hand guard. Your food processor can also be used for slicing.
Clean work surface
Clean hands, tools, and cutting surfaces to reduce the risk of pathogens that can cause food spoilage or food poisoning.
Preparing food before dehydrating consists of evenly dividing it so it can dry consistently. This usually involves slicing fruits and vegetables evenly. I cut my cored apple into 1/4-inch slices.
Slice fruits and vegetables between 1/4-inch and 1/2-inch thick.
Slice meat to less than 1/4-inch.
Pretreat vegetables and fruits if desired. Marinate meat overnight if desired.
Precook food, including veggies and meat, that you would normally cook.
Pretreating
Pretreating vegetables and fruits can help decrease or stop browning, toughness, or spoilage. Some people prefer not to pretreat, arguing that it may destroy nutrients or digestive enzymes.
There are multiple ways to pretreat fruits and vegetables [1]. Most vegetables are best pretreated with steam or water blanching, while fruits and berries are best pretreated with soaks or dips.
Dip food into boiling water to water-blanch. I water-blanched my potato slices in boiling water for 5 minutes, then soaked them in acidic water for 10 minutes.
Syrup-blanching
Syrup-blanching is for fruits only and can add softness and retain fruit color.
Add 1.5 cups of sugar with 2.5 cups of boiling water.
Add fruit and adjust the heat to a simmer.
Soaking in acidic water
Acidic water soaking reduces browning in fruits, potatoes, and turnips.
Add 1 to 3 cups of lemon or lime juice or 1 to 3 teaspoons of citric acid powder per quart of water.
Soak food for 5 to 10 minutes in solution.
Soaking in sulfite solution
Sulfite solution pretreatment comes with risks for people with asthma and allergies to sulfa-based products. I recommend trying other methods first, but sulfite soaking is often discussed in the dehydrating community.
Add 1 tablespoon of sodium metabisulfite powder in 1 quart of water (NOT sodium bisulfate or sodium sulfite).
Soak in solution for 5 minutes.
Soaking in fruit juice
Soak fruit in orange or pineapple juice for 5 minutes.
Dipping in pectin
A pectin syrup solution can be used to glaze fruits and berries.
Add 1 box of pectin to 1 cup of boiling water
Add ½ cup of sugar
Add an additional cup of cold water
Cool completely and glaze fruit with a thin film
Dipping in honey
Add ½ cup honey with 1 quart of water.
Dip fruit in honey solution.
Commercial fruit protector
Multiple products are available at the grocery store that are designed to decrease fruit browning.
Keep space between food pieces to allow for airflow. It’s okay to mix and match different fruits and vegetables on the same tray. I mixed my apple slices with my bananas. Just keep in mind that they may dry at different rates.
Also, avoid mixing and matching strong-flavored foods such as garlic with mild foods such as fruit. Spread prepared meals or leathers less than ¼ inches thick on tray liners.
I dehydrated my apples and bananas at 135°F (63°C). Every few hours, I checked the dryness and turned the slices or rotated the trays.
Time
The time to dehydrate varies significantly depending on the relative humidity and size of the pieces. It’s not uncommon for some larger pieces and chunks to take over a day to dry.
Here are several common foods and their general drying times:
Precooked meals vary significantly (usually until crumbling)
Fruit leathers take 6-15 hours.
Apple slices take 5-10 hours.
Bananas take 7-12 hours.
Blueberries take 8-24 hours.
Cherries take 10-20 hours.
Corn takes 6-12 hours.
Cranberries take 14-25 hours.
Cucumbers take 4-6 hours.
Grapes take 12-20 hours.
Greens take 3-5 hours.
Herbs take 2-18 hours.
Jerky takes 4-8 hours.
Mangoes take 6-12 hours.
Mushrooms take 3-6 hours.
Onions take 6-10 hours.
Oranges and other citrus take 9-13 hours.
Peaches take 6-12 hours.
Pears take 6-15 hours.
Peas take 5-9 hours.
Peppers take 6-10 hours.
Chile peppers take 4-15 hours.
Pineapples take 8-14 hours.
Plums take 8-18 hours.
Potatoes take 7-12 hours.
Raspberries take 12-20 hours.
Strawberries take 7-14 hours.
Tomatoes take 8-12 hours.
Zucchini takes 7-15 hours.
Temperature
Dehydrators usually have a temperature setting. However, the temperature of most dehydrators fluctuates by several degrees.
The following are guideline target temperatures for drying food:
Vegetables with a target of 125°F (52°C)
Fruits with a target of 135°F (63°C)
Prepared foods such as soups with a target of 150°F (66°C)
Precooked meat (for jerky) with a target of 140°F (60°C). Per USDA guidance, heat meat to an internal temperature of 160°F (165°F for poultry) before or after dehydrating to kill pathogens.
Fruit leathers with a target of 135°F (63°C)
Turning and stirring
You should check the pieces every few hours and turn and stir, if appropriate, to make sure everything dries evenly.
I prefer my dried apples a little crisper, so when I bent it, I was looking for a snapping or cracking sound.
Dryness varies depending on the dehydrator, food type, humidity, and temperature. Guidelines for how long to dehydrate a specific food are just recommendations, as the variables, especially relative humidity, are difficult to control completely at home. Testing for dryness is critical to ensure the food is dehydrated properly.
How to test for dryness of food in 3 steps
Cool a piece of the food to room temperature before testing.
Compare to the description of finished dehydrated food:
Leathery or supple dehydrated food should be dry on the surface and able to bend.
Brittle, dehydrated foods should break or snap when you bend them.
Overdry food is better than underdry foods.
Moisture should not be present in the center.
If food isn’t done at the end of the day, you can run a dehydrator overnight at a reduced temperature of 90-100°F (32-38°C).
I would periodically remove pieces that felt done and let them cool for a few minutes. I would then test for dryness as above. Pieces that passed the dryness test went into a glass jar. The apples took about 8 hours to finish, and the bananas 11 hours.
Food in the dehydrator often dries at different rates, so remove individual pieces as they finish. Remember, overdrying is much better than underdrying [2].
Dried fruit especially benefits from conditioning to equalize the moisture content among the pieces. This is usually done on the counter in a glass jar, which you can shake daily for several days.
Conditioning recently dehydrated food, especially dried fruits, is recommended if you plan to store it for more than a few weeks. Conditioning equalizes the moisture throughout the newly dried pieces, reducing the risk of spoilage.
To condition your newly dried food, place it in a glass jar and seal tightly. Remember only to place one food type per jar. Set the jar aside at room temperature away from direct sunlight. Gently shake the jars daily and check for any moisture or haziness on or in the jar (if so, return the food to the dehydrator for a few more hours and try again).
Pasteurization is recommended for sun-dried foods or optionally for unpeeled fruits or veggies. Sometimes, insects lay eggs in the peels or sun-dried foods that don’t get killed in the drying process.
Pasteurization is achieved in two main methods: heat at 175°F (80°C) for 15 minutes or freezing at 0°F (-18°C) for 48 hours. Pasteurization may change the flavor and nutrients.
The final stage of dehydrating food consists of storing it for future use. The primary idea is to reduce air exposure to the food.
Consider storing foods in smaller containers as moisture will enter the food and container after you open it. Most properly stored fruits and vegetables will stay preserved for several months or more [3]. Homemade jerky lasts up to 2 months at room temperature or longer in the freezer [4]. You can best achieve good dehydrated food storage as follows:
Air-tight containers such as glass jars
Vacuum sealed bags
Jars or bags with oxygen absorber packets
Jars or bags with Silica gel packets for moisture protection
Dehydrated food needs airtight containers, such as glass jars, to prevent absorbing moisture and spoiling. Then, store your dehydrated food in their containers in a dark, cool, dry place.
10) Rehydrate Food when Ready to Use
Of course, the whole purpose of dehydrating food is to use it at some point. Most dehydrated foods, such as dried apples, banana chips, or jerky, are consumed dry.
Some foods, such as dehydrated soups or many veggies, require rehydration before you can enjoy eating them.
Two Methods to Rehydrate Food
Hot-soaking –takes approximately 15 min to hours to rehydrate.
Pour boiling water to cover the dehydrated food in a container.
Let stand with occasional stirring.
Cold-soaking – takes overnight or several hours to rehydrate. Food-safety note: perishable ingredients should not sit unrefrigerated for extended periods — keep cold-soak times limited and be cautious with meat, dairy, and eggs.
Pour room-temperature purified water to cover the dehydrated food.
Refrigerate overnight.
You can create dehydrated food at home with simple preparation, equipment, and testing. Follow the 10 steps in this article to get started and experiment with different ingredients and recipes. Check out our camp meals for inspiration.
Don’t forget to start your camping checklist before your next outdoor adventure. If you’re just getting started exploring the outdoors, look at our hiking for beginners while making some homemade dried snacks.
Please leave any comments or ideas below!
FAQs
Why dehydrate my own food for camping and hiking?
I find dehydrating food interesting because it’s a great way to preserve food for camping and hiking.
Dehydrated food is lighter and more compact and doesn’t require refrigeration, making it perfect for hiking and backpacking trips.
You can also dehydrate many premade meals, such as soups, then rehydrate them on the trail or at camp.
You can also save lots of money when dehydrating your own food compared to the expensive freeze-dried food you get at the store.
You need clean drinking water in an emergency survival situation. Here are 6 ways to purify water in an emergency survival situation: boiling, filtering, disinfection, UV light, solar disinfection, and a sip well.
I’ve been hiking and camping for decades and successfully used several methods to purify water without ever getting sick. My favorite method is using UV light to purify my water when hiking or backpacking. I’ve also spent many years using various water filters with success. You, too, can learn how to purify water successfully in any situation.
If you have built a fire or have a stove, boiling water for 1 minute is an easy and efficient way to purify water from germs [2]. You might need a rough sand or debris filter to remove silt from the raw water.
Boiling doesn’t eliminate chemicals or other toxins in the water, but most water in a wilderness survival situation just needs the bacteria, viruses, and parasites neutralized.
How to purify water by boiling in 3 steps:
Filter cloudy water with paper towels, coffee filters, gravel, or clean debris like pine needles.
Bring water to a boil for 1 minute (at elevations above about 6,500 feet, boil for 3 minutes, per CDC guidance).
Water filters are designed to remove germs. They also can work well for removing some toxins, but note that common backpacking filters (0.1–0.2 micron) remove bacteria and protozoa without reliably removing viruses — true water ‘purifiers’ are a separate category. The Centers for Disease Control (CDC) recommends a filter that is <1 µm pore size, which should remove bacteria and parasites [3].Also, filters usually have a carbon part to the filter, which can improve the taste.
Don’t assume the common pitcher or refrigerator filters can also filter out germs, as they aren’t intended for this.
There are multiple filter types to choose from, including simple straw filters, water bottle filters, gravity filters, pump filters, and other filter types [4]. For directions on how to purify water with a filter, see the manufacturer’s guidelines, as each filter works differently.
Disinfection water purification generally means using chemicals to kill germs.
Small quantities of common household chlorine bleach can disinfect water, making it safe to drink. Hikers and campers can carry chlorine dioxide or iodine tablets for wilderness water purification.
How to purify water by bleach in 3 steps:
Gather a medicine dropper from an emergency kit and fresh liquid chlorine bleach (the active ingredient of 6% or 8.25% sodium hypochlorite).
Use 2 drops of regular unscented household bleach (6–8.25% sodium hypochlorite) per 1 quart or 1 liter of water — double to 4 drops only if the water is cloudy.
Common household iodine can also purify water, although pregnant women, people with thyroid disorders, and people with iodine allergies should avoid this method. It is also not recommended to drink iodine-treated water for more than a few weeks.
How to purify water by iodine tincture in 2 steps:
Use 5 drops of 2% tincture of iodine per 1 quart or 1 liter of water.
Silver is used by Europeans for disinfection but is not approved for safe water purification in the US.
Other commonly recommended household products, such as hydrogen peroxide and citrus juice, are not recommended for water purification, per the CDC [7].
Ultraviolet light can quickly and easily kill most germs in water. Handheld UV light water purification devices are affordable and available for hikers and backpackers.
UV water purification is my preferred method of purifying water as it is quick, easy, and lightweight. Unfortunately, my UV light has failed multiple times, resulting in having to boil water as a backup.
For directions on how to purify water by UV light, see the manufacturer guidelines, as each device works slightly differently.
Sunlight essentially acts as a UV source for purifying water. This is also called solar disinfection or SODIS [8].
How to purify water by solar disinfection in 3 steps:
Filter cloudy water with paper towels, coffee filter, gravel, or clean debris like pine needles. You may let the water settle and then use the clear water on top.
Fill clear PET bottles (ideally under 3 liters) with clear water.
Lay bottles on their side on a dark surface in direct sunlight for at least 6 hours [9]. Allow up to 2 days in cloudy weather.
6) Purify Water with a Sip Well
AI Photo: Daniel Borkert/Canva Magic Media™
A sip well, also known as a coyote well or gypsy well, can work as a last resort if you don’t have access to a heat source for boiling or any other way to purify water.
The basic premise is that the water will filter through the dirt and debris in the ground from a nearby water source into a small hole you dig.
I didn’t find any research that this was effective in purifying water from the germs that make you sick (such as Giardia, Cryptosporidium, and E. coli) [10].
Use this method cautiously. If possible, I always recommend disinfecting water from a sip well with another method, such as boiling.
How to purify water by a sip well in 4 steps:
Find a source of standing water (pond, large puddle, lake, spring) or stream.
Dig a small hole at least 3 feet or more from the water source that goes down below the level of the water source.
Let water seep into your hole until filled.
Process water from your sip well if possible (recommend further boiling or disinfection).
You have learned how to purify water in six ways: boiling, filtering, disinfection, UV light, solar disinfection, and sip well. Each method has advantages and disadvantages, depending on your situation and available resources.
In addition to obtaining safe drinking water, you will also need to build an emergency shelter in a survival situation.
Stay prepared with the hiking essentials on your next camping or hiking trip, and avoid a wilderness survival situation altogether.
FAQs
Why bother with purifying my water when hiking or camping?
There are over 100 germs (bacteria, viruses, parasites) in the US surface water. Water purification is essential in avoiding waterborne illness. In a survival situation, you need water to live, but you also want to avoid getting seriously ill from contaminated water.