How to store a sleeping bag in 4 steps. It’s not just about tossing it in the closet until your next camping trip. What’s the right way to store your sleeping bag?
In this guide, you’ll learn the 4 steps to properly store a sleeping bag. Whether you’re a backpacking enthusiast or a casual camper, you’ll find tips to store a sleeping bag properly to maximize its life and ensure it is in peak condition for your next journey into the great outdoors.
Key Takeaways
Keep It Loose: Ditch the stuff-sack when not trekking.
Keep It Dry: Always air the bag post-adventure, keeping moisture and mold at bay.
Store It Cool: Store your bag loosely in a large, breathable storage bag or hang it in a dry place
Contents
How to Store a Sleeping Bag
Step 1 – Remove the Sleeping Bag from the Compression Sack
When you travel or backpack, compression sacks are spacesavers. They compress your sleeping bag down to a manageable size, keeping it compact and easy to carry. But once you’re home, it’s a different story. Compression – great for mobility, not so great for long-term storage. Let’s break down why.
Fabric and Fibers: The insulation of your sleeping bag whether synthetic or down is made to “breathe”. Prolonged compression can crush the fibers, robbing your sleeping bag of its fluffy warmth—the very thing that keeps you toasty at night.
Step 2 – Air Out and Dry It
Airing out your sleeping bag after each camping trip is crucial. It’s not just about removing the stench of sweat, body oils, or campfire; if any moisture, be it from humidity, rain, or even your own body, lingers, it can become a breeding ground for mold and mildew. Not only is it unpleasant, but such growth can also deteriorate your sleeping bag’s materials, especially the synthetic or down filling.
You don’t need to wash a sleeping bag after every outing. Over-cleaning can prematurely wear your bag down. Spot cleaning does the trick for most parts.
Outside: Hang your bag up on a clothesline or a large hanger.
Inside: Turn your sleeping bag inside out and drape it over a railing or chair or lay it flat—just ensure good air circulation around and inside the bag.
Dryer: If weather’s not on your side, the air fluff/lowest heat setting in your dryer can work wonders. Chuck in a couple of clean tennis balls—they’ll help fluff the filling, making it as good as new.
Fan: No dryer? No problem. Position a fan nearby to ramp up air movement and whisk away moisture.
Avoid keeping the bag in direct sunlight for too long, which can wear the fabric down. Keep heat sources at bay, too. Too much heat and you’ll risk damaging it.
Step 3 – Loosely Place It Inside a Large Cotton or Mesh Storage Sack
A storage sack isn’t the compression stuff sack you jam your sleeping bag into while moving. Remember, the bag must be completely dry before storing it in a cotton or mesh sack.
Here are some tips for keeping your bag in a mesh or cotton storage sack:
Use a sizable storage sack: Look for a cotton or mesh sack, which promotes crucial airflow. A large laundry bag works well if your sleeping bag doesn’t have a storage sack.
Gently stuff your bag inside: The key here is to avoid tight rolls or folds. Your sleeping bag loves space; let it loft naturally.
Spaciousbeats snughere. It should accommodate your sleeping bag without squishing it.
Step 4 – Store It in a Cool and Dry Place
Storing your sleeping bag properly in a cool and dry place is pivotal to maintaining its insulating capabilities and loft.
Option 1) Breathable Storage Bag
When tucking away your sleeping bag in a closet, on a shelf, or under the bed, ensure it’s in a breathable storage bag—preferably cotton or mesh. This will prevent moisture from accumulating and causing damage.
What to Avoid: Airtight Plastic, Garages, Attics, and Basements
Do not store your sleeping bag in airtight plastic bags or bins — even with silica gel packs, airtight compression degrades the bag’s loft over time. Instead, keep the bag loose in a large breathable cotton or mesh storage sack in a cool, dry, climate-stable indoor space such as a closet or under the bed. Avoid garages, attics, and basements, where heat and moisture extremes can damage the insulation.
Option 3) Hanger in the Closet
A unique way to keep your sleeping bag’s loft in tip-top shape is to hang it up on a sturdy hanger. However, don’t just shove it in a tight space – let it hang freely. This ensures even air circulation to every nook and fiber.
Any other tips or suggestions for storing your sleeping bags?
FAQs
How can I avoid pests and dust while storing my sleeping bag?
– Regularly inspect the storage area for any signs of pests. – Seal any gaps where critters might see an invitation. – Consider a layer of plastic wrap or a storage cover to shield from dust.
Are there any specific synthetic vs. down storage needs?
Not really any differences in storage recommendations. Synthetic bags can probably be stored compressed longer without losing too much loft. Down bags definitely should be stored closely and they theoretically can lose their loft with long-term compression.
Should I wash my sleeping bag before storing it?
This depends on how dirty your sleeping bag is. You don’t need to if it’s not dirty. You should not wash your sleeping bag too often, as it can also wear out the material and cause tears or holes. A good rule of thumb is to wash your sleeping bag once a year, or more if you use it frequently or in dirty conditions.
How can you lock a tent while you’re camping? The easiest method is to use a luggage lock.
Although you can lock your tent, you might consider alternative ways to secure your campsite and tent from other people or even bears, such as a small bell tied to the zipper, a safety pin, or a tent alarm.
You can easily enhance your tent’s security with a few simple steps and confidently enjoy the great outdoors.
Other than locking your tent, there are potentially better alternative methods of securing your tent at festivals or with your family, such as a portable tent alarm system.
Common tent-locking methods include luggage locks, shoelaces, wire, or a safety pins.
Contents
Locking Your Tent
When to lock your tent?
Most camping trips don’t require locking or securing your tent from theft or unwanted visitors.
You should rarely lock your tent from the outside, as doing so does little to deter theft.
You might want to consider locking a tent from the inside when camping at a festival such as Bonnaroo or camping with kids.
Camping at a festival
I can imagine attending a festival surrounded by the vibes, the music, and the intoxicated fans. It’s all a blast until something goes wrong. Someone might accidentally mistake my tent for their own, and I wouldn’t want to wake up to unexpected company. A lock keeps their party and potential mess out of my private space.
Remember, a lock is just a deterrent—not an impenetrable force field. Always exercise caution and consider safety first when tucked in for the night. Secure your valuables, and don’t rely solely on a lock.
Camping with kids
If I’m camping with my family, my curious kid might try to go on a nighttime adventure. A lock can be a safety guard to keep my child safe and discourage any unplanned exits during the night.
The primary goal of locking your tent at a festival is to prevent unwanted festival guests from accidentally entering it while you’re in it.You shouldn’t depend on locking your tent to secure your valuables when you’re not around.
Thousands of tents, an air of carefree intoxication, and the constant noise hum create an exciting but less-than-secure environment. With a plethora of tents and lots of intoxication, it’s easy for a drunk person to mistake your tent for their own.
Secure your tent zippers from the inside
You can secure your tent inside in several ways, including tying shoelaces to the zippers, using a safety pin, a piece of wire, or even a luggage lock.
Tie a bell or other alarm to your entrance.
You could skip the lock altogether and tie a bell to your zipper, alerting you when the tent door is opened and closed. You could also consider a basic motionor wire-activated alarm.
Get to know your neighbors.
Set up camp near friendly neighbors. It’s all about community watch! If you notice something off, chat with the festival security.
Take all valuables with you or leave them at home.
Keep your money and valuables on your person even when sleeping. If that’s not possible, leave your items at home.
You could leave your valuables in a secured trunk safe in your car. Otherwise, there’s not any great way to secure your valuables. 99.999% of festival-goers are awesome people, so don’t get too paranoid.
Camping with your little adventurers requires balancing safety and fun. For keeping kids from wandering at night, alarms and bells are the safest primary solution—they alert you if a child opens the tent without blocking emergency egress. Kids are naturally curious and often act impulsively.
Let’s not forget the middle-of-the-night sprints to the bathroom and the frustration of a locked zipper.
Reserve locks for securing gear and valuables, not for keeping children inside the tent—locks can block emergency egress. If you do use a lock around kids, think easy to use. A complex lock system is asking for trouble. Here are some tips to help secure your tent with kids.
Use a safety pin or wire on the inside zippers
If possible, avoid locks altogether when camping with kids. Fumbling with a combination or key in the middle of the night isn’t worth it.
Safety includes keeping kids from wandering off and being able to get out of the tent in an emergency.
A safety pin or small wire might work better than a lock inside your tent.
Use a bell or other alarm
You might want to tie a bell to the zipper to alert you when your child opens the tent door. A basic tripwire alarm on your zipper may also work well.
Educate your kids on the safety process.
Involve your kids in the safety process.
Explain why keeping the tent zipped up and the campground rules is important.
Make your camping trip about fun activitiesto keep the little ones focused on the great outdoors rather than the tent.
In most situations, locking a tent from the outside isn’t recommended because it doesn’t deter determined thieves and may make you a more interesting target. There are other potentially better options for securing your campsite, though.
1) Take valuables with you
Always take your valuables with you if possible. The tent’s fabric isn’t secure from a thief with a knife. Similarly, your car isn’t a great place to keep your wallet or other valuables since breaking into a car is just as easy.
2) Choose a good campsite
When you’re planning your next outdoor escape, picking the right spot to pitch your tent is more than just a matter of scenery. Have you thought about how your campsite choice can affect the safety of your gear?
Look for well-reviewed campsites:Like picking a hotel, a campsite’s reputation can tell you a lot about its security. Check out what other campers say about the staff and the campsite’s upkeep. Positive reviews often reflect a safe and enjoyable environment.
Consider security measures: Does the campsite have security personnel or surveillance cameras? Facilities like gated entrances might seem overkill, but they give you peace of mind. Even the layout matters – a well-designed campsite can deter unwanted visitors just by its organization.
Store food outside your tent in a bear canister to avoid unexpected furry intruders in your tent.
3) Get to know your camping neighbors
Share about yourself: Exchange names and maybe even some background stories. Where are you all from? Any interesting hobbies that brought you into the great outdoors?
Be neighborly: If your neighbors struggle with their tent pegs or pole setup, offer a hand.
Create a mini-community: Chat about your plans for your stay. Are there any interesting trails you aim to tackle or that hidden spot by the lake you’ve heard about? Perhaps they’ll have some inside scoops or could join the adventure.
Stay connected: Connecting is easier than ever on social media. Why not follow each other? It’s a small world—campground connections can last a lifetime.
Remember, if you look out for their setup, they will likely watch over yours when you’re out.
Trust goes both ways, and a simple “Could you keep an eye on my tent?” can work wonders. You might not have locks on the fabric doors, but a community watch is priceless.
4) Consider an alarm or sensor in your tent
An alarm can be a great alternative to locking a tent and probably works more effectively since it draws attention to your tent and whatever’s happening. A tripwire alarm is the most affordable and would work best to alert you of a bear coming into your campsite or someone trying to open your tent door zipper.
Simtek makes a nifty premium alarm system, the Simtek StealthALERT, that instantly texts your cellphone if it detects someone opening your tent (it also has many other uses, such as protecting your luggage and backpack).
Some considerations when picking a tent alarm:
???? Motion-Activated: Alarms when it spots movement.
???? Wireless Connectivity: Sends an alert straight to your phone.
???? Battery-Powered: No outlet? No problem!
????️ Discreet Design: Keeps a low profile, not to draw attention.
Stashing your stuff in your car may seem clever, but a thief can easily smash glass and steal your valuables in seconds. A trunk safe is an extra barrier, making your car a less enticing target.
A sturdy metal box fastened inside your car’s trunk is impervious to quick-fingered thieves.
Material Matters: Go for metal if possible.
Lock it Up: A trunk safe must be secured to your car; otherwise, it can easily be taken.
Size Wise: Make sure it’s spacious enough to fit your stuff, from cameras to cash.
Installation: Pick one that’s easy to install and remove.
Locking a tent is easiest with a luggage combination lock, but you might want to consider alternative options to securing your campsite first. Don’t forget to assemble your camping checklistand plan some delicious camping meals. Locking your tent is part of a good safety plan while camping, including creating a custom first aid kit that meets your needs.
Leave any suggestions about how you secure your campsite and if you lock your tent.
FAQs
Are there any special locks designed for zippers on camping tents?
There are not any special locks designed for locking tents. The best option is a zipper lockused for travel luggage.
Is it possible to live in a tent full-time? Yes, but it takes thoughtful preparation and planning. Before you commit to full-time tent living, it’s essential to understand the benefits and challenges of this alternative lifestyle.
I have decades of experience hiking and camping and have researched and learned from others’ experiences living in a tent full-time.
Whether you’re considering this lifestyle change for financial, health, environmental, or personal reasons, we hope this guide will help you make a more informed decision.
Key Takeaways
Living in a tent full-time can be a liberating experience, but it also comes with many significant challenges.
Before making the switch, it’s essential to understand the benefits and challenges of this lifestyle and prepare accordingly.
This guide will provide the information you need to decide whether full-time tent living suits you.
Living in a tent full-time is not the same as camping for a short time. It requires a lot of preparation and planning and a willingness to give up some of the comforts and conveniences of modern life.
Questions to ask yourself
Are you willing to give up some of the comforts and conveniences of modern life?
Do you have a plan for your work, income, and expenses?
How will you deal with the weather, wildlife, and safety issues?
What are your goals and motivations for living in a tent?
Do you have a legal, safe place to set up camp long-term?
Answering these questions will help determine if you are ready for full-time tent living.
I recommend camping for an extended time, especially in the winter, to get a feel for living in a tent year-round before committing to it.
Off-grid living
Living in a tent full-time often means living off-grid, which requires additional preparation and planning. Off-grid living means being self-sufficient and relying on alternative energy sources like solar power. It also means providing your own food, water, and other necessities.
If you are considering off-grid living in your tent, make sure you have a plan for all your basic needs. This includes food preservation, water treatmentand storage, waste management, and emergency preparedness.
Comfort and safety
Living in a tent full-time can be challenging regarding comfort and safety. Make sure your tent is spacious, durable, and insulated, and invest in comfortable furnishings to make your tent feel like home.
Lay down carpets to soften the ground, invest in a warm and comfy bed, and ensure you have the necessary amenities.
Regarding safety, be aware of the weather and wildlife in your area and take necessary precautions. Make sure your tent is properly secured, and invest in a good-quality tent that can withstand extreme weather conditions.
Living in a tent full-time can save you money on housing expenses. You also won’t have to worry about maintaining a home or paying for repairs. Instead, you can focus on enjoying your surroundings and living a simpler life.
Living Sustainably
Living in a tent full-time can help you live a more sustainable lifestyle. You’ll use fewer resources and produce less waste than in a traditional home, which can help you lower your carbon footprint and reduce your environmental impact.
Experiencing Nature
One of the most significant benefits of living in a tent full-time is the opportunity to experience nature. You’ll be able to enjoy the beauty, diversity, and healing power of the natural world every day.
Whether camping in a national park or living off the grid in the wilderness, you’ll be able to connect with nature in a way that’s impossible in a traditional home.
Developing New Skills
Living in a tent full-time will also help you develop new skills and become more self-reliant. You’ll need to learn how to set up camp, cook over a campfire, and stay warm in cold weather.
You’ll also need to learn how to find food and water, navigate the wilderness on hikes, and deal with emergencies. These skills can help you become more resilient and independent and can be valuable in many different areas of life.
Many people live a nomadic lifestyle by participating in the WWOOF community (not sponsored, but I find it a very intriguing idea).
Having More Flexibility
Living in a tent full-time can give you more flexibility, mobility, and freedom to travel and explore. You won’t be as tied down to a specific location or a traditional job, so you can explore new places, meet new people, and experience new things without worrying about the constraints of traditional living.
One of the biggest challenges of tent living is dealing with the weather, especially in winter.
You’ll be exposed to the sun, wind, rain, and cold temperatures.
To protect yourself from the weather, you may need to invest in high-quality gear, such as a sturdy tent, tarps, waterproof clothing, and warm blankets.
Coping with Pests, Bears, and Potential Threats
Living in a tent means sharing your space with various creatures, including insects, rodents, and other animals.
You must protect yourself and your belongings from these pests using bug nets, ant traps, and bearproof containers to store food.
Lacking Amenities and Facilities
Living in a tent means you’ll have to give up some of the amenities you’re used to, such as electricity, plumbing, and internet access.
You’ll need to find alternative ways to meet your basic needs, such as using a portable stove for cooking, carrying water from a nearby source, and using a battery-powered device for communication.
Limited Space, Privacy, and Security
Living in a tent means having limited space, privacy, and security if you live with others.
To make the most of your living space, you must be creative and resourceful, such as using storage containers and multi-functional furniture.
You’ll also need to find ways to protect yourself and your belongings from theft and intrusion, such as using locks and alarms.
Limited Income Opportunities
Tent living full-time may mean you’ll need a different job to make money. Unless your job is remote via the internet or you plan on hardcore off-grid homesteading, you’ll need to figure out how to make income.
I think working with a WWOOF host is a potential and interesting way to offset living costs while tent camping full-time. Note that WWOOF is generally an exchange of work for room and board, not paid employment.
Facing Legal, Social, and Personal Issues
Living in a tent may also involve legal, social, and personal issues. You may need to obtain permits and follow regulations to camp in certain areas and face stigma and isolation from others.
Most public land only allows for 14 days of camping, although this may be less in certain areas. You’ll also need to cope with the emotional and psychological challenges of living off-grid, such as loneliness, boredom, and stress.
Many long-term tent campers report having difficulty dealing with anxiety when they transition back to traditional living in a city, at least in my research.
Size: Make sure the tent is spacious enough to accommodate all your gear and provide enough room to move around comfortably. For families, consider multi-room tents.
Durability: Choose a tent made of high-quality materials that can withstand harsh weather conditions, especially rain and snow.
Ventilation: Look for a tent with good ventilation to prevent condensation and keep the air fresh inside.
Weight (optional):Consider the tent’s weight if you plan on carrying it for extended periods.
Finding a Suitable Location
Safety: Choose a campsite location that is safe from natural hazards such as floods, landslides, and falling trees.
Legality: Ensure you can camp in the area and obtain the necessary permits or licenses.
Convenience: Follow leave-no-trace principles and choose a location that is easily accessible and close to a reliable water source.
Privacy: Look for a secluded spot away from roads or hiking trails to enjoy peace and quiet.
Securing Water
Location: Locate a nearby water source such as a river, lake, or spring.
Storage: Store enough water for emergencies and unexpected events.
Establishing Essential Systems
Electric: Create a plan for running and charging your devices and appliances, such as a portable generator or solar panels with a battery system.
Internet: Get a portable Wi-Fi hotspot if you need internet.
Heat: Your heating needs will vary depending on the season and your camping location. Tent heaters are a carbon-monoxide and fire hazard — only use a heater rated safe for indoor/tent use, ensure ventilation, use a battery-powered CO detector, and never sleep with a heater running.
Trash: Plan how you will dispose of your waste, whether grey water, sewage, or trash.
Nutrition: Plan your camping meals, consider how you will obtain food, and store perishable items such as a cooler or portable refrigerator. Learn how to dehydrate your food for shelf stability to reduce the need for refrigeration.
Wildlife Awareness
Learn about the animals in the area and their behavior.
Bring a backup shelter, such as a tarp or emergency blanket.
Know the emergency procedures and evacuation routes.
Insulating and Keeping Your Tent Warm and Dry
Use a groundsheet to prevent moisture from seeping in.
Use a rain fly to protect your tent from rain and wind.
Bring a tent-safe heater or warm clothing to stay warm during cold nights
FAQ
How do you get electricity in a tent?
You can use solar panels, batteries, generators, or power banks to generate and store electricity in your tent.
How do you get internet in a tent?
You can access the Internet in your tent using a mobile hotspot, a satellite phone, or public Wi-Fi.
How do you wash clothes while living in a tent?
You can wash clothes in your camp area using a bucket, a sink, or a river. Dispose of the grey water according to LTN principles. Many towns have laundromats, and many larger private campgrounds have laundry facilities.
How do you make money in a tent?
You can work remotely, sell your skills, create content, or take on temporary gigs. Note that WWOOF is generally an exchange of work for room and board, not paid employment.
Is it legal to live in a tent permanently?
The legality of living in a tent in the USA depends on where you want to pitch your tent and for how long. Jurisdictions have different laws and regulations regarding camping on public or private land.
Some states, such as Missouri and Tennessee, have passed statewide bans on sleeping on state-owned land, making it a misdemeanor or a felony to do so. Even on your land, you may face zoning laws, building codes, or homeowners association rules prohibiting long-term tent living.
Dispersed camping is usually allowed for 14-16 days on public lands such as the Forest Service or BLM. Camping longer than the stay limitation set by each forest (usually 14 days) is prohibited per Title 36, Chapter II, Part 261.
Does WWOOF sponsor you?
No, Worldwide Opportunities on Organic Farms (WWOOF) does not sponsor Outdoor Footprints. I do find their organization and mission intriguing for long-term travelers. I have not participated in a WWOOF program or with any of their hosts. Please comment below if you have any experience you’d like to share.
Ankle sprains, cuts, and blisters are common hiking and camping ailments that require first aid. A first aid kit is a hiking essential, and you can purchase a pre-made first aid kit relatively inexpensively. There is no such thing as a perfect wilderness first aid kit. You should consider your own situation when choosing or putting together a first aid kit.
In addition to being a medical provider, I’ve hiked and camped for multiple decades and carried many different first aid kits from just bandaids to a more comprehensive first aid kit. I’ve researched the items in the most popular first aid kits in addition to the recommendations by the Red Cross. From this, I’ve created a first aid checklist that should work well if you’re a beginner hiker or an experienced hiker looking to update your hiking essentials.
Contents
First Aid Checklist
6 Pre-Checks for Your First Aid Kit
Buck Tilton, in his excellent book Wilderness First Responder, suggests several considerations before creating a first aid kit [1].
Here are 6 questions to ask yourself before going through this first-aid checklist:
What will your environment be like, including terrain, weather, and altitude?
How far away from emergency services will you be? Hiking and camping in a remote location require additional first aid supplies you probably don’t need for a short day hike.
How many people will be in your group? This helps determine how many supplies you need to bring in your kit.
What are your physical conditioning and medical needs and those of your group? Many people have medical conditions, such as diabetes or other conditions, that might require additional emergency items in their first aid kit.
Do you have any medical expertise and skills, and can you use all the items in your first aid kit? Never carry items or medications you don’t know how to properly use.
Can everyone carry their own first aid kit? Each person should carry their own personalized first aid kit if possible.
When you learn how to dehydrate food, you can create snacks, meals, and even emergency rations while saving money. Dehydrating food is a great way to preserve fruits, vegetables, herbs, and even meat for long-term storage or lightweight meal options while camping or hiking.
Over the past several years, I’ve used a dehydrator to dry various foods, primarily fruits, for snacks. I have experience growing up around many dehydrated fruit leathers and wild game jerky.
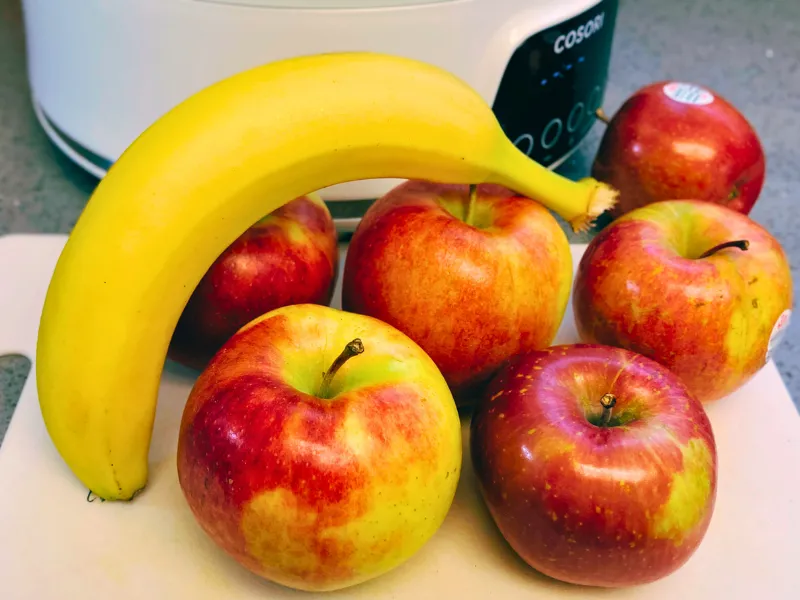
When researching and writing this article, I dehydrated five fruits and vegetables: apples, bananas, kale, potatoes, and carrots. I didn’t use expensive equipment, and it was easy to do in our compact kitchen. I look forward to dehydrating many camping meals for our next outdoor adventures.
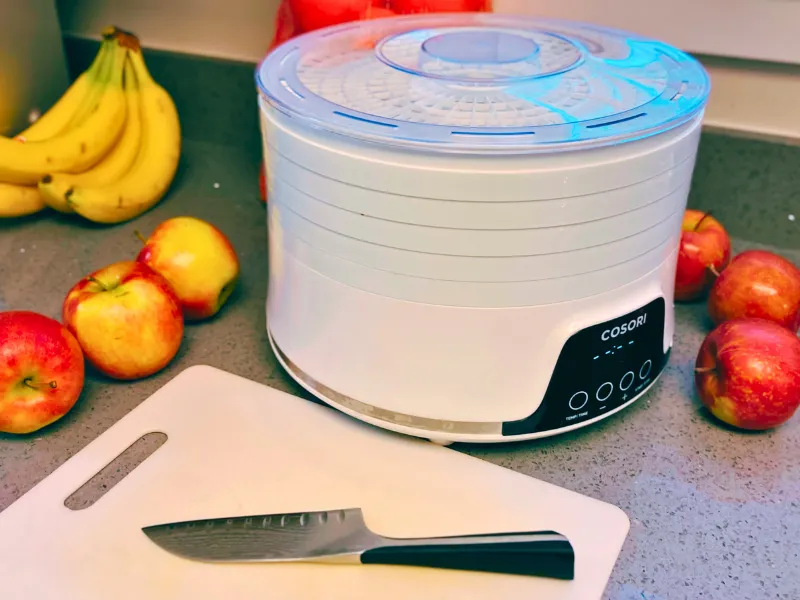
You don’t need special kitchen tools to start dehydrating, but I strongly recommend acquiring a standalone electric dehydrator.
You can use an oven to dehydrate, but it’s slow and inefficient.
My basic electric dehydrator works perfectly for most homemade snacks and meals.
Electric Dehydrators
Electric dehydrators are standalone appliances that are best for dehydrating food at home. They usually have a built-in fan and an adjustable heater between 90-150°F (32 and 66°C).
Electric dehydrators are available in two form factors: stackable/vertical and box/horizontal.
Stackable dehydrators are less expensive and expandable, but you will need to cycle the trays in the stack for more even drying.
Box dehydrators dry more evenly and efficiently but are more expensive. Both electric dehydrators will require separate tray liners for drying liquids/mashes such as fruit leather or soups.
Tips for Electric Dehydrator Use
Use a dehydrator with an adjustable heater between 90-150°F (32 – 66°C)
Check the dehydrator’s temperature about 20 minutes after starting, as temperatures often vary depending on the manufacturer.
Check the trays every few hours to evaluate how evenly the trays are drying.
Use a nonstick cooking spray with fruits or other food that tends to stick to trays or liners.
Oven-Drying
Oven-drying isn’t recommended unless you’re just learning to dehydrate. It’s hard to keep a consistent temperature, and the drying process usually takes almost twice the time of an electric dehydrator.
Also, there’s the increased risk of a kitchen fire or risk of harm to kids or pets, or even accidentally burning the food.
Electric dehydrators work significantly better and are inexpensive ($50 for a basic electric dehydrator). Some newer ovens with convection features have a dehydrating cycle, which can work well. Most ovens are non-convection ovens.
Follow the manufacturer’s directions for dehydrating with a convection oven that has a dehydrating cycle.
For all other non-convection ovens, here is how to use your oven to dehydrate.
How to Use an Oven for Dehydrating
Set the oven at the lowest temperature, preferably <140°F or 60°C.
Place an empty baking sheet to catch any falling drips or food.
Place food on removable wire racks.
Leave the oven door cracked open 1-2 inches for airflow.
Place and use a fan outside the oven, blowing into a slightly cracked oven door.
Monitor the temperature with an oven thermometer and adjust oven heat accordingly.
For thousands of years, sun-drying food was the traditional method of dehydrating food. Sun-drying food requires an air temperature greater than 90°F and a relative humidity less than 60%. This works best in the Southwest USA.
It is recommended to sun-dry only chile peppers and fruits, including tomatoes. Fish, meats, and other vegetables are not recommended for sun-drying due to a higher risk of spoilage.
Home-made dehydrators
There are lots of DIY dehydrator ideas if you’re so inclined. These come in all different designs and sizes. The important factors to remember are an adjustable heating of the air and even airflow across the food.
Cutting tools
Beyond a cutting board and a sharp kitchen knife, you don’t need any special cutting tools. If you want even slices, consider a mandolin slicer with a hand guard. Your food processor can also be used for slicing.
Clean work surface
Clean hands, tools, and cutting surfaces to reduce the risk of pathogens that can cause food spoilage or food poisoning.
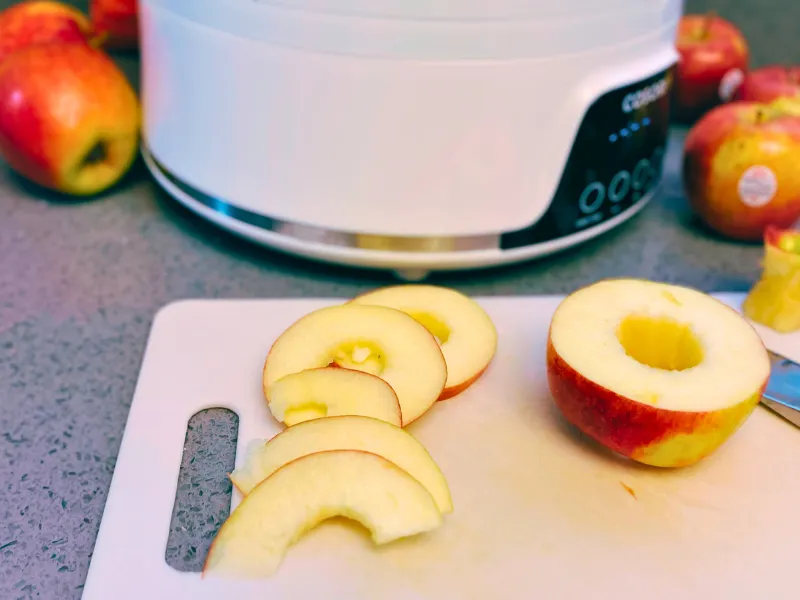
Preparing food before dehydrating consists of evenly dividing it so it can dry consistently. This usually involves slicing fruits and vegetables evenly. I cut my cored apple into 1/4-inch slices.
Slice fruits and vegetables between 1/4-inch and 1/2-inch thick.
Slice meat to less than 1/4-inch.
Pretreat vegetables and fruits if desired. Marinate meat overnight if desired.
Precook food, including veggies and meat, that you would normally cook.
Pretreating
Pretreating vegetables and fruits can help decrease or stop browning, toughness, or spoilage. Some people prefer not to pretreat, arguing that it may destroy nutrients or digestive enzymes.
There are multiple ways to pretreat fruits and vegetables [1]. Most vegetables are best pretreated with steam or water blanching, while fruits and berries are best pretreated with soaks or dips.
Dip food into boiling water to water-blanch. I water-blanched my potato slices in boiling water for 5 minutes, then soaked them in acidic water for 10 minutes.
Syrup-blanching
Syrup-blanching is for fruits only and can add softness and retain fruit color.
Add 1.5 cups of sugar with 2.5 cups of boiling water.
Add fruit and adjust the heat to a simmer.
Soaking in acidic water
Acidic water soaking reduces browning in fruits, potatoes, and turnips.
Add 1 to 3 cups of lemon or lime juice or 1 to 3 teaspoons of citric acid powder per quart of water.
Soak food for 5 to 10 minutes in solution.
Soaking in sulfite solution
Sulfite solution pretreatment comes with risks for people with asthma and allergies to sulfa-based products. I recommend trying other methods first, but sulfite soaking is often discussed in the dehydrating community.
Add 1 tablespoon of sodium metabisulfite powder in 1 quart of water (NOT sodium bisulfate or sodium sulfite).
Soak in solution for 5 minutes.
Soaking in fruit juice
Soak fruit in orange or pineapple juice for 5 minutes.
Dipping in pectin
A pectin syrup solution can be used to glaze fruits and berries.
Add 1 box of pectin to 1 cup of boiling water
Add ½ cup of sugar
Add an additional cup of cold water
Cool completely and glaze fruit with a thin film
Dipping in honey
Add ½ cup honey with 1 quart of water.
Dip fruit in honey solution.
Commercial fruit protector
Multiple products are available at the grocery store that are designed to decrease fruit browning.
Keep space between food pieces to allow for airflow. It’s okay to mix and match different fruits and vegetables on the same tray. I mixed my apple slices with my bananas. Just keep in mind that they may dry at different rates.
Also, avoid mixing and matching strong-flavored foods such as garlic with mild foods such as fruit. Spread prepared meals or leathers less than ¼ inches thick on tray liners.
I dehydrated my apples and bananas at 135°F (63°C). Every few hours, I checked the dryness and turned the slices or rotated the trays.
Time
The time to dehydrate varies significantly depending on the relative humidity and size of the pieces. It’s not uncommon for some larger pieces and chunks to take over a day to dry.
Here are several common foods and their general drying times:
Precooked meals vary significantly (usually until crumbling)
Fruit leathers take 6-15 hours.
Apple slices take 5-10 hours.
Bananas take 7-12 hours.
Blueberries take 8-24 hours.
Cherries take 10-20 hours.
Corn takes 6-12 hours.
Cranberries take 14-25 hours.
Cucumbers take 4-6 hours.
Grapes take 12-20 hours.
Greens take 3-5 hours.
Herbs take 2-18 hours.
Jerky takes 4-8 hours.
Mangoes take 6-12 hours.
Mushrooms take 3-6 hours.
Onions take 6-10 hours.
Oranges and other citrus take 9-13 hours.
Peaches take 6-12 hours.
Pears take 6-15 hours.
Peas take 5-9 hours.
Peppers take 6-10 hours.
Chile peppers take 4-15 hours.
Pineapples take 8-14 hours.
Plums take 8-18 hours.
Potatoes take 7-12 hours.
Raspberries take 12-20 hours.
Strawberries take 7-14 hours.
Tomatoes take 8-12 hours.
Zucchini takes 7-15 hours.
Temperature
Dehydrators usually have a temperature setting. However, the temperature of most dehydrators fluctuates by several degrees.
The following are guideline target temperatures for drying food:
Vegetables with a target of 125°F (52°C)
Fruits with a target of 135°F (63°C)
Prepared foods such as soups with a target of 150°F (66°C)
Precooked meat (for jerky) with a target of 140°F (60°C). Per USDA guidance, heat meat to an internal temperature of 160°F (165°F for poultry) before or after dehydrating to kill pathogens.
Fruit leathers with a target of 135°F (63°C)
Turning and stirring
You should check the pieces every few hours and turn and stir, if appropriate, to make sure everything dries evenly.
I prefer my dried apples a little crisper, so when I bent it, I was looking for a snapping or cracking sound.
Dryness varies depending on the dehydrator, food type, humidity, and temperature. Guidelines for how long to dehydrate a specific food are just recommendations, as the variables, especially relative humidity, are difficult to control completely at home. Testing for dryness is critical to ensure the food is dehydrated properly.
How to test for dryness of food in 3 steps
Cool a piece of the food to room temperature before testing.
Compare to the description of finished dehydrated food:
Leathery or supple dehydrated food should be dry on the surface and able to bend.
Brittle, dehydrated foods should break or snap when you bend them.
Overdry food is better than underdry foods.
Moisture should not be present in the center.
If food isn’t done at the end of the day, you can run a dehydrator overnight at a reduced temperature of 90-100°F (32-38°C).
I would periodically remove pieces that felt done and let them cool for a few minutes. I would then test for dryness as above. Pieces that passed the dryness test went into a glass jar. The apples took about 8 hours to finish, and the bananas 11 hours.
Food in the dehydrator often dries at different rates, so remove individual pieces as they finish. Remember, overdrying is much better than underdrying [2].
Dried fruit especially benefits from conditioning to equalize the moisture content among the pieces. This is usually done on the counter in a glass jar, which you can shake daily for several days.
Conditioning recently dehydrated food, especially dried fruits, is recommended if you plan to store it for more than a few weeks. Conditioning equalizes the moisture throughout the newly dried pieces, reducing the risk of spoilage.
To condition your newly dried food, place it in a glass jar and seal tightly. Remember only to place one food type per jar. Set the jar aside at room temperature away from direct sunlight. Gently shake the jars daily and check for any moisture or haziness on or in the jar (if so, return the food to the dehydrator for a few more hours and try again).
Pasteurization is recommended for sun-dried foods or optionally for unpeeled fruits or veggies. Sometimes, insects lay eggs in the peels or sun-dried foods that don’t get killed in the drying process.
Pasteurization is achieved in two main methods: heat at 175°F (80°C) for 15 minutes or freezing at 0°F (-18°C) for 48 hours. Pasteurization may change the flavor and nutrients.
The final stage of dehydrating food consists of storing it for future use. The primary idea is to reduce air exposure to the food.
Consider storing foods in smaller containers as moisture will enter the food and container after you open it. Most properly stored fruits and vegetables will stay preserved for several months or more [3]. Homemade jerky lasts up to 2 months at room temperature or longer in the freezer [4]. You can best achieve good dehydrated food storage as follows:
Air-tight containers such as glass jars
Vacuum sealed bags
Jars or bags with oxygen absorber packets
Jars or bags with Silica gel packets for moisture protection
Dehydrated food needs airtight containers, such as glass jars, to prevent absorbing moisture and spoiling. Then, store your dehydrated food in their containers in a dark, cool, dry place.
10) Rehydrate Food when Ready to Use
Of course, the whole purpose of dehydrating food is to use it at some point. Most dehydrated foods, such as dried apples, banana chips, or jerky, are consumed dry.
Some foods, such as dehydrated soups or many veggies, require rehydration before you can enjoy eating them.
Two Methods to Rehydrate Food
Hot-soaking –takes approximately 15 min to hours to rehydrate.
Pour boiling water to cover the dehydrated food in a container.
Let stand with occasional stirring.
Cold-soaking – takes overnight or several hours to rehydrate. Food-safety note: perishable ingredients should not sit unrefrigerated for extended periods — keep cold-soak times limited and be cautious with meat, dairy, and eggs.
Pour room-temperature purified water to cover the dehydrated food.
Refrigerate overnight.
You can create dehydrated food at home with simple preparation, equipment, and testing. Follow the 10 steps in this article to get started and experiment with different ingredients and recipes. Check out our camp meals for inspiration.
Don’t forget to start your camping checklist before your next outdoor adventure. If you’re just getting started exploring the outdoors, look at our hiking for beginners while making some homemade dried snacks.
Please leave any comments or ideas below!
FAQs
Why dehydrate my own food for camping and hiking?
I find dehydrating food interesting because it’s a great way to preserve food for camping and hiking.
Dehydrated food is lighter and more compact and doesn’t require refrigeration, making it perfect for hiking and backpacking trips.
You can also dehydrate many premade meals, such as soups, then rehydrate them on the trail or at camp.
You can also save lots of money when dehydrating your own food compared to the expensive freeze-dried food you get at the store.
You can make and tend a cozy, successful fire in 5 steps, whether in your backyard, at the campground, or in the backcountry. Successful firebuilding is an art that takes practice.
I’ve been building and making cozy, safe fires for decades, whether in the backyard, hearth, or the backcountry. I’ve experimented with several different fire-building methods with varying degrees of success. My favorite method is the log cabin method due to its burning efficiency and cozy, pleasing manner.
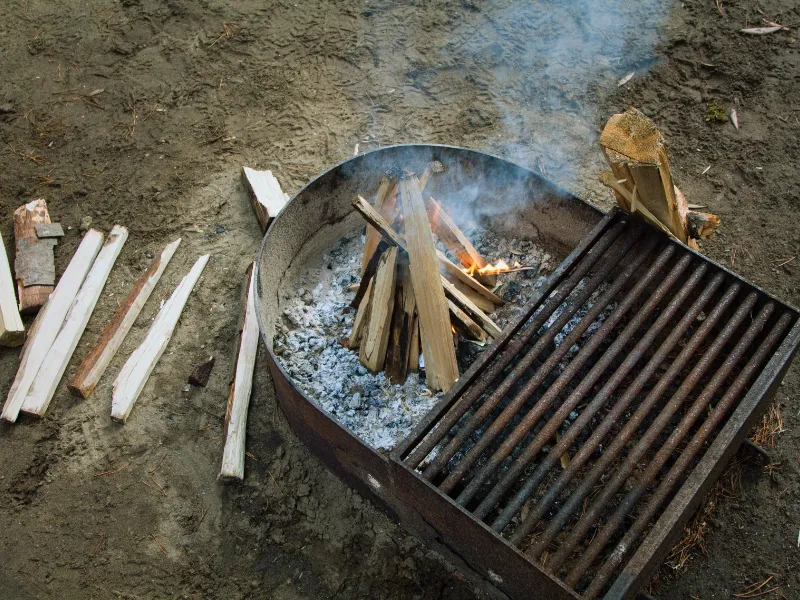
Always use the designated fire pit or fire ring in a campground. Don’t try to move the fire ring or build a fire bigger than the designated fire pit. Never leave a fire unattended.
Building a fire in backcountry/wilderness areas
If possible, use an existing fire ring or previous fire pit. You want to minimize environmental impact while also considering safety. Not all previous fire pits are great locations for a fire, so look for potential hazards such as low-hanging trees, bushes, or brush that is too close to your fire.
If an existing fire pit or fire ring is not available or ideal, consider creating a fire mound. A fire mound is a 6-8” deep gravel or sand circular pile that you make flat. You then build your fire on top of the fire mound. When you are done with your fire, you scatter the fire mound, leaving minimal impact on the area and following the leave no trace guidelines.
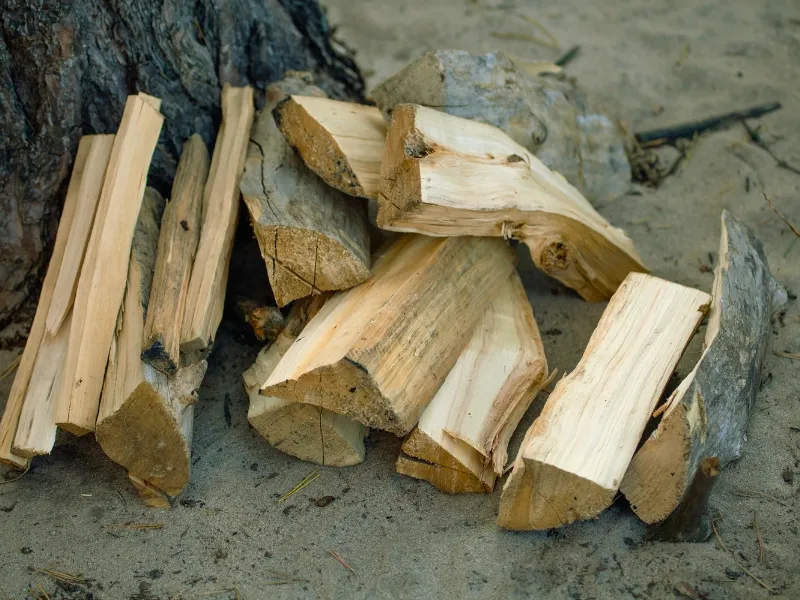
Next, you will need to gather the fuel for your fire. You can separate your firewood/fuel into 3 different groups: tinder, kindling, and fuel wood.
Gather Tinder
Tinder provides the initial fuel for starting your fire. This means tinder should light easily and burn quickly. Tinder has many different options.
Generally, you want something light and very dry. When car camping, I often loosely crumple old newspapers as kindling. I also use paper towels or TP for kindling when backpacking.
Other great kindling includes yellow, dry pine needles or dry brown grass. The key is making sure it’s very dry and not too compacted together. You will generally need a handful or so of tinder.
Gather Kindling
Kindling is the small and medium-sized sticks that are less than 1 inch in size and provide the fuel for your tinder when starting your fire. Kindling could almost be tinder, but it doesn’t start well by itself. Kindling burns longer than tinder and helps get your main fuel firewood going.
Often, you can create kindling by splitting pieces off your firewood chunks with a hatchet. Small, dry, dead branches also work well. You will need a small basketball-size pile of kindling.
Gather Fuel Wood
Your fuel firewood provides the long-lasting heat and crackling logs that most people imagine when they think of a fire. When car camping, buying local pre-cut wood sourced < 50 miles away from your camp is best to avoid introducing pests [1].
If you’re gathering wood from the forest, check the regulations in the area for gathering wood [2]. You should only gather downed wood that is no thicker than an adult’s wrist.
Artificial logs provide another option for fuel firewood and may burn cleaner than regular firewood [3]. The disadvantage of artificial logs is that they often don’t burn as hot or aesthetically pleasing as regular firewood.
A fire structure is how you organize and burn firewood in the fire pit.
Here are 6 popular fire structuremethods:
Log cabin fire
The log cabin fire burns slower but quickly makes a large fire.
How to build a log cabin fire
Place two large fuel wood parallel approximately 6”-12” apart.
Stack two additional pieces on top at a right angle.
Continue alternate stacking patterns, building a log cabin-type structure.
Place tinder at the base in the middle of the structure.
Fill the inside of the cabin loosely with kindling.
Light kindling at multiple points.
Teepee or cone fire
A teepee or cone fire works best for cooking because it burns fast and creates a hot bed of coal, but it needs more frequent maintenance to keep going. Cook food after the teepee collapses on a coal bed and feed the fire with kindling.
How to build a teepee or cone fire
Place several pieces of fuel wood on their edges, creating a cone-shaped structure.
Place the tinder inside the center of the teepee/cone.
Place some kindling inside and in the gaps of the cone/teepee structure.
Light kindling inside the teepee.
Pile Fire
A pile fire is easy to build and can create a nice bed of coals for cooking. It also requires maintenance to keep burning.
How to build a pile fire
Place tinder in the center of the fire pit.
Loosely pile kindling on top of the tinder.
Pile a few pieces of fuel wood on kindling.
Light kindling at multiple points.
Platform or upside-down pyramid fire
A platform or upside-down pyramid fire works great for cooking and is a longer-lasting fire. However, it will take time for the fire to burn down before you can cook well.
How to build a platform/pyramid fire
Place three large pieces of fuel wood together on the bottom
Layer three pieces of wood at a right angle on top of the previous layer.
Continue layering fuel wood from larger to smaller for at least three layers thick.
Place tinder and kindling wood on the top.
Light the tinder.
Lean-to fire
A lean-to fire works well for cooking and works best for windy conditions.
How to build a lean-to fire
Secure a long piece of kindling or fuel wood in the ground at an angle with the tinder underneath.
Build a “roof” on one side with kindling and fuel wood, creating a lean-to structure.
Light tinder under the lean-to.
Star Fire
A star fire can work well if you only have whole logs. It also burns slower but requires maintenance as the log ends burn.
How to build a star fire
Place several log ends or fuel wood ends towards each other to create a spoke structure or star structure.
Build a teepee/cone fire in the center to start the star fire.
As the log ends burn, push the ends toward each other.
After you’ve started your fire. You will need to feed and maintain it. Usually, this involves occasionally placing 1-2 pieces of fuel wood on the fire. If you’re cooking, you’ll want to make smaller adjustments with kindling only. Generally, you’ll start with smaller pieces and then gradually burn the larger pieces. Never burn trash, especially any plastics. Take care to stir and rearrange the fire with a long enough stick.
Always extinguish your fire when you’re done with it [4]. Never leave the fire unattended.
When we were backpacking, a nearby group had a nice fire but then left it going after they went to bed in their tents. The wind picked up, and their fire became a serious hazard.
Extinguishing a fire usually starts at least 30 minutes before you plan to be done with the fire. This is when you let the fire burn down as much as possible.
How to extinguish a campfire
Break the fire structure apart, keeping pieces in the fire pit.
Pour water on firewood in the fire pit until steam and sizzling stop.
Stir ashes and wood with a stick and pour more water on the ashes and unburnt wood.
Observe for any signs of smoke, steam, or heat from the fire requiring further water dowsing.
What is your favorite fire-building method? Do you have any tips or tricks that we should know? Leave a comment below.
FAQs
What if I don’t have matches or a lighter?
You can still start a fire without matches or a lighter in survival situations. It’s usually much more difficult, so consider practicing these methods beforehand.
Flint and Steel: Strike steel against flint to create sparks that ignite tinder. Solar Method: Focus sunlight through a magnifying glass onto the tinder. Friction Methods: Learn primitive techniques like the bow drill or hand drill.
Can I use any wood for my fire?
Not all wood is created equal when it comes to building a fire. Generally, wood is classified as hardwood or softwood:
Hardwoods: Like oak and maple, burn slower and hotter, making them ideal for cooking and warmth. Softwoods: Softwoods like pine burn faster and are good for starting fires. They can pop and throw sparks but also work well to make a quick cooking fire. Avoid: Using green or moist wood is hard to burn and produces excessive smoke.
Much of your wood choice is probably regionally dependent on what’s available. Hardwood has more energy packed into it, so it usually burns hotter and longer. Softwoods usually have less energy but can burn quicker and are usually easier to split and use.
You need clean drinking water in an emergency survival situation. Here are 6 ways to purify water in an emergency survival situation: boiling, filtering, disinfection, UV light, solar disinfection, and a sip well.
I’ve been hiking and camping for decades and successfully used several methods to purify water without ever getting sick. My favorite method is using UV light to purify my water when hiking or backpacking. I’ve also spent many years using various water filters with success. You, too, can learn how to purify water successfully in any situation.
If you have built a fire or have a stove, boiling water for 1 minute is an easy and efficient way to purify water from germs [2]. You might need a rough sand or debris filter to remove silt from the raw water.
Boiling doesn’t eliminate chemicals or other toxins in the water, but most water in a wilderness survival situation just needs the bacteria, viruses, and parasites neutralized.
How to purify water by boiling in 3 steps:
Filter cloudy water with paper towels, coffee filters, gravel, or clean debris like pine needles.
Bring water to a boil for 1 minute (at elevations above about 6,500 feet, boil for 3 minutes, per CDC guidance).
Water filters are designed to remove germs. They also can work well for removing some toxins, but note that common backpacking filters (0.1–0.2 micron) remove bacteria and protozoa without reliably removing viruses — true water ‘purifiers’ are a separate category. The Centers for Disease Control (CDC) recommends a filter that is <1 µm pore size, which should remove bacteria and parasites [3].Also, filters usually have a carbon part to the filter, which can improve the taste.
Don’t assume the common pitcher or refrigerator filters can also filter out germs, as they aren’t intended for this.
There are multiple filter types to choose from, including simple straw filters, water bottle filters, gravity filters, pump filters, and other filter types [4]. For directions on how to purify water with a filter, see the manufacturer’s guidelines, as each filter works differently.
Disinfection water purification generally means using chemicals to kill germs.
Small quantities of common household chlorine bleach can disinfect water, making it safe to drink. Hikers and campers can carry chlorine dioxide or iodine tablets for wilderness water purification.
How to purify water by bleach in 3 steps:
Gather a medicine dropper from an emergency kit and fresh liquid chlorine bleach (the active ingredient of 6% or 8.25% sodium hypochlorite).
Use 2 drops of regular unscented household bleach (6–8.25% sodium hypochlorite) per 1 quart or 1 liter of water — double to 4 drops only if the water is cloudy.
Common household iodine can also purify water, although pregnant women, people with thyroid disorders, and people with iodine allergies should avoid this method. It is also not recommended to drink iodine-treated water for more than a few weeks.
How to purify water by iodine tincture in 2 steps:
Use 5 drops of 2% tincture of iodine per 1 quart or 1 liter of water.
Silver is used by Europeans for disinfection but is not approved for safe water purification in the US.
Other commonly recommended household products, such as hydrogen peroxide and citrus juice, are not recommended for water purification, per the CDC [7].
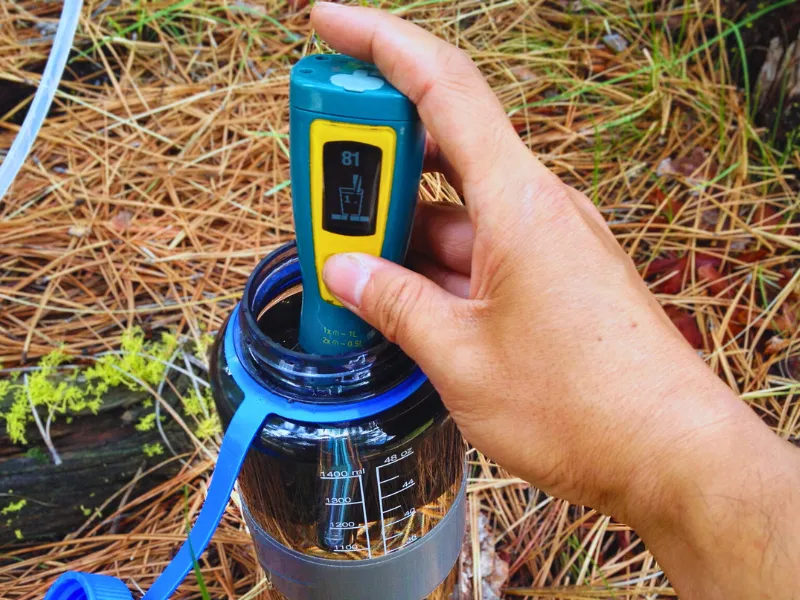
Ultraviolet light can quickly and easily kill most germs in water. Handheld UV light water purification devices are affordable and available for hikers and backpackers.
UV water purification is my preferred method of purifying water as it is quick, easy, and lightweight. Unfortunately, my UV light has failed multiple times, resulting in having to boil water as a backup.
For directions on how to purify water by UV light, see the manufacturer guidelines, as each device works slightly differently.
Sunlight essentially acts as a UV source for purifying water. This is also called solar disinfection or SODIS [8].
How to purify water by solar disinfection in 3 steps:
Filter cloudy water with paper towels, coffee filter, gravel, or clean debris like pine needles. You may let the water settle and then use the clear water on top.
Fill clear PET bottles (ideally under 3 liters) with clear water.
Lay bottles on their side on a dark surface in direct sunlight for at least 6 hours [9]. Allow up to 2 days in cloudy weather.
6) Purify Water with a Sip Well
AI Photo: Daniel Borkert/Canva Magic Media™
A sip well, also known as a coyote well or gypsy well, can work as a last resort if you don’t have access to a heat source for boiling or any other way to purify water.
The basic premise is that the water will filter through the dirt and debris in the ground from a nearby water source into a small hole you dig.
I didn’t find any research that this was effective in purifying water from the germs that make you sick (such as Giardia, Cryptosporidium, and E. coli) [10].
Use this method cautiously. If possible, I always recommend disinfecting water from a sip well with another method, such as boiling.
How to purify water by a sip well in 4 steps:
Find a source of standing water (pond, large puddle, lake, spring) or stream.
Dig a small hole at least 3 feet or more from the water source that goes down below the level of the water source.
Let water seep into your hole until filled.
Process water from your sip well if possible (recommend further boiling or disinfection).
You have learned how to purify water in six ways: boiling, filtering, disinfection, UV light, solar disinfection, and sip well. Each method has advantages and disadvantages, depending on your situation and available resources.
In addition to obtaining safe drinking water, you will also need to build an emergency shelter in a survival situation.
Stay prepared with the hiking essentials on your next camping or hiking trip, and avoid a wilderness survival situation altogether.
FAQs
Why bother with purifying my water when hiking or camping?
There are over 100 germs (bacteria, viruses, parasites) in the US surface water. Water purification is essential in avoiding waterborne illness. In a survival situation, you need water to live, but you also want to avoid getting seriously ill from contaminated water.
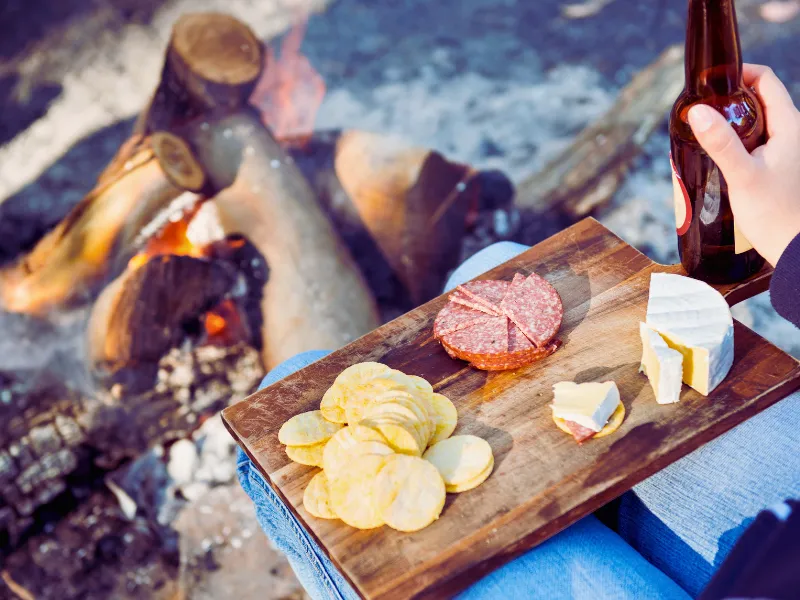
Discover some of the most mouth-watering and satisfying camping meals you can make with minimal equipment and ingredients for your next camping trip. From breakfast to dessert, these camping meal ideas will make your trip more enjoyable and memorable.
I have decades of experience in car camping, and these are some of my favorite yet easy car camping meals. I’ve included some tips, including whether your will need a cooler, gas stove, or campfire.
Food safety basics: Keep your cooler at or below 40°F (4°C) — use a thermometer to check. Follow the 2-hour rule: don’t leave perishable food (meat, dairy, eggs, cooked leftovers) out at camp for more than 2 hours, or more than 1 hour if the temperature is above 90°F.
FAQs
What essential cooking gear should I bring for car camping?
The right cooking gear can enhance your car camping experience significantly, so I recommend using a camping checklist to make sure you don’t forget anything.
A portable stove, such as the Jetboil Genesis Basecamp Cooking System or the Coleman Classic Propane Stove, is crucial for boiling water and cooking meals.
A high-quality cooler like the Yeti Tundra 65 or Coleman Steel Belted Cooler will keep your perishables fresh.
Don’t forget a cast iron skillet for versatile cooking, cooking spatulas, a good chef’s knife, a paring knife, and a lightweight cutting board.
If you enjoy grilling, a portable grill like the Weber Q1200 can be a great addition.
How do I manage food storage and keep meals fresh during car camping?
Proper food storage is key to keeping meals fresh. Non-perishable items such as canned goods, granola bars, dehydrated foods, and instant oatmeal are convenient as they don’t require refrigeration.
For perishable items like fresh fruits, vegetables, cheese, and meat, a well-insulated cooler packed with ice will maintain freshness.
Organize your food items in a camp kitchen bin for easy access and to prevent any critters from getting into your supplies. Remember to pack your cooler with a combination of ice packs and loose ice to ensure a consistent cold temperature.
Did you know that there are tons of science-based benefits of being outside? Your exposure to nature can significantly impact your health and well-being. Many studies reveal a wide range of health benefits from enjoying nature outdoors [1].
I’m a passionate outdoors enthusiast who finds lots of personal rejuvenation and joy in nature outdoors. I’m also a medical provider and love to help others improve and optimize their health. While modern medicine has its place, there’s not much better than the prescription to enjoy the outdoors to benefit your health and well-being.
I’ve found fourteen benefits of being outside in nature for the whole family. These could be further categorized broadly as mental health benefits and physical benefits, although both intertwine and contribute to our overall health.
Time spent outside, including hikingand camping, can result in an improved ability to concentrate and think [2]. Spending time outdoors can also improve your ability to focus overall [3]. Research has shown that the time to complete a task was decreased by more than 7 seconds for those who spend time outdoors in nature [4].
Stress reduction is a potential benefit of being outside. Studies have shown that spending time outdoors, including hikingand camping, reduces the stress hormone cortisol and overall sense of stress [5, 6].
Multiple studies have shown a benefit in reducing depression and anxiety symptoms in participants who spent quality time outdoors [7, 8]. A 50-minute hike weekly improved the mood and cognition of individuals who were being treated for depression [9].
This didn’t replace treatment but acted as a powerful supplement to existing treatment for those experiencing depression. People who exercised outside also experienced decreased anxiety more than those who exercised indoors [10].
Youth who have regular time outside in nature are at a decreased risk for mental health disorders compared to kids who have minimal outdoor exposure. Youth with minimal outdoor nature exposure have a 55% higher risk of developing a psychiatric disorder into adulthood [11].
Kids with attention-deficit/hyperactivity disorder (ADHD) improved their ability to focus after a walk outdoors [12]. Regularly hikingand campingwith your kids could potentially improve their general mental health and decrease their risk of developing a mental health disorder.
Spending time in nature outside improves mood and sense of well-being [13, 14, 15]. People who spend time outside also feel an improvement in their vitality [16]. One study associated spending 120 minutes per week outside with improved mood and well-being [17].
Spending time outside can increase social connections and a sense of belonging in a community [18]. Community is an important aspect of human health and well-being.
The outdoor community is generally friendly and welcoming to beginner hikersand people from all backgrounds. Many life-long friendships and marriages have resulted from people’s love of the outdoors.
Sleep cycles are dependent on our circadian rhythm or internal clock. Sunlight is a potent regulator of our sleep/awake cycles [19]. Therefore, exposure to sunlight requires spending time outside. Who doesn’t want better sleep?
Research shows that people who spend time outdoors in nature live longer [20, 21]. This effect is probably due to multiple factors, but the result is a longer lifespan from spending time in nature.
Being outside increases physical activity with lower perceived exertion, resulting in improved physical fitness [22, 23]. Not only will you exercise more, but you’ll enjoy the experience of getting in shape more.
Heart disease and stroke are among the top causes of death, according to the CDC [24]. Getting outside has multiple benefits for your cardiovascular system, including decreased blood, heart rate, and overall stroke/ heart disease mortality [25, 26, 27].
People who regularly participate in outdoor activities such as hikingor campinghave decreased obesity [28, 29, 30]. This is probably partially related to the increased physical activity.
Studies have associated spending time outdoors frequently with a lower risk of developing type 2 diabetes (the most common type of diabetes) [31]. Having diabetes significantly increases your risk of other health problems, including heart disease, kidney dysfunction, vision problems, and multiple other health complications [32].
New research has found that spending quality time outside may boost your immune system and decrease the risk of infections [33]. It’s unknown exactly how this works (probably multiple pathways), but outdoor exposure results in a boosted immune system.
Getting your kids outdoors may decrease the risk of needing glasses for nearsightedness compared to friends who spend most of their time indoors [34, 35].
FAQs
How much time do I need to spend outside to get the benefits?
According to a 2019 study, spending at least 120 minutes per week in nature can significantly boost your health and well-being. You can take a 2-hour chunk or break it into smaller daily segments.
Another study found that people who were being treated for depression improved their mood and cognition after only a weekly 50-minute hike [9].
The time outside is probably different for everyone, but the point is that getting outside, even in small doses, is probably beneficial.
What are some outdoor activities that can help me enjoy nature?
Many outdoor activities can help you enjoy nature, such as hiking, camping, caving, fishing, picnicking, gardening, birdwatching, or simply walking in a park or a green space. You can also involve your family and friends in outdoor activities and increase your social connections.
How can being outside in nature help me cope with isolation and loneliness?
Being outside in nature can help you cope with isolation and loneliness by providing opportunities to connect with other people and living beings. You can join a local outdoor group, volunteer for a conservation project, or simply chat with a friendly stranger at the park.
If you have thoughts of hurting yourself or others, please seek help or call 911.
How can being outside in nature enhance my creativity and problem-solving skills?
Being outside in nature can enhance your creativity and problem-solving skills by stimulating your brain and reducing mental fatigue. Nature offers novel and diverse stimuli, such as sights, sounds, smells, and textures, that can spark your imagination and curiosity. Nature can also help you relax and clear your mind, allowing you to focus better and think more clearly.
How can being outside in nature support my children’s development and learning?
Being outside in nature can support your children’s development and learning by fostering their physical, emotional, social, and cognitive growth. Nature can provide your children with a safe and stimulating playground where they can exercise, explore, play, and learn. Nature can also help children develop positive attitudes, values, and behaviors towards themselves, others, and the environment.
A good camping checklist helps you figure out what you need to take on your next car camping trip. This camping checklist includes the essential items for an enjoyable and comfortable car camping trip while including some optional items depending on your trip.
I have been car camping for decades and have refined my camping checklist over the years. We especially enjoy our car camping trips to various national parks. I’ve found that it’s really easy to bring too much stuff for car camping, so I’ve included the items that I have found are important for an enjoyable camping trip.
An SUV, crossover, wagon, or minivan with fold-down seats provides plenty of cargo space for gear. Higher clearance helps access campsites down dirt roads, and all-wheel drive adds stability for varied terrain.
How do I organize my gear for car camping?
Keeping your car organized is crucial due to the gear you can bring. Store each gear category in separate bins and ensure everything has a designated place in your car. Keep essentials like your headlamp, water bottle, and portable charger in your center console for easy access.
How can I ensure safety and comfort while car camping alone, especially as a solo female traveler?
Car camping can be a safe way to travel solo if you follow common sense and a list of safety precautions. Choose well-lit and populated campgrounds or big box stores that welcome campers. Always lock your doors at night and keep a personal safety device within reach.