Daniel Borkert is the founder and editor-in-chief of Outdoor Footprints, a website that tells you everything you need to know about camping and hiking. He is an avid outdoorsman with almost four decades of experience in hiking, camping, caving, and fishing. Daniel loves to involve his wife and kids in his outdoor pursuits and inspire other families to do the same. He lives in Seattle, Washington with his family and an energetic Boston Terrier named Zion.
Waterproofing your hiking boots isn’t just a good practice; it’s a fundamental step to ensure your feet remain comfortable and dry. When you know how to waterproof hiking boots properly, you’re investing in your footwear’s performance and durability. If you’re still deciding between boots and trail runners, see our hiking shoes vs boots guide.
Key Takeaways
Waterproofing your boots is crucial for comfort and durability during hikes.
Cleaning and preparing boots is a vital preparatory step before applying waterproof treatment.
You should always choose the correct waterproofing treatment product for your boot material.
Contents
How to Waterproof Hiking Boots
Step 1 – Choose an Appropriate Waterproof Treatment Type
It’s crucial to match the right waterproofing product to the type of boot material to avoid damage and maintain breathability.
Full-grain leather boots are robust and durable. For these, you’ll want to stick with:
Wax-based treatments like Sno-Seal
Cream-based options like those provided by Nikwax for Leather
Suede or nubuck leather boots require a gentler touch due to their softer texture and need:
Spray-based treatments, which provide a light, even coat
Sponge-based applications also work well. Examples include Grangers Footwear + Gear Cleaner or Nikwax Nubuck & Suede Proof.
For fabric or synthetic boots, which are usually lighter and more flexible, you can use:
Spray-based treatments that won’t compromise the fabric structure
Sponge applications that allow for precise application without oversaturating the material. Suitable products may be Grangers Performance Repel or Nikwax Fabric and Leather Proof.
If you’ve got boots with Gore-Tex or other waterproof membranes, they generally only require cleaning to maintain their waterproofing.
A note on DWR for membrane boots: Gore-Tex and similar waterproof-breathable membranes depend on a durable water repellent (DWR) coating on the outer fabric to keep water beading. DWR wears off with use — when water stops beading and soaks in instead, wash the boots, then revive the DWR with a tumble dry on low (or a low iron with a cloth between iron and boot). When beading no longer returns, reapply a spray-on DWR treatment made for waterproof-breathable footwear.
Remove Laces and Insoles: Take out the laces and insoles to ensure no nooks or crannies are left uncleaned.
Dust Off: Gently brush away loose soil or dust from your boots. If you’re working with leather hiking boots, a soft brush is ideal to avoid scratches.
Washing Up: Dampen your boots with clean water. Apply a small amount of mild soap or a cleaner specifically for boots, then softly scrub away any stubborn dirt.
Rinse Well: Rinse thoroughly with clean water to remove soap residue.
Prep for Waterproofing: Your boots should be damp but not drenched. This is the sweet spot for applying waterproofing treatments—they adhere better and penetrate deeply on a damp surface.
Step 3 – Apply the Waterproof Treatment
Be mindful that the application process varieswith the type of treatment and the material of your boots.
Whether your boots are made of leather, nubuck, or synthetic fabric, the key is to cover all areas evenly without oversaturating.
How to apply Wax-Based Treatments
Start by dabbing a cloth or a brush into the wax.
Rub it firmly into the boot, paying particular attention to the seams and the tongue where water can sneak in.
A gentle blast of heat from a hair dryer can help the wax penetrate better. Keep the dryer at a safe distance to avoid damage.
How to apply Spray-On Treatments
Shake the bottle as instructed, then spray evenly from about 6 inches away.
Apply with light, even strokes, to avoid pooling.
Allow each coat to dry before applying the next.
Step 4 – Dry Boots after the Treatment Application
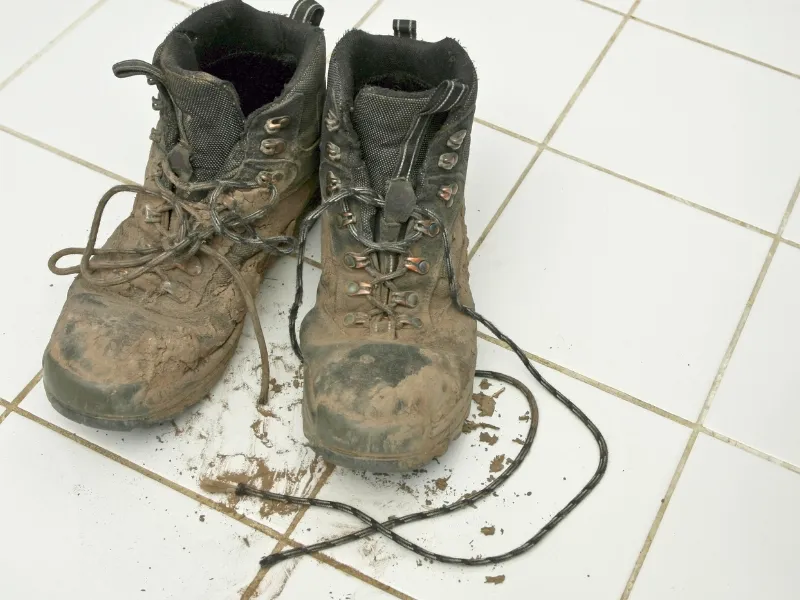
AI Photo: Daniel Borkert/Canva Magic Media™
It’s essential to avoid the temptation to speed up the process, which could damage your boots.
Drying them incorrectly could lead to cracking, shrinking, or deforming them, rendering your efforts for naught.
Here’s how to ensure your boots dry properly, maintaining their shape and effectiveness:
Room Temperature: Always let your boots dry at room temperature.
Ventilation: Choose a well-ventilated area to foster a steady drying process. Avoid direct sunlight, and do not place boots near a heat source like a radiator or fireplace.
Steady Air Flow: A gentle breeze from a fan can help moisture evaporate more swiftly from the boots’ exterior.
To help your boots absorb residual moisture inside:
Newspaper or Paper Towels: Stuff the inside of each boot with these materials. They’re excellent for soaking up moisture.
Cedar Shoe Trees: They absorb moisture, maintain the shape of your boots, and add a fresh scent.
Change It Up: Whether it’s newspaper or paper towels, replace them periodically until the boots are dry.
Tips for Waterproofing Your Boots
Preparing the Boots
If your boots are leather, particularly full-grain leather, consider using a conditioner after cleaning to maintain the leather’s suppleness.
Testing
Always test the product on a small, inconspicuous area to check for discoloration or damage.
Remember to stick to the manufacturer’s guidelines for the best results.
Application
Apply a waterproofing agent appropriate for your boot material, avoiding products with silicone or oil to retain breathability.
Pay special attention to seams, as these are potential leak points. Consider using a seam sealerdesigned explicitly for boots withleather uppers.
Maintenance
Repeat the waterproofing process regularly, depending on how frequently you use your boots and the conditions they’re subjected to.
Consider adding gaiters to your setup for those long hikes where you need extended ankle support and protection. These will provide an extra layer of water resistance and protection from debris.
FAQs
How do I know if my boots need waterproofing?
Your boots likely need waterproofing if: – Water no longer beads off their surface. – The material has started to absorb water rather than repel it, leading to a darker crease or color. – You’ve begun to notice decreased comfort due to dampness, or blisters are becoming more frequent.
How often should I waterproof my boots?
You should re-waterproof your boots when: – After roughly every 15-20 hikes, or when you notice water resistance waning. – More frequently if you frequently hike in wet conditions or have noticeable wear and tear.
Can I use household items to waterproof my boots, such as beeswax, candle wax, or petroleum jelly?
While some hikers use alternative methods like beeswax, for optimal results and to maintain the integrity of your boots, it is recommended to use: – Products specifically designed for hiking boot materials, such as waterproofing sprays and pastes tailored for leather or synthetic fabrics. – Follow manufacturer guidelines to ensure compatibility with materials like GORE-TEX or other breathable membranes.
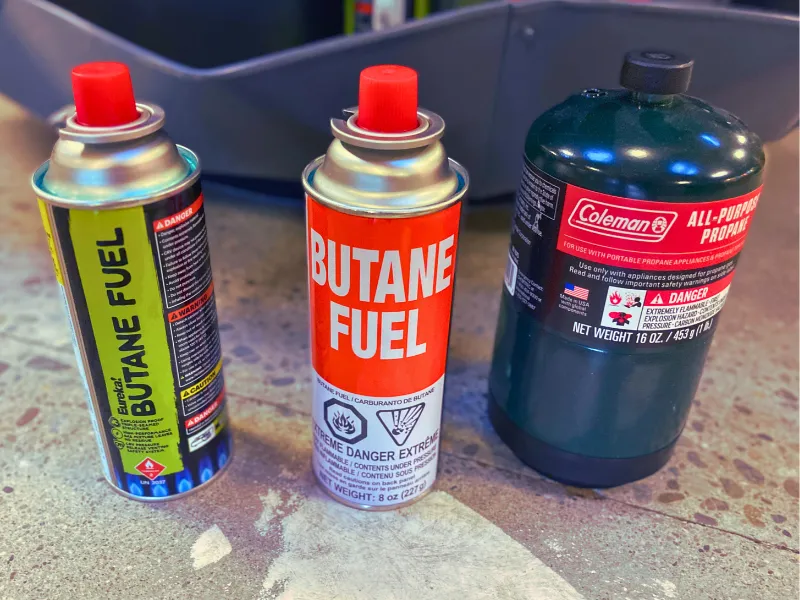
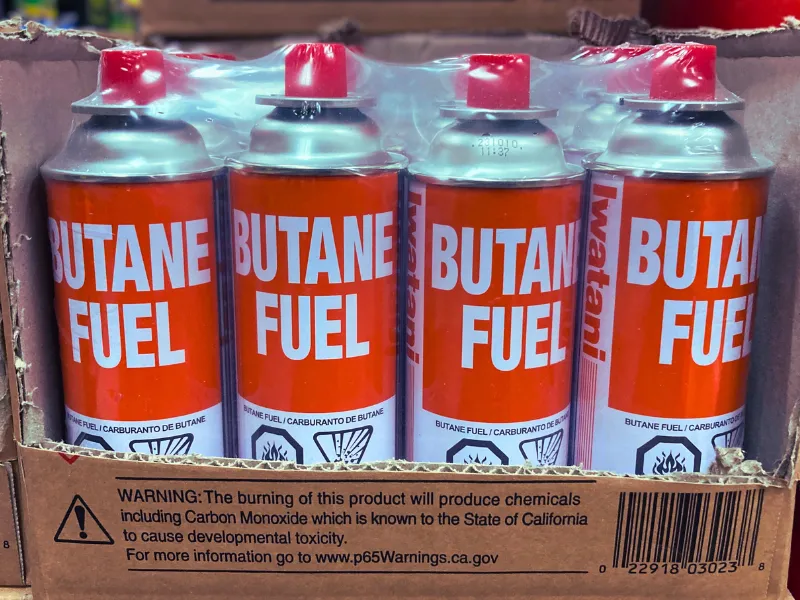
Butane vs propane stove: what is better for camping? I think a propane stove is a better choice for most camping trips in the USA.
Butane and propane stoves are two common options in portable cooking at camp, each with small advantages or disadvantages. From the ease of igniting a butane stove to the robustness of propane in colder environments, there are many factors to consider.
Important safety warning: Never use a canister stove inside a tent, vehicle, or other enclosed space. Burning fuel in an enclosed area can cause deadly carbon-monoxide buildup and poses a serious fire risk. Always cook outdoors in a well-ventilated area.
Key Takeaways
Propane stoves excel in cold weather performance, while butanestoves are slightly more portable.
The difference in experience cooking with butane and propane for your camping trip is likely minimal and inconsequentialunless it’s below freezing.
In below-freezing weather, propane stoves excel as the clear winner.
Contents
Butane vs Propane
What is Propane?
Propane is a liquid hydrocarbon gas commonly stored in tanks under high pressure, also known as liquid propane gas (LPG). Propane is probably most familiar as the fuel for your backyard BBQ grill.
Propane is a clean-burning fuel, producing minimal soot and fewer harmful emissions like carbon monoxide and carbon dioxide. This makes it a friendlier option for you and the environment, though it is still a greenhouse gas.
When camping in colder weather, you’ll appreciate propane. Its lower boiling point of -42°C means it vaporizes even at arctic temperatures, keeping your stove running smoothly.
Here are some benefits of propane stoves that make them a solid choice for your outdoor adventures:
High heat output: You can cook your food or boil water quickly.
Consistent performance: It offers reliable cooking and is even great, thanks to its steady vapor pressure.
Versatility: Can be used in a range of conditions, which is excellent for different types of trips.
Large fuel canisters: This means less frequent replacements, which are a boon on more extended expeditions.
On the flip side, the only notable drawback is the heavier weight of high-pressurized steel propane canisters.
Butane is also a liquid hydrocarbon gas stored in canisters under low pressure. It is known for its clean, odorless flame and is a popular gas stove fuel in some Asian culinary circles. Butane is also considered a greenhouse gas, so let’s be mindful of our beautiful wild spaces whenever we use it.
Butane’s boiling point is just below freezing (approximately 31°F/−0.5°C), so it doesn’t vaporize well in cold weather when temperatures dip.
Here are the benefits of a butane stove that you might consider:
Weight and Size: Butane stoves are usually more compact and weigh less, making them great for car camping trips tight on space.
Disadvantages: Butane stoves struggle in colder weather, and those compact canisters need more frequent replacing due to their smaller size.
Note that butane stoves are not used for backpacking(backpacking stoves use isobutane/propane mixtures that are incompatible).
Practical Comparison of Butane vs Propane for Camping and Outdoor Use
Let’s distinguish the practical differences between butane and propane stoves, focusing on performance, portability, and cost.
Performance in Different Environments
When you’re out in the wild, the weather doesn’t always play nice, and the performance of your stove can make or break your camping cuisine experience.
Propane: Propane vaporizes at -42°C (-44°F), so propane stoves will reliably output heat even when braving the chill.
Butane: Butane holds its own when things get warmer. Its higher boiling point is approximately −0.5°C (31°F), so on those sunny camping trips, butane stoves perform just as well.
Portability and Convenience
Size and weight are pivotal when considering portability.
Butane stoves have a potential advantage here. They are often designed with lightweight frames, weighing less than their propane counterparts.
Butane stoves: Smaller canisters, lighter build.
Propane stoves: Larger canisters, bulkier design.
Cost and Availability
Butane stoves are easier on your wallet, both in terms of initial purchase and ongoing use. A bottle of butane generally costs less than propane.
Cheaper bottle form makes butane stoves attractive for budget-conscious campers.
Widely distributed in urban areas and Asian markets, given butane’s popularity there.
Propane stoves might stretch the budget more if you opt for the small bottles. However, the cost can become more manageable if you invest in larger tanks or BBQ cylinders, trading off initial expenses for longer-term savings.
More costly small bottles, but economical in larger tanks
Propane’s rural prevalence and dominance in North American outdoors makes it a go-to there
Your choice might not be dictated by the price tag alone but by the standard fuel available where you plan to camp.
How to Pick the between Butane and Propane
Prioritize Fuel Efficiency: Opt for the stove that will give you the most bang for your buck in your common camping conditions.
Consider Portability: Lighter is better if you’re always on the move. Butane stoves typically win here.
Examine Construction: Durability can make or break your cooking experience outdoors. Choose stoves with robust build quality.
Don’t overlook dual-fuel stoves or isobutane options—they provide a versatile middle ground. Don’t forget to review your camping checklistbefore your next adventure.
FAQs
How do butane and propane stoves vary in fuel cost and overall efficiency?
Propane is generally more affordable and burns hotter, translating to more efficient cooking, especially in windy or cold weather.
Butane can be costlier, and its efficiency can drop in cooler conditions, which might mean slightly higher fuel costs over time.
What factors should I consider when choosing between butane and propane stoves for a campervan setup?
For a campervan, you’ll want to weigh the stove and fuel storage size, the ease of obtaining refills, and the climate you’ll typically encounter.
Propane stoves are often favored for their versatility and fuel availability. Still, butane could be a better fit for lightweight and space-limited setups.
What is the difference between butane and isobutane?
Isobutane is a form of butane with a different molecular structure, which allows it to perform better in colder temperatures.
Isobutane/propane mixtures are also the preferred fuel for backpacking stoves.
How long does a butane or propane canister last?
A canister’s duration depends on many factors, such as stove efficiency, altitude, temperature, and cooking habits.
On average, a standard 8-ounce butane canister may provide around 2 hours of cooking time. In comparison, a 16-ounce propane canister could last about 4 hours.
How do I dispose of empty butane or propane canisters?
Proper disposal is vital to protecting the environment. Once entirely empty, puncture the canister to ensure it’s not refillable — but only where local recycling/disposal programs accept prepared canisters; check local rules first. Recycle it at a facility that accepts mixed metals. Never throw an unpunctured canister in the trash; it can present a hazard.
Learning how to shower while camping may not always be easy. You may face challenges such as finding a suitable shower spot, having enough water and privacy, and dealing with the weather and temperature. Fortunately, several solutions exist to overcome these challenges and enjoy a refreshing shower in the wilderness.
Key Takeaways
Portable Camp Shower: This convenient and flexible option allows you to shower anywhere with a shower bag or a pressurized system. However, it requires a water source, accessories, and cost considerations.
Public Showers: An accessible and ready-to-use option available at many campgrounds, RV parks, and truck stops, but may vary in quality, availability, and privacy.
Natural Bath in River or Lake: A refreshing and memorable option that lets you enjoy the natural scenery but requires respect for the environment, caution for the water temperature, and compliance with local regulations.
Wet Wipes: A simple and portable option that can temporarily replace a shower but may be wasteful, less thorough, and potentially irritating to the skin.
Sponge Bath: A thorough and relaxing option that uses a basin or bucket of water and a sponge or cloth but requires planning, water sourcing, and privacy
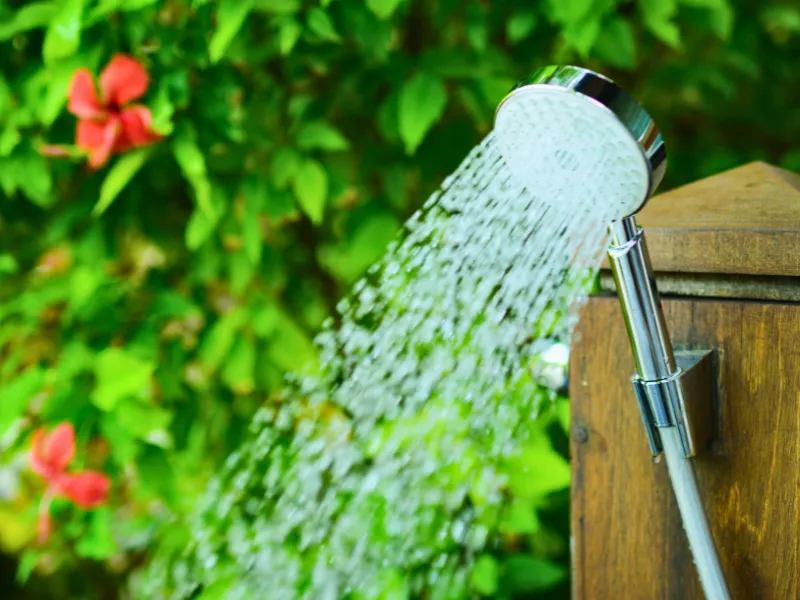
A portable camp shower allows you to shower and stay clean anywhere in the great outdoors while car camping. Typically, these showers are designed to heat up using solar energy with a shower bag or large PVC pipe on the roof rack. Others might run on propane or batteries.
These can range from a simple gravity shower to a bucket and cup to a fancy pressurized hot shower setup. An additional pop-up shower tent can increase the privacy of this setup.
Pros
Convenience: Easy setup and use.
Adjustable: Some offer temperature control and variable pressure.
Flexibility: Don’t rely on campground facilities.
Eco-Friendly: Can lessen environmental impact by avoiding contamination of lakes and streams.
Cons
Cost: It can be more expensive than other options.
Bulk: Certain models are hefty and less compact.
Water Source: Requires nearby water or hauling in your supply.
Accessories: You might need a shower tent or a mat for complete privacy and comfort.
Tips
Set up at least 200 feet from natural water sources in an area so the grey water does not impact the local environment.
Hang the shower bag or pocket shower high enough to step underneath effortlessly.
Remember to use biodegradable soap only.
Heat water using the sun for a warm shower, or consider a battery-powered model for a hot shower.
Plan water usage to ensure you have enough for rinsing.
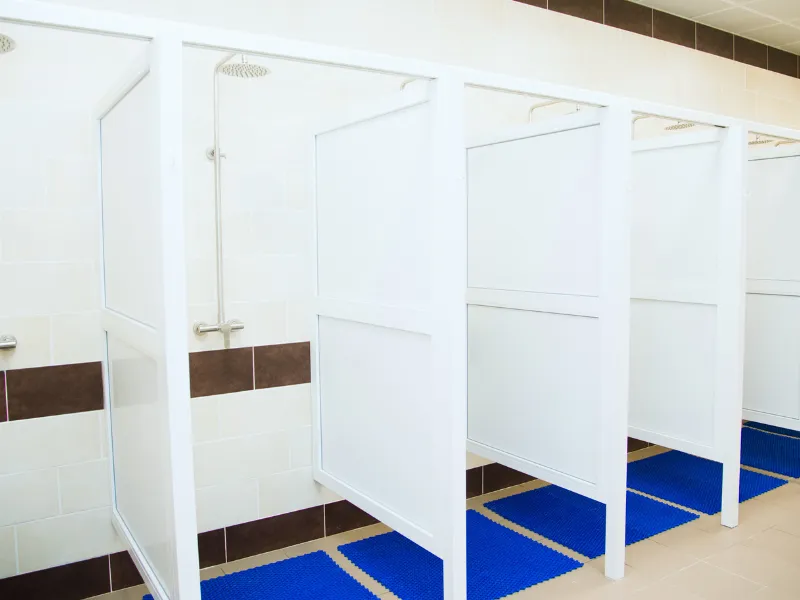
Public showers are probably the best option for camping at a campsite or roving in your RV. Shared shower facilities are often at campgrounds, RV parks, and truck stops.
Pros
Accessibility: Many campgrounds and parks offer shower facilities, so it’s not hard to come by with a bit of research.
No Setup Required: These are ready to use, unlike a pop-up shower tent or a privacy tent with a shower curtain.
Overall Cost: They’re either inexpensive with coins or tokens or free.
Privacy: You can enjoy a shower in relative privacy.
Sanitation: More often than not, they are cleaned and maintained regularly.
Cons
Availability: During peak seasons, they might have long lines,and some might require you to bring coins or tokens.
Time Limits: Some places impose shower time restrictions to manage usage.
Quality: This can vary from place to place, although most shower options are adequate.
Shared Space: Your setup is more private.
Tips & Advice
Bring the Essentials:Pack your towel, soap, and shampoo, and remember to wear shower shoes or flip-flops to protect your feet.
Check First: Before you step in, test the water temperature and pressure.
Security: Always lock the door and keep your essentials within arm’s reach.
Efficiency: Keep it brief to be considerate to fellow campers waiting in line.
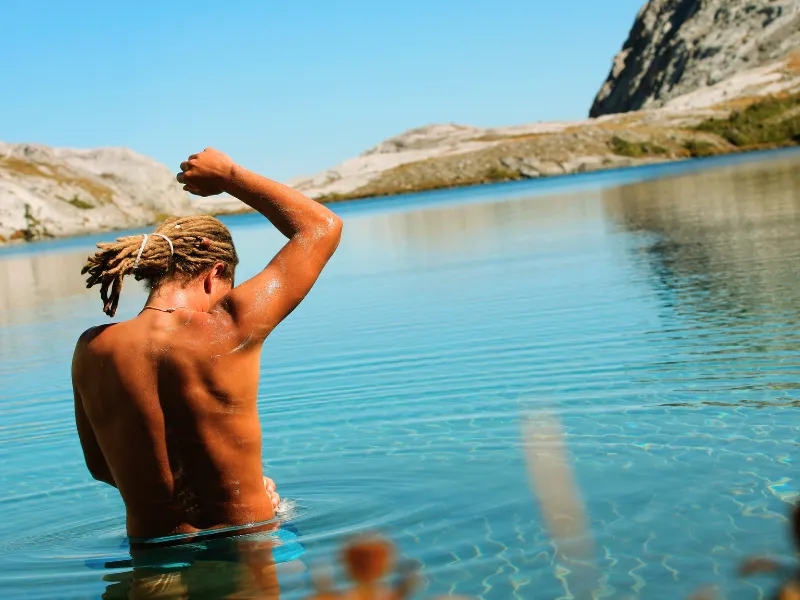
Taking a dip in a natural water source might make your camping trip memorable, but bathing in a natural body of water requires respect for the environment.
Tips
Avoid areas of a lake or river with a lot of boat traffic or where others get their drinking water.
Cold water can be refreshing but risky, causing a shock to the system, so ease in slowly.
If you need to soap up, use biodegradable soap — but even biodegradable soap must never be used directly in lakes, rivers, or streams. Do all washing and dispose of wastewater at least 200 feet from natural water sources. Regular soaps and shampoos can cause contamination, causing algae blooms that harm wildlife.
Check with local regulations, as some areas have strict rules against bathing in natural water sources.
Cons
Even in summer, natural water sources can be unexpectedly cold.
Bathing can stir up sediments, potentially covering you in silt instead of cleaning you off.
Sometimes, you can’t shower when camping, and grabbing a pack of body wipes and including them in your hiking essentials might be your most straightforward solution.
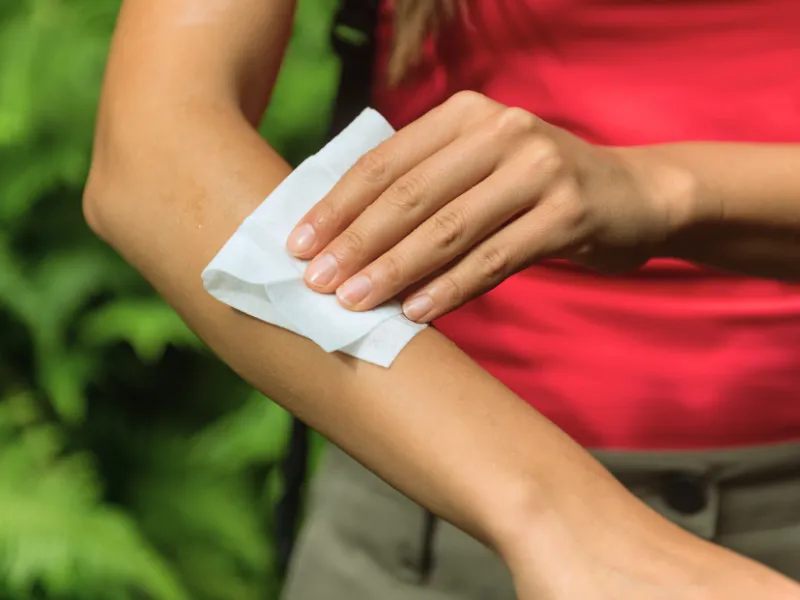
Body wipes are designed to clean off the day’s collection of dirt, sweat, and body odor for the body, face, hands, and feet.
How to Use Wet Wipes
Start with cleaner body parts and work towards dirtier areas.
Use wet wipes mindfully, as they aren’t always eco-friendly.
Dispose of used wipes responsibly in a trash bag—not in the wilderness.
Pros and Cons
Pros: Wet wipes are inexpensive, portable, and do not require water. They’re typically gentle and can temporarily replace a shower on your outdoor adventures.
Cons: They can be wasteful and are generally less thorough than a traditional wash-up. There’s also a chance of skin irritation, and they may leave behind a residual stickiness.
Tips
Opt for unscented, hypoallergenic, and alcohol-free options to reduce skin irritation.
Consider eco-friendly biodegradable wipes or even reusable cloth wipes to minimize environmental impact.
Pairing baby wipes with hand sanitizer or water can offer a smoother, more hygienic result.
A sponge bath can be a good alternative to a traditional shower, lake, or stream.
How to do a sponge bath
Set Up Your Supplies: Equip yourself with a basin or bucket, ideally filled with warm water from your campfireor stove.
Add Soap: A dash of biodegradable soap will do wonders for your hygiene without harming the environment.
Go Step-by-Step: Tackle one body part at a time to stay organized, and rinse with a clean sponge or cloth.
Pros of a Sponge Bath
You can maintain a high level of cleanliness.
Gives you a reason to pause and relax for a bit.
You’re using resources sparingly, which is essential in the wild.
Cons to Consider
There are more quick ways to get clean; you must pace yourself.
Planning is required, and water sourcing needs consideration.
Privacy can be a concern if you’re in a busy camp area.
Tips and Advice
Begin with the face and move towards the feet, avoiding any cross-contamination.
If camping near the sea, remember that a sponge bath requires fresh water, never saltwater, to avoid skin irritation.
FAQs
What are some tips to stay clean while camping?
Some tips to keep clean while camping include packing essential hygiene products, choosing campsites with shower facilities, utilizing portable shower systems, and practicing regular personal hygiene habits to stay clean and refreshed during your camping trip.
How can I maintain personal hygiene while dispersed, wild camping?
You can maintain personal hygiene while camping by investing in a portable shower or utilizing alternative methods such as wet wipes, dry shampoo, and cleaning with a towel and soap.
What are the best ways to keep clean on an extended camping trip?
You can stay fresh for multiple days without a shower while camping by using body wipes and dry shampoo, changing clothes regularly, and practicing good personal hygiene habits such as brushing your teeth and washing your hands.
Many outdoor camping activities can make your trip more fun, adventurous, and rewarding. Whether you’re looking for physical challenges, mental stimulation, or relaxation, there’s an outdoor activity for you.
Here are 27 outdoor camping activities you can enjoy on your next trip. I’ll also give you some tips and popular places for most activities so you should better know how to plan your outdoor recreational activities and make the most of your camping experience.
There are many outdoor camping activities, such as hiking, biking, fishing, kayaking, geocaching, and more.
To choose the best outdoor camping activities for your trip, consider your goals, preferences, abilities,and the available resources and facilities at your campsite.
When you hit the trails for a hike, you’re not just treating yourself to an adventure but also engaging in a potent fitness activity that revitalizes your connection with nature. Hiking allows you to explore the great outdoors at your own pace.
Planning is vital before setting out. Start by selecting a trail suited to your hiking skill level. You’ll want to check out local maps and understand the terrain. Pack hiking essentials like water, snacks, a map, and a compass—or a GPS device—to ensure you’re prepared for your journey. Wear comfortable, sturdy footwear and dress in layers to adapt to changing weather conditions.
Remember, safety is paramount:
Inform someone about your hiking plan and expected return time.
Check the weather forecast before heading out.
Be wildlife aware and know what to do in an encounter.
While on the trail, keep a moderate pace and take regular breaks. This is not just a physical activity; it’s a chance to breathe in the scents of the forest, hear the sounds of wildlife, and feel the earth beneath your feet.
Lastly, practice Leave No Trace principles. This means packing out what you pack in, staying on marked trails to protect the surroundings, and being considerate of nature and fellow hikers.
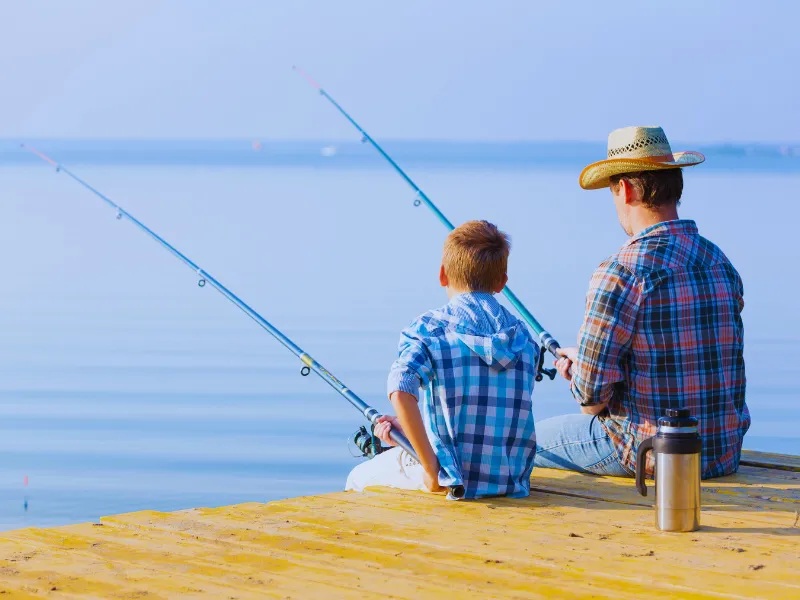
Picture yourself by a tranquil lake at sunrise; there’s something exceptional about being surrounded by nature, rod in hand, waiting for that gentle tug. It’s both a peaceful and exhilarating way to start your day.
For the most enjoyable experience, you’ll want to gear up appropriately. Choosing a rod and selecting the right bait is essential. Live bait, such as worms, often works wonders, but artificial bait can be just as effective depending on the fish and conditions.
When camping with family or friends, swimming is a quintessential activity that works wonders for fun, fitness, and cooling off. Your kids will splish-splash their way to joy, and it’s a great way for everyone to bond.
Swimming Safety Tips:
Swim in designated areas.
Buddy up, even if you’re a strong swimmer.
Wear life jackets for weaker swimmers, especially the young ones.
Keep a close eye on the weather and water conditions.
Be mindful of local wildlife and water currents
Avoid diving unless you know for sure it’s safe.
For the ultimate swimming experience during your trip, seek pristine lakes, gentle rivers, or coastal campgrounds known for their clear waters. However, remember that not all water bodies are safe and clean – make informed choices before jumping in.
Birdwatching, or birding, is more than just a pastime; it’s a way to connect with nature while sharpening your observational skills. As you tune into the diverse world of birds, you deepen your appreciation for wildlife and contribute to its conservation. Spotting a flash of color in the treetops or listening for a distinctive call can be unexpectedly thrilling and deeply satisfying.
When embarking on a birdwatching adventure during your camping trips, keep these pointers in mind:
Equip yourself with a reliable field guide to help identify various bird species.
Bring binoculars for a closer look at birds without disturbing them.
Keep a birding journal and note behaviors and characteristics like plumage, size, and sounds.
Discovering the best spots and the right season can drastically enhance your birdwatching experience:
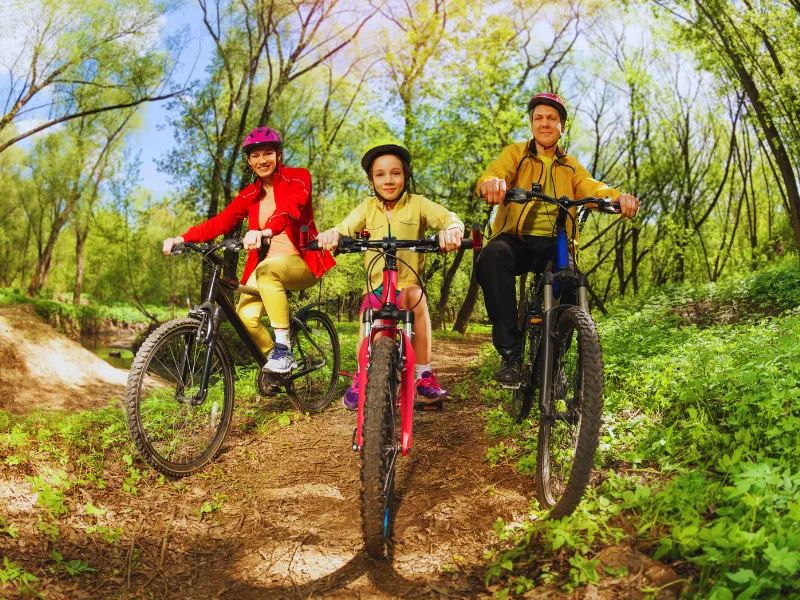
Biking as an outdoor activity offers you the perfect blend of transportation, exercise, and the thrill of adventure. On two wheels, you can explore diverse terrains and soak in nature’s splendor at your own pace, from casual trail riding to adrenaline-pumping mountain biking.
Always bring essential gear like helmets and repair kits. Here’s a quick guide:
Mountain Bikes: Ideal for rough terrain
Hybrid Bikes: For a bit of everything, roads and light trails
Road Bikes: Best on pavement for speed and distance
While exploring, remember to ride responsibly and store your bike securely at night to prevent damage or theft.
Venturing into the wilderness calls for preparedness. Here are some top trails to consider that promise both beauty and challenge:
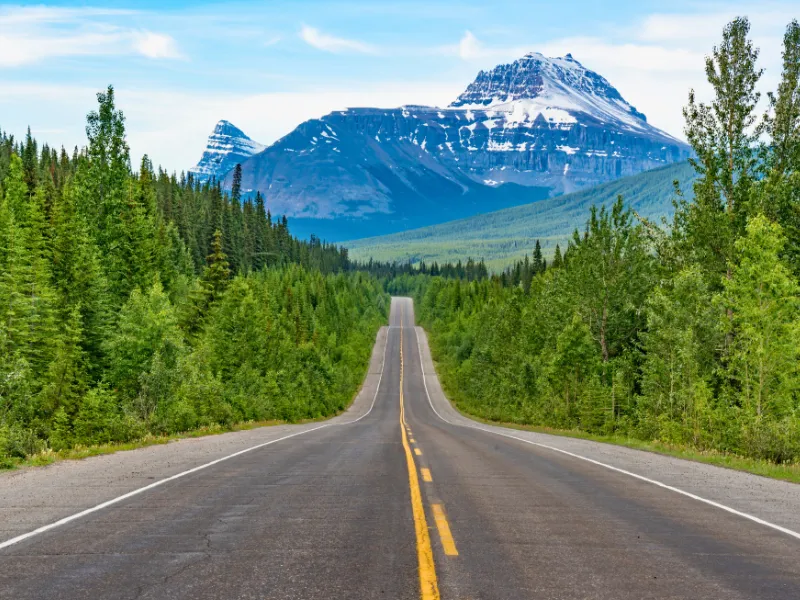
Consider incorporating a scenic drive into the journey when planning your next camping trip. There’s something extraordinary about cruising through the mountains or a national park, where every turn in the road offers a new and breathtaking view.
Before you head out, make sure your route is mapped and your vehicle is ready for the road. Here’s what I always do before I venture out:
Check the weather conditions: Always be prepared for what Mother Nature might throw at you.
Plan your stops: Identify campgrounds and lookouts ahead of time, especially if you have kids in tow.
Consider daylight: Aim to drive for the most vivid scenery during the day.
If you’re looking to put rubber to the road on some of the most striking drives, then here are a few you absolutely shouldn’t miss:
Icefields Parkway, Canada: Connecting Banff to Jasper, this 150-mile journey is filled with majestic mountain vistas and pristine lakes, perfect for an RV adventure.
Shenandoah National Park, VA: Enjoy the 105-mile scenic road through Shenandoah National Park, which has over 75 scenic overlooks.
A scenic drive isn’t just a means to get to your camping destination; it’s an integral part of the adventure, beckoning you to slow down, breathe in the fresh air, and soak up the ever-changing canvas of the natural world.
Have you ever wondered how you can combine learning with your love for the outdoors? Agrotourism is the answer, blending agriculture and tourism into a family-friendly and educational experience. It’s all about farm-based fun, where you engage with the local way of life, dive into nature’s beauty, and support sustainable practices while having a blast exploring the fields and forests.
Research is vital to find a local farm to visit during your camping trip. Stop by a regional visitor center or search online for “agrotourism near me.” Here’s a quick list of various agrotourism ideas:
Orchard Trails: Wander and taste nature’s sweets
Farm Markets: Shop for fresh, local produce
Petting Zoos: Get up close with farm animals
Workshops: Learn traditional farming skills
Wagon Rides: Bounce along scenic trails
Farm-based Camping: Sleep under the stars within earshot of the countryside
Cycling Tours: Pedal through verdant fields
By visiting and supporting local farms, you create memories, contribute to the local economy, and promote environmental stewardship.
Horseback riding is an incredible way to soak in the grandeur of nature.
Your best bet is to seek out local stables or tour operators near your camping destination. They’ll set you up with a horse that matches your riding ability and often guide you through trails tailored to your experience level. Always wear a helmet, follow the guide’s instructions, and treat your horse with the respect it deserves.
Here are a few practical tips for your equestrian adventure:
Booking: Reserve your riding slot in advance, especially during peak camping seasons.
Riding Gear: Wear comfortable clothes and sturdy footwear; avoid loose, fluttering garments that might spook your horse.
Approach: If you’re new to this, don’t worry! The guides will show you the ropes, from mounting to steering.
Looking for an unforgettable horseback trail? Check out the scenic vistas of Yosemite National Park or embrace the historical paths of Gettysburg. You’ll be trotting along routes etched into the history books.
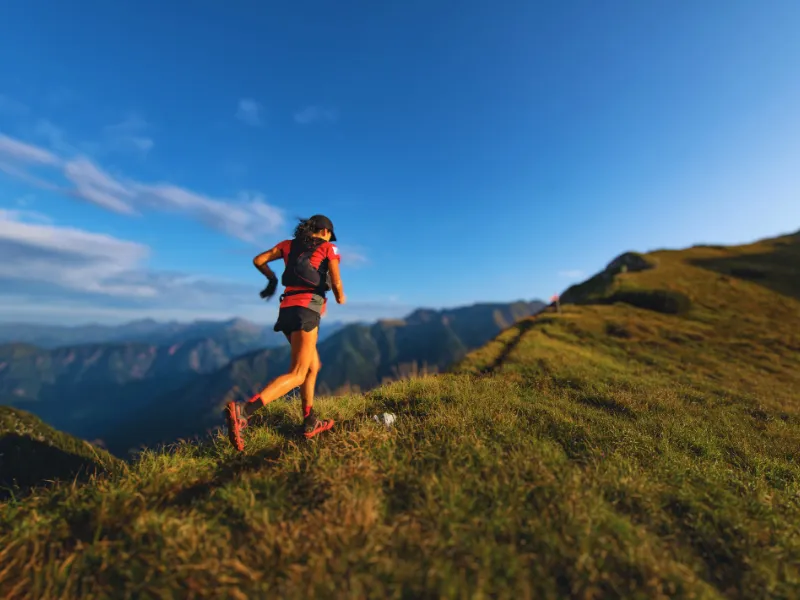
Trail running takes your fitness to nature’s domain, turning routine jogs into adventures. Imagine bounding over roots, weaving through trees, and taking in fresh oxygen while pushing your limits. You’ll get a blend of aerobic exercise and mental stimulation as you navigate diverse terrains, from gentle dirt paths to challenging mountain ascents.
Here’s how to gear up and hit those trails:
Start with proper footwear: Invest in trail running shoes with good grip and support.
Stay safe: Bring your GPS, snacks, and water. Always tell someone your route.
Build your stamina: Begin with short trails, gradually increasing distance and elevation.
Training for trail running is different from training for the streets. Uncertain terrain makes flexibility and balance crucial. Include exercises like lunging and side-stepping to avoid tripping over nature’s hurdles. Don’t forget to rehydrate yourself properlyafter a great trail run!
Rock climbing is a formidable test of strength and skill, often described as a vertical dance with nature. As you grip and search for footholds, you engage in a full-body workout that builds muscle, enhances coordination, and provides an adrenaline rush. Bouldering, its less height-focused sibling, offers similar benefits without needing ropes or harnesses.
If you’re keen to integrate rock climbing into your camping escapades:
Start Small: Find a local climbing gym or attend a beginner’s class. It’s vital to grasp the basics of technique and safety first.
Gear Up: Essential equipment includes a sturdy climbing harness, reliable shoes, a safety helmet, and a belay device.
Safety is Paramount: Always climb with a partner and check your gear before each ascent.
The United States has a bounty of rock climbing sites in its natural landscapes, offering climbers of all levels a chance to connect with nature while challenging their bodies. Some of the top destinations include:
Moab, UT, has multiple desert towers and canoyeering opportunities.
Whether you’re guiding a sailboat across a gentle breeze or throttling a powerboat over waves, boating offers a fantastic mode for appreciating and exploring nature. The rhythmic sounds of water lapping against the hull can be incredibly soothing, making these experiences ideal for families looking to bond in the great outdoors.
When you’re planning a camping trip that includes boating, remember these tips:
Select a Suitable Watercraft: Marinas often provide rentals. Choose one that fits your group’s size and experience level.
Safety First: Always wear life jackets, and if you need clarification on operating a boat, feel free to ask for a quick tutorial.
Minimize Impact: If you opt for powerboating, be conscious that it utilizes fossil fuels, which can have environmental drawbacks. Whenever possible, consider eco-friendly alternatives such as sailing.
Here’s some quick guidance for your boating-themed camping escapade:
Family Fun: Look for calm lakes where water sports like tubing and waterskiing are popular.
Nature Immersion: For a tranquil retreat, paddle quietly in a canoe or kayak to observe wildlife.
Top Spots: Seek out renowned boating destinations like Lake Powell or the Finger Lakes, where
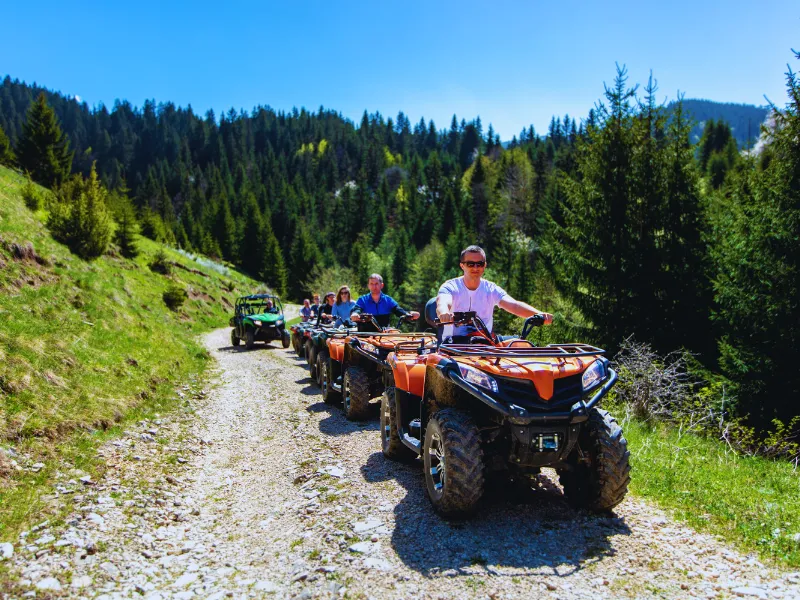
Off-highway vehicles (OHVs), such as ATVs, motorcycles, and UTVs, bring unparalleled adventure to outdoor enthusiasts like yourself. Imagine the thrill of exploring rugged terrains, accessing remote campgrounds, or simply basking in the freedom of the wide-open trails.
Before you ride:
Safety first: Gear up with helmets, eye protection, and appropriate clothing.
Get trained: Educate yourself on OHV operation, trail etiquette, and environmental respect.
Rent smartly: Look for reputable rental programs, like Polaris Adventures, for high-quality equipment.
Despite the adrenaline rush, OHVs can be loud and disrupt wildlife. Always ride responsibly, stick to the trails, and minimize your environmental impact to preserve the great outdoors we love. Learn about Tread Lightly!
When camping with OHVs, balance the rush of adrenaline with moments of tranquility. Enjoy activities like fishing or hiking to appreciate nature fully. While OHVs can add adrenaline to your outdoor adventures, they’re not for everyone. Judge the risks, rent if you’re a newbie, and always put safety and nature care at the forefront. Happy trail riding!
Kayaking is a marvelous way to engage in outdoor activities near a lake. It can grant you access to areas off the beaten path. Consider kayak or canoe camping.
Choosing the right kayak is critical when gearing up for kayak camping. You want stability, storage space, and comfort for those long stretches on the water. Opt for kayaks designed for touring if you’re planning longer trips—these typically have ample storage for camping gear. Clean, drain, and dry your kayak thoroughly after your day on the water.
Here are a few tips to enhance your kayaking outings:
For Families: Opt for tandem kayaks, which are great for bonding and sharing the paddling.
For Solo Paddlers: A single kayak offers agility and the chance to connect with nature one-on-one.
Paddleboarding: If you’re looking for a full-body workout, try stand-up paddleboarding, another fantastic way to explore the waterways.
As for the best spots for kayak camping, consider the calm waters of a nearby lake for a serene getaway or the meandering paths of a gentle river for a bit of exploration. Look for established campsites along the shores that cater to water adventurers. The Boundary Watersoffers an epic adventure for kayak and canoe camping.
Imagine yourself drifting down a serene river, surrounded by nature, as you bask in the sun with your family and friends. Not only is it a fantastic way to cool off, but it also offers an opportunity for socialization as you float along.
When you select a tube, consider the size and durability suited to your needs. It should comfortably support your weight and withstand the river’s challenges. Before hitting the water, properly inflate your tube to the manufacturer’s recommendations to ensure safety and performance.
Here’s a pro tip: learn the basics of riding a tube, such as steering with your hands and feet or linking up with other tubers to create a flotilla. Always wear a life jacket, regardless of your swimming skills, and watch river conditions for a safe experience.
For a memorable tubing outing, consider rivers known for their gentle flow and picturesque surroundings. Some favorite spots among campers include the Guadalupe Riverin Texas, the Saco River in Maine, and the Shenandoah River in Virginia. These locations are renowned for their clear waters and family-friendly atmospheres.
Treasure hunting isn’t just for the kids; it’s an all-ages, engaging activity that encourages creativity, fosters teamwork, and injects excitement into your camping experience.
Designing a treasure hunt might seem daunting, but it’s all about themed clues and hiding spots reflective of your natural surroundings. Start by crafting a narrative—maybe you’re pirates searching for buried gold or explorers on the trail of a lost artifact. Your clues can be riddles tied to the environment, leading campers from an ancient tree to a hidden stream.
Tips for Organizing Your Treasure Hunt:
Create a Map: Sketch out your campsite and mark potential hiding spots.
Safety First: Ensure all locations are safe, especially for kids.
Be Resourceful: Use natural elements like rocks or leaves to mark spots.
For the best themes, blend the location’s features with imaginative tales. A forest, for example, is ripe for an enchanted woodland quest or a Robin Hood-style caper. Here’s a simple clue to get you started: “Walk to where the water bends. The next clue hides where the river ends.”
Remember, the real treasure is the fun and bonding along the way. So grab your map and compass, round up your crew, and set off on a camping treasure hunt.
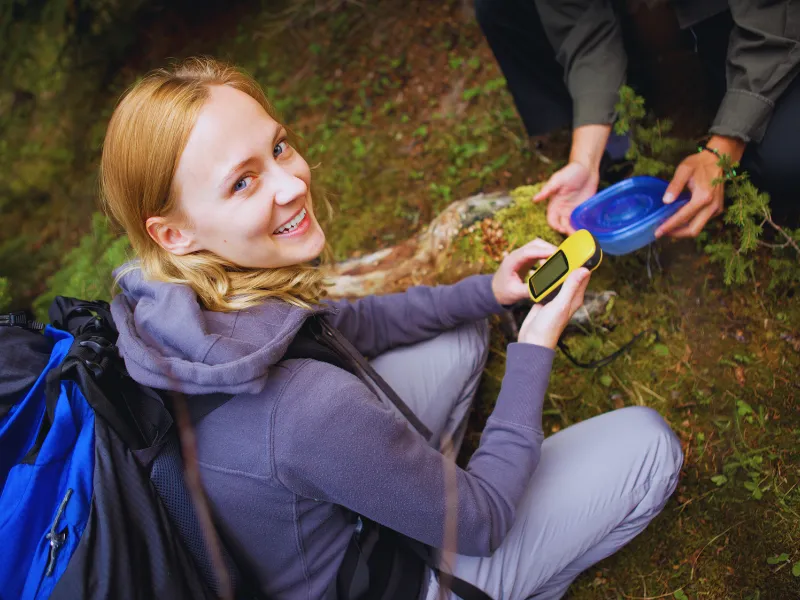
Geocaching is a game that leads you through nature’s nooks, encourages learning through navigation, and fosters a sense of community as you share experiences with fellow geocachers.
Here’s how to get started:
Find a Geocache: Use your GPS or a smartphone with a geocaching app to locate hidden caches. You’ll find these by following specific coordinates.
Hide a Geocache: After finding a few, you might want to hide one. Choose a durable container and a non-invasive spot that won’t disturb the local wildlife or environment.
Log Your Experience: Inside each cache, there’s a logbook. Write down your geocaching handle and the date. Share your experience online and a cleaver hint or two for the next adventurer.
Tips for Successful Geocaching:
Respect nature: Leave no trace and be mindful of the environment.
Be prepared: Carry essentials like water, snacks, and a first aid kit.
Stay safe: Inform someone about your geocaching plans and location.
Letterboxing is an intriguing fusion of art, adventure, and collection, perfect for those who enjoy exploring the great outdoors with a creative twist. As you set up camp amid nature’s tranquility, consider adding a dash of mystery and treasure hunting to your experience. You’ll imbibe the wonders of your natural surroundings and connect with an age-old pastime that sparks creativity and a sense of discovery.
To begin your letterboxing quest, you’ll need to carve a personal stamp—it reflects your identity in this adventurous hobby. Once equipped, you must seek out hidden letterboxes by following clues that often lead you through scenic trails and seldom-visited wilderness corners. Here’s the crux of it:
Prepare: Craft your unique stamp and secure an inkpad and a notepad, which will serve as your logbook.
Discover: Use resources like Atlas Quest to find clues for letterbox locations in your camping area.
Collect: Upon discovering a box, stamp your logbook with the letterbox’s stamp and imprint your stamp in the letterbox’s logbook, a record of your presence there.
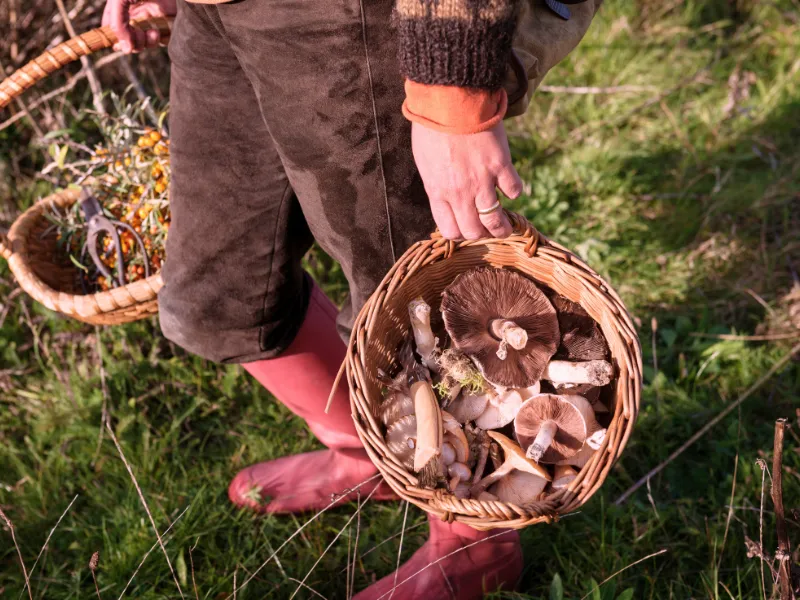
When surrounded by nature’s bounty, foraging is a delightful activity that taps into your primal survival skills and offers a nutritious boost to your camping meals. I’m talking about the art of identifying and gathering wild foods—think of it as a treasure hunt, where the bounty is deliciously edible plants and mushrooms.
If you’re gearing up to forage, remember these essentials:
Safety First: Always carry a reliable guide to edible plants and mushrooms specific to your region. Some plants and mushrooms can be toxic, and mistakes can be dangerous.
Respect the Environment: Take only what you need without harming the ecosystem. For example, when harvesting berries, leave enough for wildlife and the continued health of the plant.
Here’s a simple way to get started on your foraging adventure:
Identify: Start with easily recognizable foods like wild berries or dandelion greens.
Gather: Use a gentle touch to avoid damaging the plant or its surroundings.
Prepare: Wash your finds and prepare them as you would store-bought equivalents—many wild greens can be added to salads, while certain mushrooms are great in stir-fries.
Grab your bag and head to locales known for their abundance, like forest floors for mushrooms or riverbanks for wild herbs. Also, consider dehydrating your foraged foodfor other meals over the next few months. Try these quick recipes next time you camp:
Pine needle tea: Rich in vitamin C, it’s as simple as steeping cleaned needles in hot water. Identification warning: some evergreens (notably yew) are toxic and ponderosa pine is contraindicated in pregnancy — only harvest pine needles when you are certain of the species.
Wildberry compote: Heat berries over a fire with honey for a sweet treat.
Stargazing, the simple act of looking up at the stars, offers a blend of wonder, knowledge, and a timeless romantic backdrop to any camping trip. From a family bonding experience to a serene moment of self-reflection, there’s something truly magnificent about the tranquility of the stars.
When you’re planning for a night of stargazing, keep these tips in mind:
Find a Dark Spot: Steer clear of light pollution. Nature reserves or national parks often offer the clearest views. Death Valley and the area just south of Grand Canyon National Park are prime examples.
Know When to Go: New moon phases and clear skies provide optimal conditions. Aim for times when the Milky Way’s glow is at its peak.
Gear Up: A telescope or binoculars can enhance the experience, but even the naked eye can catch constellations and shooting stars.
Capture the Moment: For photography enthusiasts, a tripod and a camera with manual settings can help you photograph the night sky. Use long exposures to capture the stars’ trails.
When we talk about photography in the great outdoors, it’s not just about clicking the shutter—it’s about capturing the essence of those spontaneous family adventures and the beauty of nature surrounding us. It’s the art of holding onto those fleeting moments, whether basking in the golden hour or witnessing wildlife in action. Let’s take a journey through the lens.
Choosing Your Subjects
Landscapes: Find a vantage point that offers a vast perspective of nature’s splendor.
Wildlife: Be patient and consider a telephoto lens.
Family and Friends: Capture candid and posed moments while exploring the wilderness.
Photography Techniques
Steady your camera with a tripod for sharp, high-quality images, especially in low light.
Master your camera’s manual settings to adapt to dynamic outdoor conditions.
Enhancing Your Photos
Edit photos to highlight the beauty you’ve captured but keep it authentic to the moment.
Share your experiences online or create a photo album to keep those memories alive.
Sketching in the great outdoors can be a remarkable way to connect with nature and unleash your creativity. You’re not just capturing the scene before you but interpreting the vibrant hues and dynamic light that only the wilderness can provide. It’s a practice that offers serenity and hones your artistic skills – all you need is a pencil and paper.
Begin by selecting a focal point in the natural landscape. Let this be the heart of your sketch: the rugged mountain outline, the intricate pattern of leaves, or a flowing stream. Here are a few pointers to guide your hand:
Outline your subject with gentle, loose strokes to capture the basic shape.
Shade lightly at first, building up layers to create depth.
Add color sparingly; sometimes, a touch of hues can bring a sketch to life.
Invest in a sturdy sketchbook and drawing pencils for your toolkit. A foldable stool and a lightweight easel can also enhance your comfort and stability as you draw.
Look for scenes that speak to you, those little moments of wilderness that stand out. The dappled light through a canopy of leaves, for example, or the way the sun sets the horizon ablaze, can be magic for your sketchpad. And remember, it’s about the experience, not just the outcome. So find your spot, take a deep breath of fresh air, and let nature guide your hand. It’s all about the fun of creating something unique and personal as you relish the tranquility of the outdoors.
Whittling is more than just slicing away at a piece of wood; it’s a craft that requires concentration and precision, often leading to a meditative state. When camping, having a knife and a simple block of wood can transform idle time into a session of creative expression. Here are a few tips to get you started:
Choose your tools wisely: A sharp pocket knife with a locking blade for safety or a specialized whittling knife will do. Keeping your blade sharp is crucial, as a dull knife is unsafe and makes for rough work.
Selecting your wood: Softwoods like pine or basswood are ideal for beginners due to their softer composition. Ensure the wood is dry; though fresh green wood is smoother and easier to cut, it’s prone to cracking as it dries.
Here’s a couple of whittling ideas that are perfect for the campsite:
Whittle a cooking utensil, like a simple spatula or spoon. They’re not just handy but also a fantastic reminder of your trip.
Craft an animal that makes a great camping souvenir.
Remember always to carve away from your body and use a glove to protect your holding hand. Whittling isn’t a race; take your time and enjoy the process. It’s a rewarding craft where the journey is just as enjoyable as the destination—a carved piece you can call your own.
Slacklining, an activity that tests balance and agility, is a fantastic addition to camping activities. Initially conjured up by climbers in Yosemite to sharpen their balancing skills on rest days, it has since evolved into a fun pastime perfect for outdoor enthusiasts like you. You only need flat webbing, two sturdy points like trees or posts, and a sense of adventure.
Here’s how to get started:
Find the perfect spot: Look for two strong trees about 20 to 30 feet apart and with no obstacles in between.
Set up your slackline: Tie the webbing around each tree at a comfortable height. Use a ratchet or similar tensioning system to get the right amount of slack – not too tight or loose.
Walk the line: Begin by stepping onto the slackline with one foot while holding onto a friend or a tree for support. Focus your gaze on a fixed point ahead and walk slowly, placing one foot in front of the other.
Perform tricks: Once you’re comfortable walking, try sitting, turning, and even jumping on the line to add some fun tricks to your balance work.
Slacklines vary in length and tension, and they are suitable for different difficulty levels and fun. For beginners, a shorter and more low-lying line would be ideal. At the same time, seasoned slackliners might enjoy a longer and higher setup. Beyond the physical benefits, slacklining at a camp is a delightful way to bond with friends and family and share a few laughs — you’ll be surprised at how quickly you can progress from wobbly steps to confident strides.
When camping with family and friends, there’s no better way to add excitement to your day than with a good old-fashioned Water War. Picture this: you’re armed with water balloons in one hand and a water gun in the other. Laughter echos around you as everyone dashes and dodges, soaking wet but cool from the heat, the competition as intense as the midday sun.
Here are a few tips to get your Water War battle-ready:
Prepare Your Arsenal: Stock up on water balloons and reliable water guns. Aim for easy-to-fill balloons and guns with a good range and capacity.
Safety First: To avoid accidents, choose a spacious outdoor area away from camping gear and ensure the ground isn’t slippery.
Keep It Friendly: Remember, it’s all about fun. Set some basic rules to ensure no one gets hurt and everyone enjoys the game.
Outdoor games are a great way to add excitement and camaraderie to any camping trip. They’re not just for kids; games can also foster a sense of family and togetherness, making your outdoor experience memorable.
When selecting games, consider your group’s age range and interests. Look for games that require minimal equipment and setup. Classics like Tag need nothing but open space and are perfect for getting everyone moving.
Here are some all-time favorites perfect for campers of all stripes:
Tag: Always a hit, it’s simple and lively, and you can add variations to keep it fresh.
Capture the Flag: This team game combines stealth and strategy and is a hit with kids and adults alike.
Cornhole: Toss the bean bag into the hole, which is popular with teens and adults.
Horseshoes: Popular game with older adults, although kids and young adults enjoy the challenge.
Volleyball: Hang a net and mark the boundaries; you’ve got the recipe for a fun time.
Bocce Ball: Classic beach game that is just as fun while camping.
Spike ball: Combine volleyball with four square and a circular net for a fast-paced game for teens and young adults.
Yoga is a practice that combines physical postures, breathing techniques, and meditation to foster harmony between your mind, body, and nature. When you’re camping, incorporating yoga can enhance your outdoor experience, promising relaxation and a chance to meditate amidst the tranquility of the natural world.
When considering yoga styles for camping, opt for Hatha or Yin yoga. These styles focus on longer-held poses and are perfect for practicing with the serene backdrop of the outdoors. Yoga while camping isn’t about perfection; it’s about embracing the moment and your unique setting.
Picnicking is a delightful way to combine your love for the outdoors with the simple pleasure of dining al fresco. There’s something inherently comforting about spreading a blanket and unpacking a food basket amidst nature. It’s a casual yet intimate setting that invites relaxation and provides a scenic backdrop for your meal. Whether with family or friends, picnicking enhances your connection with nature and each other.
For the best experience, prepare by choosing foods that are easy to pack and serve. Items like sandwiches, fruits, salads, and cold cuts are perfect for a picnic. Pack utensils, napkins, and trash bags for an easy cleanup. Keep your food fresh and safe using a cooler with ice packs, especially if your picnic includes perishables.
When you’re camping, seek spots known for their views and tranquility. Lakeshores, streams, park meadows, and forest clearings are prime picnicking locations.
My favorite picnic was beside a beautiful river in Yellowstone National Park. Remember to respect the wildlife and environment; leave no trace after your meal.
Key Tips for Your Next Picnic:
Prepare: Opt for portable, non-perishable food items when possible.
Pack: Use a cooler to keep your food at a safe temperature.
Pick a Spot: Choose locations with beautiful views and minimal disturbance.
Protect Nature: Always clean up after yourself to preserve the outdoors.
Whether you’re a seasoned camper or a beginner, there’s always something new to try and discover in the great outdoors. Outdoor camping activities can enrich your trip and make it more memorable and satisfying.
What outdoor camping activities do you enjoy? Leave a comment below!
FAQ
What are outdoor camping activities?
Outdoor camping activities are any recreational or educational activities that can be done outside while staying in a tent, cabin, or RV. Some outdoor camping activities include hiking, fishing, biking, kayaking, birdwatching, and stargazing.
What are the benefits of outdoor camping activities?
Outdoor camping activities can provide many benefits for physical and mental health, such as reducing stress, improving mood, boosting immunity, enhancing creativity, and strengthening relationships. Outdoor camping activities can also help you appreciate nature and learn new skills. They also help your kids get all that energy out in a creative and fun way.
What are some fun camping activities for kids and families?
There are many fun camping activities for kids and families that can keep them entertained and engaged. Some examples are nature scavenger hunts, attending outdoor programs, completing junior ranger activities, playing games like tag, swimming, biking around camp, hiking, and making s’mores.
What are some camping activities for couples?
Camping can be a romantic and adventurous way to spend time with your partner. Some camping activities for couples are cooking a special meal, watching the sunset or sunrise, cuddling by the fire, reading or listening to music together, and playing card or board games. If you and your partner are feeling adventurous, you can also try some more challenging activities like rock climbing, kayaking, or zip-lining.
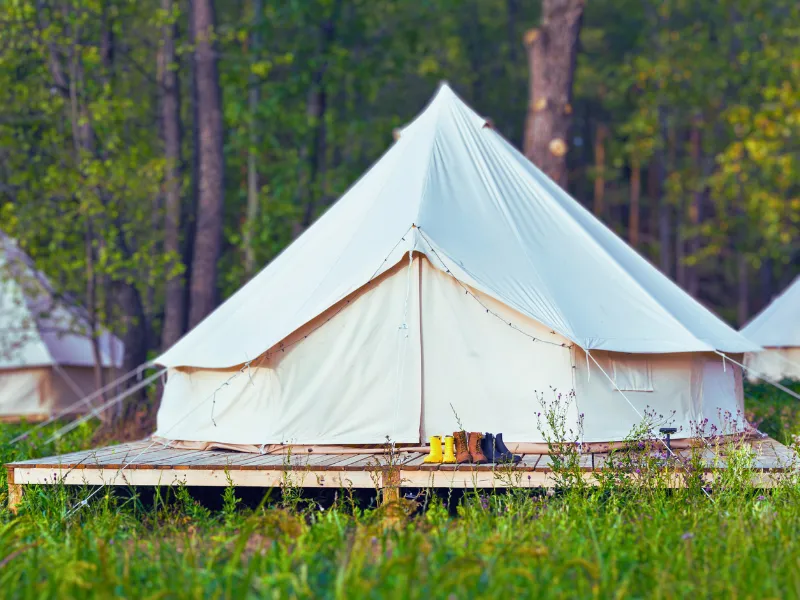
Building your tent platform is not just about practicality; it’s a project that adds a touch of personality and comfort to your camping experience.
Whether you have set your sights on a serene lakeside or a secluded forest spot, constructing a platform allows you to choose your perfect viewmore permanently. A well-built platform can also enhance the aesthetics of your campsite, blending functionality and protecting the environment.
Key Takeaways
A tent platform ensures comfort and protection by providing a level and dry area for tent setup.
Construction involves careful planning, such as designing the platform, selecting materials, and woodworking.
With a platform deck, your camping spot becomes more permanent and weatherproof, increasing the practicality of outdoor living.
Contents
How to Build a Tent Platform
Step 1 – Design the Platform
Choose the Right Location
You want a spot with privacy, natural protection, and a great view.
Also, a spot with good drainage is preferable, although not always possible.
Avoid spots that are in danger zones, such as areas that could have rock falls, landslides, or flash floods.
Determine the Tent Platform Size and Shape
Measure your tent’s dimensions.
Add the perimeter of space you’d like around the tent—for walking, an extra deck, or gear storage. A good rule of thumb is to add at least a couple of feet extra on each side.
Sketch out potential shapes: square, rectangle, or hexagon.
Mark your platform on the ground using a nylon string line to outline your desired shape.
Consider how high off the ground you want to raise the platform to mitigate moisture issues.
Codes and safety check: Before you build, check local building codes and permit requirements — a tent platform may legally count as a structure. In cold climates, account for frost heave by setting posts below the frost line or using a floating (non-frost-protected) design. And build for the full load: the platform and tent plus occupants, gear, and any expected snow load.
Step 2 – Gather Tools and Materials
Materials
Pressure-treated lumber (cedar lumber as an alternative) for posts and joists
Decking material of either wood or composite decking
3” Galvanized screws or 10D nails
Joist hangers for securing the joists to the posts
Post anchors to secure the platform legs to the ground.
Concrete for setting the post anchors firmly in the ground
Concrete deck blocks (optional/alternative)
Tools
Circular saw for cutting lumber to the desired length
Drill, preferably cordless, for fastening screws
Hammer for driving in nails and other fasteners
Post-hole digger to prepare the holes for your posts
Tape measure for precise measurements
Level
Carpenter pencil
Nylon string
Step 3 – Clear the Area
Once you’ve pinpointed your ideal location. Grab a pair of gloves and clear away any rocks, sticks, and forest debris.
Look out for larger rocks or roots that might need a shovel, saw, or large equipment.
Consider also placing gravel under the platform area to improve water drainage.
Step 4 – Dig Foundation Post Holes
Mark the location of the footings/post holes with stakes and nylon string to square the corners and establish a rough layout.
Mark the location of the holes with spray paint.
If you are in an urban area, remember to call before you dig to avoid hitting any underground utilities.
If you’re using cinderblock piers or concrete deck blocks for your platform post legs, you can skip to step 6.
5 Steps to Dig Post Holes
Choose Your Tool: Grab a post-hole digger, a sturdy shovel, or a powered auger.
Measure Up: Generally, you want each hole to be roughly three times the width of your post.
Consider Alternatives: If digging isn’t up your alley or the terrain disagrees, a concrete deck block or cinder block pier can save the day. They’re a solid base for your posts without all the digging.
Start Digging: With your post-hole digger, cleanly remove the earth. Remember to check your measurements as you go, ensuring consistent depth and diameter.
Setting the Scene for Support: If you’re using concrete to set your posts, a concrete form tube can guide you to a smooth, strong pillar. Level the form tubes so they’re about 1” above the ground. Pack the soil around the form tubes with a tamp.
Step 5 – Pour Concrete and Place Post Anchors
Mixing and Pouring Concrete
Start with ready-mix concrete from your local hardware store.
Follow the package directions. Typically, you’ll combine the concrete mix with water until it has a thick, oatmeal-like consistency.
Shovel or pour the concrete into your pre-dug holes, filling up to just below ground level.
Setting Your Post Anchors
Immediately after pouring, set your post anchors in the center of the wet concrete.
Use a level and be meticulous to ensure they’re perfectly straight.
Align them with a string line
Cure Time
Let the concrete cure for at least 24 hours.
Step 6 – Attach Posts or Beams to the Concrete Base
Place your beam or post into the anchors.
Utilizing a drill or hammer, fasten the posts to the anchors with post-base screws or nails.
Always do a second sweep with your level. A well-leveled beam or post makes all the difference.
Use a nylon line that is leveled and set to the correct height to mark and cut posts evenly and consistently.
Step 7 – Attach Rim Joists or Beams
When setting up a sturdy tent platform, rim joists or beams are the backbone of your structure. They provide the perimeter frame on which every other part depends, so attaching them correctly is critical.
Attach rim joists on the outer edges of the posts. Start with one fastener per post in case you need to adjust.
Add fasteners to the rim joists after confirming everything is level and square.
Cut the posts even with the joists if not already trimmed.
If you’re using beams, finish the open ends with a rim joist on both sides, making an enclosed, secure perimeter.
Step 8 – Attach Inner Joists to Rim Joists or Beams
Position your joist hangers along the inside face of the perimeter rim joists or beams spaced 16-24 inchesapart. Be consistent and follow any building codes in your area.
Attach joist hangers with fasteners.
Slide each joist into its hanger. They should fit snugly. Then, with a drill and screws, secure the joists to the hangers.
Check each joist to make sure your platform is level. If a joist is a bit off, a wood shim can help level it.
Step 9 – Install Decking Boards to the Top of the Joists
Begin at an end: Start by aligning a decking board against the first joist. Check that it’s flush with the edge for a clean look. Hold it steady and then drill two screws into the board—one at each end—securing it to the joist. Move down the line, driving screws through the board into each intersecting joist.
Mind the gaps: A crucial but often overlooked step is leaving a small space between each decking board. Use a spacer or a small nail to keep your gaps consistent. These gaps are vital for:
Expansion and contraction: Wood responds to weather, and those spaces allow it to breathe.
Drainage: Gaps prevent water from pooling, ensuring a dry deck.
Sawing it down to size: If your boards extend beyond your joist frame, don’t fret. Mark the excess length with a pencil and line up your circular saw. Finding a comfortable stance, cut along the marked line for a tailor-fit finish of your deck.
Step 10 – Stain and Seal Wood
Pick Your Stain: Stains always have pigment or color in them. Select a stain with high weather resistance and a color that matches your style. I prefer a semi-transparent stain since it enhances the wood grain and stands up well to the elements, including UV rays.
Sealing Matters: After staining, don’t forget to apply a waterproof sealer. This extra layer is crucial for keeping moisture out and preserving your platform. Sealers have no color, and they dry clear.
Applying Stain and Sealant
Ensure Wood is Clean and Dry: Clean any debris or dust off your wood and make sure it’s completely dry.
Apply Stain: Using a brush, roller, or sprayer, evenly coat the wood following the grain. Remember, it’s not just aesthetics—this is your platform’s armor!
Allow to Dry: Patience, my friend. Let the stain dry as the manufacturer recommends, usually 24-48 hours.
Seal It: With a clean brush or sprayer, apply the sealant thoroughly
FAQs
How much does it cost to build a tent platform?
The cost of building a tent platform depends on several factors, such as the size, design, material, and location of your platform.
You can expect to spend between $1,000 to $5,000 on materials, and between $1,500 and $3,500 on labor, for a standard platform that can fit a 12’x14′ tent.
However, these are only rough estimates, and your actual cost may vary depending on your specific needs and preferences and the current cost of lumber.
How long does it take to build a tent platform?
The time it takes to build a tent platform also depends on several factors, such as the complexity, skill, and tools involved in the project.
You can expect to spend between one and two days building a basic platform that can fit a 12’x14′ tent. However, this is only a rough estimate, and your actual time may vary depending on your specific needs and preferences.
What are the advantages and disadvantages of a tent platform?
A tent platform can have both advantages and disadvantages, depending on your situation and preference. Here are some of the pros and cons of using a tent platform:
Advantages
– Can protect your tent from water and other damage, turning your canvas tent into a practical and enduring shelter. – Can provide you with a flat, comfortable, and dry surface for sleeping and relaxing, regardless of the terrain and weather conditions. – Can discourage insects and animals from living under your tent, and reduce the debris that you track into your tent. – Can offer more headroom, storage space, and configuration options than a ground tent, especially for larger and taller tents. – Can enhance the appearance and style of your tent, making it look more elegant and inviting.
Disadvantages
– Can be expensive and time-consuming to build, requiring materials, labor, and tools that may not be readily available or affordable. – Can be difficult and tricky to pitch a tent on, requiring special techniques and equipment to anchor the tent securely and properly. – Can be less flexible and movable than a ground tent, requiring more planning and preparation to find a suitable and legal location to set it up. – Can reduce the natural and authentic feel of camping, as it separates you from the ground and the elements.
How to pitch a tent on a platform?
You want to pitch your tent in the same way and shape that you would on the ground. You fasten the tent to the platform with screw through the metal grommets on your tent not the elastic bands. Your guylines really need to have the same angle they would on the ground to avoid stress on the tent poles. This might mean using short guyline poles or stakes that are attached to your platform. Remember to keep 1-2 feet of line you can tension between the guyline pole and the tent.
How can I figure out how much lumber I’ll need for my tent platform?
To figure out the amount of lumber you need, first decide on the dimensions of your tent platform. Let’s say your desired platform is 10 feet by 12 feet. Standard lumber sizes typically come in even-length increments, so you’d need to calculate how many pieces of lumber will cover the platform’s length and width when cut to fit. For custom sizes, you can get beams cut to specific lengths at your local lumberyard or home improvement store—just bring your measurements.
Why use concrete for the posts?
Pouring concrete for your post holes ensures a stable and durable deck foundation to withstand the rigors of mother nature. A concrete base prevents your structure from shifting, keeping your tent platform level and secure.
Why use a stain or sealant?
When building a tent platform, selecting and applying the right stain and sealant is crucial for durability and aesthetics. You’ll want to choose a stain that not only complements the natural beauty of the wood but also provides a reliable waterproofing barrier, especially under heavy rain. You don’t always need both, especially if you want the natural wood color.
How to store a sleeping bag in 4 steps. It’s not just about tossing it in the closet until your next camping trip. What’s the right way to store your sleeping bag?
In this guide, you’ll learn the 4 steps to properly store a sleeping bag. Whether you’re a backpacking enthusiast or a casual camper, you’ll find tips to store a sleeping bag properly to maximize its life and ensure it is in peak condition for your next journey into the great outdoors.
Key Takeaways
Keep It Loose: Ditch the stuff-sack when not trekking.
Keep It Dry: Always air the bag post-adventure, keeping moisture and mold at bay.
Store It Cool: Store your bag loosely in a large, breathable storage bag or hang it in a dry place
Contents
How to Store a Sleeping Bag
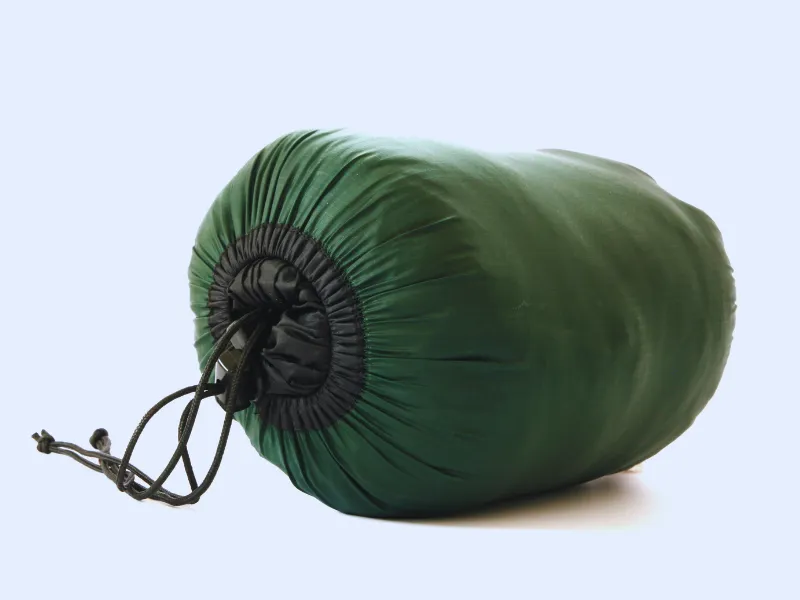
Step 1 – Remove the Sleeping Bag from the Compression Sack
When you travel or backpack, compression sacks are spacesavers. They compress your sleeping bag down to a manageable size, keeping it compact and easy to carry. But once you’re home, it’s a different story. Compression – great for mobility, not so great for long-term storage. Let’s break down why.
Fabric and Fibers: The insulation of your sleeping bag whether synthetic or down is made to “breathe”. Prolonged compression can crush the fibers, robbing your sleeping bag of its fluffy warmth—the very thing that keeps you toasty at night.
Step 2 – Air Out and Dry It
Airing out your sleeping bag after each camping trip is crucial. It’s not just about removing the stench of sweat, body oils, or campfire; if any moisture, be it from humidity, rain, or even your own body, lingers, it can become a breeding ground for mold and mildew. Not only is it unpleasant, but such growth can also deteriorate your sleeping bag’s materials, especially the synthetic or down filling.
You don’t need to wash a sleeping bag after every outing. Over-cleaning can prematurely wear your bag down. Spot cleaning does the trick for most parts.
Outside: Hang your bag up on a clothesline or a large hanger.
Inside: Turn your sleeping bag inside out and drape it over a railing or chair or lay it flat—just ensure good air circulation around and inside the bag.
Dryer: If weather’s not on your side, the air fluff/lowest heat setting in your dryer can work wonders. Chuck in a couple of clean tennis balls—they’ll help fluff the filling, making it as good as new.
Fan: No dryer? No problem. Position a fan nearby to ramp up air movement and whisk away moisture.
Avoid keeping the bag in direct sunlight for too long, which can wear the fabric down. Keep heat sources at bay, too. Too much heat and you’ll risk damaging it.
Step 3 – Loosely Place It Inside a Large Cotton or Mesh Storage Sack
A storage sack isn’t the compression stuff sack you jam your sleeping bag into while moving. Remember, the bag must be completely dry before storing it in a cotton or mesh sack.
Here are some tips for keeping your bag in a mesh or cotton storage sack:
Use a sizable storage sack: Look for a cotton or mesh sack, which promotes crucial airflow. A large laundry bag works well if your sleeping bag doesn’t have a storage sack.
Gently stuff your bag inside: The key here is to avoid tight rolls or folds. Your sleeping bag loves space; let it loft naturally.
Spaciousbeats snughere. It should accommodate your sleeping bag without squishing it.
Step 4 – Store It in a Cool and Dry Place
Storing your sleeping bag properly in a cool and dry place is pivotal to maintaining its insulating capabilities and loft.
Option 1) Breathable Storage Bag
When tucking away your sleeping bag in a closet, on a shelf, or under the bed, ensure it’s in a breathable storage bag—preferably cotton or mesh. This will prevent moisture from accumulating and causing damage.
What to Avoid: Airtight Plastic, Garages, Attics, and Basements
Do not store your sleeping bag in airtight plastic bags or bins — even with silica gel packs, airtight compression degrades the bag’s loft over time. Instead, keep the bag loose in a large breathable cotton or mesh storage sack in a cool, dry, climate-stable indoor space such as a closet or under the bed. Avoid garages, attics, and basements, where heat and moisture extremes can damage the insulation.
Option 3) Hanger in the Closet
A unique way to keep your sleeping bag’s loft in tip-top shape is to hang it up on a sturdy hanger. However, don’t just shove it in a tight space – let it hang freely. This ensures even air circulation to every nook and fiber.
Any other tips or suggestions for storing your sleeping bags?
FAQs
How can I avoid pests and dust while storing my sleeping bag?
– Regularly inspect the storage area for any signs of pests. – Seal any gaps where critters might see an invitation. – Consider a layer of plastic wrap or a storage cover to shield from dust.
Are there any specific synthetic vs. down storage needs?
Not really any differences in storage recommendations. Synthetic bags can probably be stored compressed longer without losing too much loft. Down bags definitely should be stored closely and they theoretically can lose their loft with long-term compression.
Should I wash my sleeping bag before storing it?
This depends on how dirty your sleeping bag is. You don’t need to if it’s not dirty. You should not wash your sleeping bag too often, as it can also wear out the material and cause tears or holes. A good rule of thumb is to wash your sleeping bag once a year, or more if you use it frequently or in dirty conditions.
How can you lock a tent while you’re camping? The easiest method is to use a luggage lock.
Although you can lock your tent, you might consider alternative ways to secure your campsite and tent from other people or even bears, such as a small bell tied to the zipper, a safety pin, or a tent alarm.
You can easily enhance your tent’s security with a few simple steps and confidently enjoy the great outdoors.
Other than locking your tent, there are potentially better alternative methods of securing your tent at festivals or with your family, such as a portable tent alarm system.
Common tent-locking methods include luggage locks, shoelaces, wire, or a safety pins.
Contents
Locking Your Tent
When to lock your tent?
Most camping trips don’t require locking or securing your tent from theft or unwanted visitors.
You should rarely lock your tent from the outside, as doing so does little to deter theft.
You might want to consider locking a tent from the inside when camping at a festival such as Bonnaroo or camping with kids.
Camping at a festival
I can imagine attending a festival surrounded by the vibes, the music, and the intoxicated fans. It’s all a blast until something goes wrong. Someone might accidentally mistake my tent for their own, and I wouldn’t want to wake up to unexpected company. A lock keeps their party and potential mess out of my private space.
Remember, a lock is just a deterrent—not an impenetrable force field. Always exercise caution and consider safety first when tucked in for the night. Secure your valuables, and don’t rely solely on a lock.
Camping with kids
If I’m camping with my family, my curious kid might try to go on a nighttime adventure. A lock can be a safety guard to keep my child safe and discourage any unplanned exits during the night.
The primary goal of locking your tent at a festival is to prevent unwanted festival guests from accidentally entering it while you’re in it.You shouldn’t depend on locking your tent to secure your valuables when you’re not around.
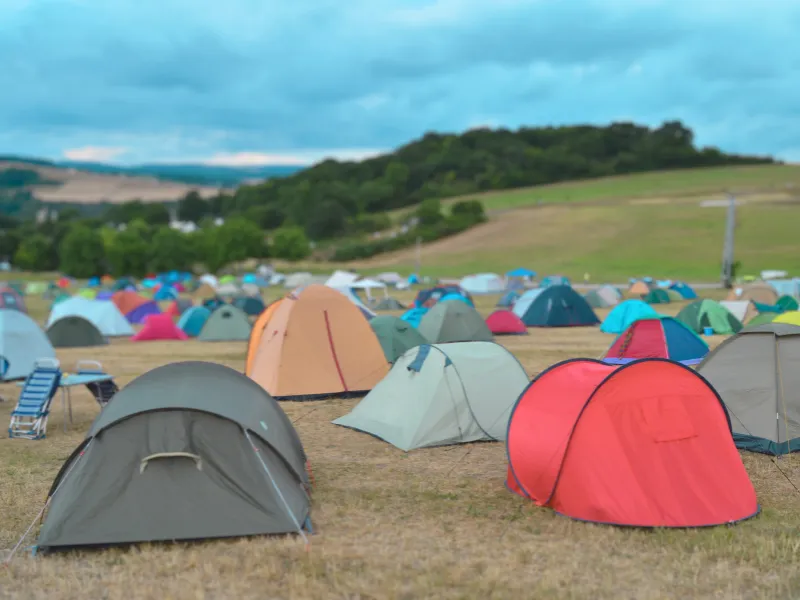
Thousands of tents, an air of carefree intoxication, and the constant noise hum create an exciting but less-than-secure environment. With a plethora of tents and lots of intoxication, it’s easy for a drunk person to mistake your tent for their own.
Secure your tent zippers from the inside
You can secure your tent inside in several ways, including tying shoelaces to the zippers, using a safety pin, a piece of wire, or even a luggage lock.
Tie a bell or other alarm to your entrance.
You could skip the lock altogether and tie a bell to your zipper, alerting you when the tent door is opened and closed. You could also consider a basic motionor wire-activated alarm.
Get to know your neighbors.
Set up camp near friendly neighbors. It’s all about community watch! If you notice something off, chat with the festival security.
Take all valuables with you or leave them at home.
Keep your money and valuables on your person even when sleeping. If that’s not possible, leave your items at home.
You could leave your valuables in a secured trunk safe in your car. Otherwise, there’s not any great way to secure your valuables. 99.999% of festival-goers are awesome people, so don’t get too paranoid.
Camping with your little adventurers requires balancing safety and fun. For keeping kids from wandering at night, alarms and bells are the safest primary solution—they alert you if a child opens the tent without blocking emergency egress. Kids are naturally curious and often act impulsively.
Let’s not forget the middle-of-the-night sprints to the bathroom and the frustration of a locked zipper.
Reserve locks for securing gear and valuables, not for keeping children inside the tent—locks can block emergency egress. If you do use a lock around kids, think easy to use. A complex lock system is asking for trouble. Here are some tips to help secure your tent with kids.
Use a safety pin or wire on the inside zippers
If possible, avoid locks altogether when camping with kids. Fumbling with a combination or key in the middle of the night isn’t worth it.
Safety includes keeping kids from wandering off and being able to get out of the tent in an emergency.
A safety pin or small wire might work better than a lock inside your tent.
Use a bell or other alarm
You might want to tie a bell to the zipper to alert you when your child opens the tent door. A basic tripwire alarm on your zipper may also work well.
Educate your kids on the safety process.
Involve your kids in the safety process.
Explain why keeping the tent zipped up and the campground rules is important.
Make your camping trip about fun activitiesto keep the little ones focused on the great outdoors rather than the tent.
In most situations, locking a tent from the outside isn’t recommended because it doesn’t deter determined thieves and may make you a more interesting target. There are other potentially better options for securing your campsite, though.
1) Take valuables with you
Always take your valuables with you if possible. The tent’s fabric isn’t secure from a thief with a knife. Similarly, your car isn’t a great place to keep your wallet or other valuables since breaking into a car is just as easy.
2) Choose a good campsite
When you’re planning your next outdoor escape, picking the right spot to pitch your tent is more than just a matter of scenery. Have you thought about how your campsite choice can affect the safety of your gear?
Look for well-reviewed campsites:Like picking a hotel, a campsite’s reputation can tell you a lot about its security. Check out what other campers say about the staff and the campsite’s upkeep. Positive reviews often reflect a safe and enjoyable environment.
Consider security measures: Does the campsite have security personnel or surveillance cameras? Facilities like gated entrances might seem overkill, but they give you peace of mind. Even the layout matters – a well-designed campsite can deter unwanted visitors just by its organization.
Store food outside your tent in a bear canister to avoid unexpected furry intruders in your tent.
3) Get to know your camping neighbors
Share about yourself: Exchange names and maybe even some background stories. Where are you all from? Any interesting hobbies that brought you into the great outdoors?
Be neighborly: If your neighbors struggle with their tent pegs or pole setup, offer a hand.
Create a mini-community: Chat about your plans for your stay. Are there any interesting trails you aim to tackle or that hidden spot by the lake you’ve heard about? Perhaps they’ll have some inside scoops or could join the adventure.
Stay connected: Connecting is easier than ever on social media. Why not follow each other? It’s a small world—campground connections can last a lifetime.
Remember, if you look out for their setup, they will likely watch over yours when you’re out.
Trust goes both ways, and a simple “Could you keep an eye on my tent?” can work wonders. You might not have locks on the fabric doors, but a community watch is priceless.
4) Consider an alarm or sensor in your tent
An alarm can be a great alternative to locking a tent and probably works more effectively since it draws attention to your tent and whatever’s happening. A tripwire alarm is the most affordable and would work best to alert you of a bear coming into your campsite or someone trying to open your tent door zipper.
Simtek makes a nifty premium alarm system, the Simtek StealthALERT, that instantly texts your cellphone if it detects someone opening your tent (it also has many other uses, such as protecting your luggage and backpack).
Some considerations when picking a tent alarm:
???? Motion-Activated: Alarms when it spots movement.
???? Wireless Connectivity: Sends an alert straight to your phone.
???? Battery-Powered: No outlet? No problem!
????️ Discreet Design: Keeps a low profile, not to draw attention.
Stashing your stuff in your car may seem clever, but a thief can easily smash glass and steal your valuables in seconds. A trunk safe is an extra barrier, making your car a less enticing target.
A sturdy metal box fastened inside your car’s trunk is impervious to quick-fingered thieves.
Material Matters: Go for metal if possible.
Lock it Up: A trunk safe must be secured to your car; otherwise, it can easily be taken.
Size Wise: Make sure it’s spacious enough to fit your stuff, from cameras to cash.
Installation: Pick one that’s easy to install and remove.
Locking a tent is easiest with a luggage combination lock, but you might want to consider alternative options to securing your campsite first. Don’t forget to assemble your camping checklistand plan some delicious camping meals. Locking your tent is part of a good safety plan while camping, including creating a custom first aid kit that meets your needs.
Leave any suggestions about how you secure your campsite and if you lock your tent.
FAQs
Are there any special locks designed for zippers on camping tents?
There are not any special locks designed for locking tents. The best option is a zipper lockused for travel luggage.
Is it possible to live in a tent full-time? Yes, but it takes thoughtful preparation and planning. Before you commit to full-time tent living, it’s essential to understand the benefits and challenges of this alternative lifestyle.
I have decades of experience hiking and camping and have researched and learned from others’ experiences living in a tent full-time.
Whether you’re considering this lifestyle change for financial, health, environmental, or personal reasons, we hope this guide will help you make a more informed decision.
Key Takeaways
Living in a tent full-time can be a liberating experience, but it also comes with many significant challenges.
Before making the switch, it’s essential to understand the benefits and challenges of this lifestyle and prepare accordingly.
This guide will provide the information you need to decide whether full-time tent living suits you.
Living in a tent full-time is not the same as camping for a short time. It requires a lot of preparation and planning and a willingness to give up some of the comforts and conveniences of modern life.
Questions to ask yourself
Are you willing to give up some of the comforts and conveniences of modern life?
Do you have a plan for your work, income, and expenses?
How will you deal with the weather, wildlife, and safety issues?
What are your goals and motivations for living in a tent?
Do you have a legal, safe place to set up camp long-term?
Answering these questions will help determine if you are ready for full-time tent living.
I recommend camping for an extended time, especially in the winter, to get a feel for living in a tent year-round before committing to it.
Off-grid living
Living in a tent full-time often means living off-grid, which requires additional preparation and planning. Off-grid living means being self-sufficient and relying on alternative energy sources like solar power. It also means providing your own food, water, and other necessities.
If you are considering off-grid living in your tent, make sure you have a plan for all your basic needs. This includes food preservation, water treatmentand storage, waste management, and emergency preparedness.
Comfort and safety
Living in a tent full-time can be challenging regarding comfort and safety. Make sure your tent is spacious, durable, and insulated, and invest in comfortable furnishings to make your tent feel like home.
Lay down carpets to soften the ground, invest in a warm and comfy bed, and ensure you have the necessary amenities.
Regarding safety, be aware of the weather and wildlife in your area and take necessary precautions. Make sure your tent is properly secured, and invest in a good-quality tent that can withstand extreme weather conditions.
Living in a tent full-time can save you money on housing expenses. You also won’t have to worry about maintaining a home or paying for repairs. Instead, you can focus on enjoying your surroundings and living a simpler life.
Living Sustainably
Living in a tent full-time can help you live a more sustainable lifestyle. You’ll use fewer resources and produce less waste than in a traditional home, which can help you lower your carbon footprint and reduce your environmental impact.
Experiencing Nature
One of the most significant benefits of living in a tent full-time is the opportunity to experience nature. You’ll be able to enjoy the beauty, diversity, and healing power of the natural world every day.
Whether camping in a national park or living off the grid in the wilderness, you’ll be able to connect with nature in a way that’s impossible in a traditional home.
Developing New Skills
Living in a tent full-time will also help you develop new skills and become more self-reliant. You’ll need to learn how to set up camp, cook over a campfire, and stay warm in cold weather.
You’ll also need to learn how to find food and water, navigate the wilderness on hikes, and deal with emergencies. These skills can help you become more resilient and independent and can be valuable in many different areas of life.
Many people live a nomadic lifestyle by participating in the WWOOF community (not sponsored, but I find it a very intriguing idea).
Having More Flexibility
Living in a tent full-time can give you more flexibility, mobility, and freedom to travel and explore. You won’t be as tied down to a specific location or a traditional job, so you can explore new places, meet new people, and experience new things without worrying about the constraints of traditional living.
One of the biggest challenges of tent living is dealing with the weather, especially in winter.
You’ll be exposed to the sun, wind, rain, and cold temperatures.
To protect yourself from the weather, you may need to invest in high-quality gear, such as a sturdy tent, tarps, waterproof clothing, and warm blankets.
Coping with Pests, Bears, and Potential Threats
Living in a tent means sharing your space with various creatures, including insects, rodents, and other animals.
You must protect yourself and your belongings from these pests using bug nets, ant traps, and bearproof containers to store food.
Lacking Amenities and Facilities
Living in a tent means you’ll have to give up some of the amenities you’re used to, such as electricity, plumbing, and internet access.
You’ll need to find alternative ways to meet your basic needs, such as using a portable stove for cooking, carrying water from a nearby source, and using a battery-powered device for communication.
Limited Space, Privacy, and Security
Living in a tent means having limited space, privacy, and security if you live with others.
To make the most of your living space, you must be creative and resourceful, such as using storage containers and multi-functional furniture.
You’ll also need to find ways to protect yourself and your belongings from theft and intrusion, such as using locks and alarms.
Limited Income Opportunities
Tent living full-time may mean you’ll need a different job to make money. Unless your job is remote via the internet or you plan on hardcore off-grid homesteading, you’ll need to figure out how to make income.
I think working with a WWOOF host is a potential and interesting way to offset living costs while tent camping full-time. Note that WWOOF is generally an exchange of work for room and board, not paid employment.
Facing Legal, Social, and Personal Issues
Living in a tent may also involve legal, social, and personal issues. You may need to obtain permits and follow regulations to camp in certain areas and face stigma and isolation from others.
Most public land only allows for 14 days of camping, although this may be less in certain areas. You’ll also need to cope with the emotional and psychological challenges of living off-grid, such as loneliness, boredom, and stress.
Many long-term tent campers report having difficulty dealing with anxiety when they transition back to traditional living in a city, at least in my research.
Size: Make sure the tent is spacious enough to accommodate all your gear and provide enough room to move around comfortably. For families, consider multi-room tents.
Durability: Choose a tent made of high-quality materials that can withstand harsh weather conditions, especially rain and snow.
Ventilation: Look for a tent with good ventilation to prevent condensation and keep the air fresh inside.
Weight (optional):Consider the tent’s weight if you plan on carrying it for extended periods.
Finding a Suitable Location
Safety: Choose a campsite location that is safe from natural hazards such as floods, landslides, and falling trees.
Legality: Ensure you can camp in the area and obtain the necessary permits or licenses.
Convenience: Follow leave-no-trace principles and choose a location that is easily accessible and close to a reliable water source.
Privacy: Look for a secluded spot away from roads or hiking trails to enjoy peace and quiet.
Securing Water
Location: Locate a nearby water source such as a river, lake, or spring.
Storage: Store enough water for emergencies and unexpected events.
Establishing Essential Systems
Electric: Create a plan for running and charging your devices and appliances, such as a portable generator or solar panels with a battery system.
Internet: Get a portable Wi-Fi hotspot if you need internet.
Heat: Your heating needs will vary depending on the season and your camping location. Tent heaters are a carbon-monoxide and fire hazard — only use a heater rated safe for indoor/tent use, ensure ventilation, use a battery-powered CO detector, and never sleep with a heater running.
Trash: Plan how you will dispose of your waste, whether grey water, sewage, or trash.
Nutrition: Plan your camping meals, consider how you will obtain food, and store perishable items such as a cooler or portable refrigerator. Learn how to dehydrate your food for shelf stability to reduce the need for refrigeration.
Wildlife Awareness
Learn about the animals in the area and their behavior.
Bring a backup shelter, such as a tarp or emergency blanket.
Know the emergency procedures and evacuation routes.
Insulating and Keeping Your Tent Warm and Dry
Use a groundsheet to prevent moisture from seeping in.
Use a rain fly to protect your tent from rain and wind.
Bring a tent-safe heater or warm clothing to stay warm during cold nights
FAQ
How do you get electricity in a tent?
You can use solar panels, batteries, generators, or power banks to generate and store electricity in your tent.
How do you get internet in a tent?
You can access the Internet in your tent using a mobile hotspot, a satellite phone, or public Wi-Fi.
How do you wash clothes while living in a tent?
You can wash clothes in your camp area using a bucket, a sink, or a river. Dispose of the grey water according to LTN principles. Many towns have laundromats, and many larger private campgrounds have laundry facilities.
How do you make money in a tent?
You can work remotely, sell your skills, create content, or take on temporary gigs. Note that WWOOF is generally an exchange of work for room and board, not paid employment.
Is it legal to live in a tent permanently?
The legality of living in a tent in the USA depends on where you want to pitch your tent and for how long. Jurisdictions have different laws and regulations regarding camping on public or private land.
Some states, such as Missouri and Tennessee, have passed statewide bans on sleeping on state-owned land, making it a misdemeanor or a felony to do so. Even on your land, you may face zoning laws, building codes, or homeowners association rules prohibiting long-term tent living.
Dispersed camping is usually allowed for 14-16 days on public lands such as the Forest Service or BLM. Camping longer than the stay limitation set by each forest (usually 14 days) is prohibited per Title 36, Chapter II, Part 261.
Does WWOOF sponsor you?
No, Worldwide Opportunities on Organic Farms (WWOOF) does not sponsor Outdoor Footprints. I do find their organization and mission intriguing for long-term travelers. I have not participated in a WWOOF program or with any of their hosts. Please comment below if you have any experience you’d like to share.
Ankle sprains, cuts, and blisters are common hiking and camping ailments that require first aid. A first aid kit is a hiking essential, and you can purchase a pre-made first aid kit relatively inexpensively. There is no such thing as a perfect wilderness first aid kit. You should consider your own situation when choosing or putting together a first aid kit.
In addition to being a medical provider, I’ve hiked and camped for multiple decades and carried many different first aid kits from just bandaids to a more comprehensive first aid kit. I’ve researched the items in the most popular first aid kits in addition to the recommendations by the Red Cross. From this, I’ve created a first aid checklist that should work well if you’re a beginner hiker or an experienced hiker looking to update your hiking essentials.
Contents
First Aid Checklist
6 Pre-Checks for Your First Aid Kit
Buck Tilton, in his excellent book Wilderness First Responder, suggests several considerations before creating a first aid kit [1].
Here are 6 questions to ask yourself before going through this first-aid checklist:
What will your environment be like, including terrain, weather, and altitude?
How far away from emergency services will you be? Hiking and camping in a remote location require additional first aid supplies you probably don’t need for a short day hike.
How many people will be in your group? This helps determine how many supplies you need to bring in your kit.
What are your physical conditioning and medical needs and those of your group? Many people have medical conditions, such as diabetes or other conditions, that might require additional emergency items in their first aid kit.
Do you have any medical expertise and skills, and can you use all the items in your first aid kit? Never carry items or medications you don’t know how to properly use.
Can everyone carry their own first aid kit? Each person should carry their own personalized first aid kit if possible.
Drinking frequent sips of plain water is good for dehydration. Sports drinks and water-rich food are also good for dehydration.
If you are severely dehydrated, you need to seek a medical professional immediately, as you may need IV fluids or other medical support.
Chronic dehydration may also increase the risk of developing other chronic diseases [1]. Carrying adequate water is essential for day hikingto prevent dehydration.
I’ve spent multiple hours researching the recommended foods and drinks for rehydration when dehydrated. I’m also a medical provider who has seen and treated many dehydrated patients.
If you are mildly dehydrated, such as during a hike or after vigorous exercise, these 10 foods and beverages are good for dehydration.
Regular water without anything added is generally the best antidote for dehydration from hiking or vigorous activity.
If you’re exercising or hiking longer than an hour, a snack might also help you continue your activity without sudden energy loss. This is primarily related to blood glucose and tissue glycogen depletion rather than water loss or sweating during activity.
Our bodies are efficient at conserving sodium and other electrolytes, so we usually only need regular plain water to rehydrate us during and after hiking or vigorous exercise. If you’re outdoors, you must drink clean purified water to avoid water-borne illness.
2) Sports Drinks
Sports drinks such as Gatorade also help with rehydration primarily through their high water content. They usually contain lots of extra sugar, which isn’t usually necessary unless you’re vigorously exercising for more than an hour.
The extra electrolytes are probably not necessary unless you have extensive fluid loss from diarrhea or vomiting or if you sweat profusely for multiple hours on end, such as during a marathon or other athletic event.
3) Coconut Water
Coconut water can also rehydrate you as it has electrolytes, sugars, and high water content. Studieshave shown that coconut water rehydrates just as well as sports drinks, although it may cause more bloating and an upset stomach.
Coconut water also requires refrigeration several hours after opening to prevent spoilage.
4) Oral Rehydration Solution
Oral rehydration solution or oral rehydration salts (ORS) is a glucose-electrolyte solution formulated by the World Health Organization (WHO) to reduce dehydration in people with severe diarrhea.
ORS is usually available in powder packets that you dissolve in clean purified water and then consume. Pedialyte is a common premixed ORS similar to the WHO formulation.
Generally, ORS therapy is done under the supervision of your medical provider, primarily in the setting of dehydration due to severe diarrhea. Most hikers and athletes do not need ORS rehydration unless they’re in the backwoods with severe diarrhea.
5) Milk
Milk also contains carbohydrates and electrolytes, lots of water, and the bonus of additional protein. Research studiessuggest that milk may be a great post-exercise rehydration drink.
Not everyone can tolerate the lactose in milk, which can cause bloating and loose stools. Because milk is calorie-rich, it is probably not an ideal beverage for rehydration during exercise as it may upset your stomach during your activity.
6) Soups
Soup is another ideal rehydrating food post-physical activity. It usually contains significant water and nutrition to replenish your energy. While broth is often recommended, there is no reason to stick with only broth unless you’re on a calorie-restricted diet.
As a caution, many soups, including broth, contain lots of sodium, which may make you feel even more thirsty and swollen.
7) Melons
Melons are a great way to rehydrate, as they usually have about 90% water content. They also provide fiber to help the natural sugars absorb more evenly.
8) Cucumbers
Cucumbers are also a good rehydrating food, with a 96% water content. They can also be added to water for a taste benefit. However, they do cause some people to burp and have stomach aches, so keep this in mind before consuming them.
9) Berries
Strawberries, blueberries, raspberries, and many other berries contain rehydrating water, fiber, and sugar that can help you recover after hiking or vigorous exercise.
Remember that you’ll need to eat a bunch to rehydrate yourself completely. Berries work well as a supplement to the other rehydrating methods.
10) Tomatoes
Tomatoes contain 95% water and can help increase your water intake to avoid dehydration or rehydrate after hiking or other sweaty activities. Tomatoes are a low-calorie food that can supplement your other water intake.
Dehydration commonly occurs from water loss, usually from sweat or diarrhea. During vigorous exercise in a hot, dry environment, one can lose more than 1-2 L/hr.
If you get diarrhea, you can lose several liters of fluid with electrolytes daily. A sports drink or coconut water might better replenish your body when you have diarrhea. Medical help is recommended for guidance.
Otherwise, if you’re hiking or participating in other vigorous activities, plain water works best, as our daily diets usually make up for the loss of electrolytes such as sodium.
What are Common Signs and Symptoms of Dehydration?
Most people will get a natural sense of thirst when their water levels are decreased. A common sign of dehydration is dark urine. Your urine should usually be clear to yellow when you’re hydrated. Other common symptoms of dehydration include headaches, dizziness, or muscle cramps. Here are some common signs and symptoms that may indicate dehydration (usually, you will have more than one if you’re dehydrated): – Dry tongue – Headaches – Confusion – Tiredness – Dizziness – Craving sugar – Muscle cramps – Chills – Dark urine
How to Prevent Dehydration?
Dehydration sometimes can’t be prevented, such as during severe diarrhea, but most dehydration CAN be prevented with a little planning.
– Drink 0.5L (16 oz) of water around 1 hour before your activity. – Drink small sips of water every 10-15 minutes or approximately 0.5L/hr during your hike or other activity (more per hour if you’re profusely sweating). – Drink another 0.5L (16 oz) after you finish your activity to rehydrate.