How to Dehydrate Food in 10 steps

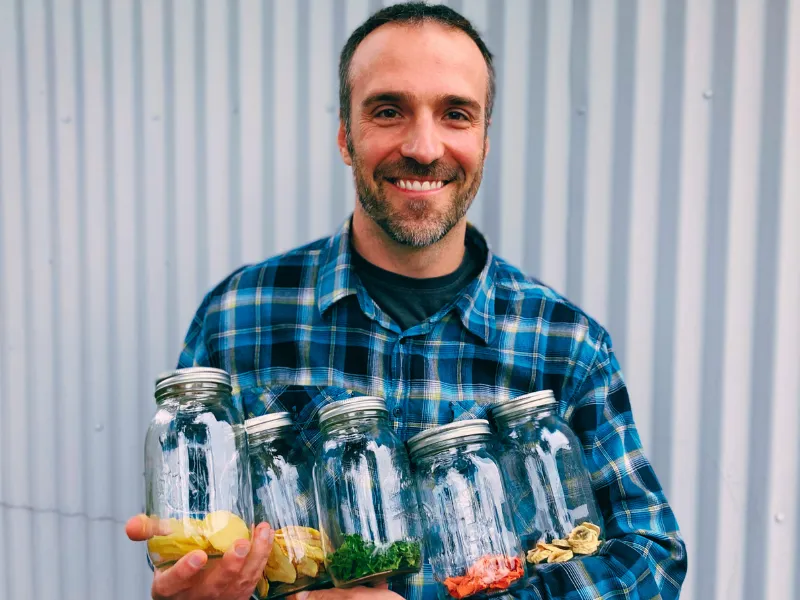
Author holding his dehydrated food in jars

When you learn how to dehydrate food, you can create snacks, meals, and even emergency rations while saving money. Dehydrating food is a great way to preserve fruits, vegetables, herbs, and even meat for long-term storage or lightweight meal options while camping or hiking. 

Over the past several years, I’ve used a dehydrator to dry various foods, primarily fruits, for snacks. I have experience growing up around many dehydrated fruit leathers and wild game jerky.

When researching and writing this article, I dehydrated five fruits and vegetables: apples, bananas, kale, potatoes, and carrots. I didn’t use expensive equipment, and it was easy to do in our compact kitchen. I look forward to dehydrating many camping meals for our next outdoor adventures. 

1) Choose Fresh Food

Photo: ©Daniel Borkert/OutdoorFootprints.com

Choose fresh, ripe fruits, vegetables, and herbs for dehydrating. Ideally, the produce should come fresh from your garden or local farm.

Store-bought produce also works well if it is fresh and ripe.

Frozen vegetables can also be used since they are usually frozen when fresh. 

2) Prepare Your Equipment
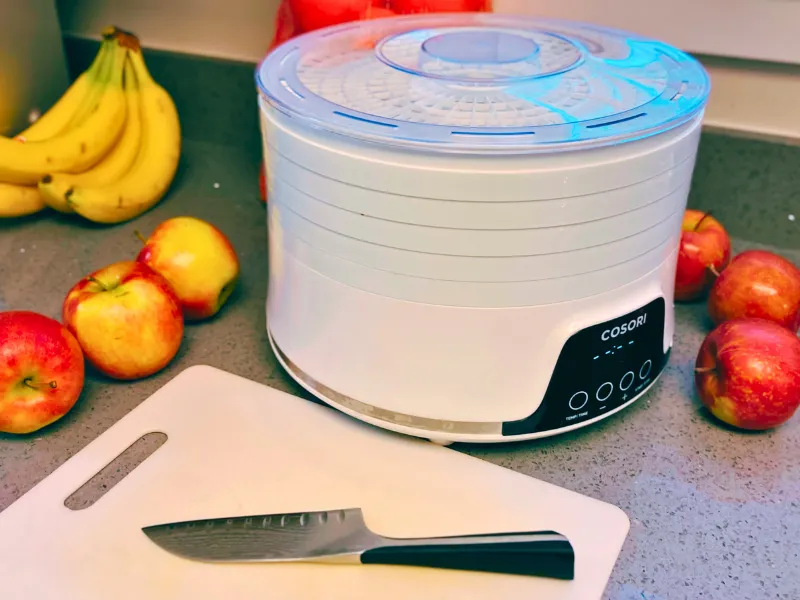
Photo: ©Daniel Borkert/OutdoorFootprints.com

You don’t need special kitchen tools to start dehydrating, but I strongly recommend acquiring a standalone electric dehydrator.

You can use an oven to dehydrate, but it’s slow and inefficient. 

My basic electric dehydrator works perfectly for most homemade snacks and meals.

Electric Dehydrators

Electric dehydrators are standalone appliances that are best for dehydrating food at home. They usually have a built-in fan and an adjustable heater between 90-150°F (32 and 66°C).

Electric dehydrators are available in two form factors: stackable/vertical and box/horizontal.

Stackable dehydrators are less expensive and expandable, but you will need to cycle the trays in the stack for more even drying.

Box dehydrators dry more evenly and efficiently but are more expensive. Both electric dehydrators will require separate tray liners for drying liquids/mashes such as fruit leather or soups. 

Tips for Electric Dehydrator Use

  1. Use a dehydrator with an adjustable heater between 90-150°F (32 – 66°C)
  2. Check the dehydrator’s temperature about 20 minutes after starting, as temperatures often vary depending on the manufacturer. 
  3. Check the trays every few hours to evaluate how evenly the trays are drying.
  4. Use a nonstick cooking spray with fruits or other food that tends to stick to trays or liners.

Oven-Drying

Oven-drying isn’t recommended unless you’re just learning to dehydrate. It’s hard to keep a consistent temperature, and the drying process usually takes almost twice the time of an electric dehydrator.

Also, there’s the increased risk of a kitchen fire or risk of harm to kids or pets, or even accidentally burning the food.

Electric dehydrators work significantly better and are inexpensive ($50 for a basic electric dehydrator). Some newer ovens with convection features have a dehydrating cycle, which can work well. Most ovens are non-convection ovens.

Follow the manufacturer’s directions for dehydrating with a convection oven that has a dehydrating cycle.

For all other non-convection ovens, here is how to use your oven to dehydrate. 

How to Use an Oven for Dehydrating

  1. Set the oven at the lowest temperature, preferably  <140°F or 60°C.
  2. Place an empty baking sheet to catch any falling drips or food. 
  3. Place food on removable wire racks. 
  4. Leave the oven door cracked open 1-2 inches for airflow. 
  5. Place and use a fan outside the oven, blowing into a slightly cracked oven door. 
  6. Monitor the temperature with an oven thermometer and adjust oven heat accordingly. 
  7. Rotate food pieces as needed until dry.
  8. Do not leave the oven unattended. 

Other Dehydrating Methods

Sun-Drying

For thousands of years, sun-drying food was the traditional method of dehydrating food. Sun-drying food requires an air temperature greater than 90°F and a relative humidity less than 60%. This works best in the Southwest USA.

It is recommended to sun-dry only chile peppers and fruits, including tomatoes. Fish, meats, and other vegetables are not recommended for sun-drying due to a higher risk of spoilage. 

Home-made dehydrators

There are lots of DIY dehydrator ideas if you’re so inclined. These come in all different designs and sizes. The important factors to remember are an adjustable heating of the air and even airflow across the food. 

Cutting tools

Beyond a cutting board and a sharp kitchen knife, you don’t need any special cutting tools. If you want even slices, consider a mandolin slicer with a hand guard. Your food processor can also be used for slicing. 

Clean work surface

Clean hands, tools, and cutting surfaces to reduce the risk of pathogens that can cause food spoilage or food poisoning. 

3) Prepare Food
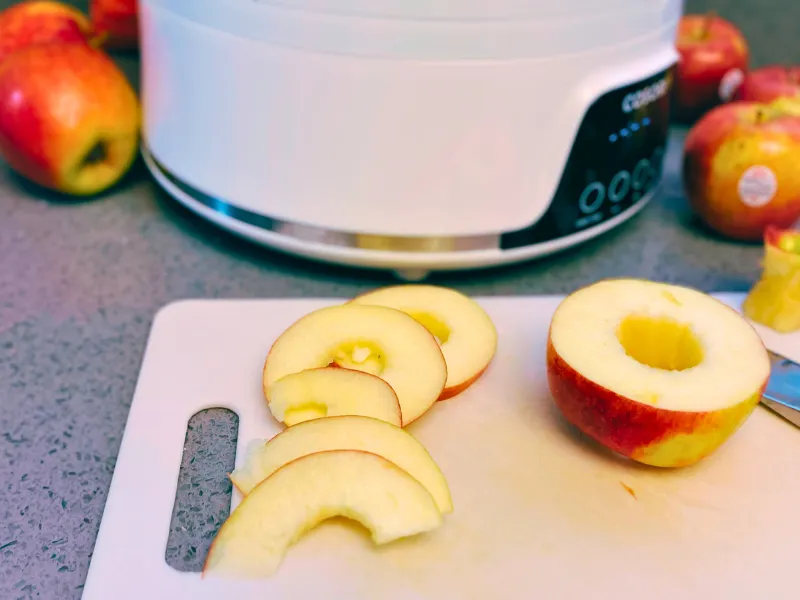
Photo: ©Daniel Borkert/OutdoorFootprints.com

Preparing food before dehydrating consists of evenly dividing it so it can dry consistently. This usually involves slicing fruits and vegetables evenly. I cut my cored apple into 1/4-inch slices.

Slice fruits and vegetables between 1/4-inch and 1/2-inch thick.

Slice meat to less than 1/4-inch.

Pretreat vegetables and fruits if desired. Marinate meat overnight if desired.

Precook food, including veggies and meat, that you would normally cook.

Pretreating

Pretreating vegetables and fruits can help decrease or stop browning, toughness, or spoilage. Some people prefer not to pretreat, arguing that it may destroy nutrients or digestive enzymes.

There are multiple ways to pretreat fruits and vegetables [1]. Most vegetables are best pretreated with steam or water blanching, while fruits and berries are best pretreated with soaks or dips. 

Steam-blanching

Use a steamer pan or basket to steam the food. 

Water-blanching

Photo: ©Daniel Borkert/OutdoorFootprints.com

Dip food into boiling water to water-blanch. I water-blanched my potato slices in boiling water for 5 minutes, then soaked them in acidic water for 10 minutes.

Syrup-blanching

Syrup-blanching is for fruits only and can add softness and retain fruit color. 

  1. Add 1.5 cups of sugar with 2.5 cups of boiling water. 
  2. Add fruit and adjust the heat to a simmer.

Soaking in acidic water 

 Acidic water soaking reduces browning in fruits, potatoes, and turnips. 

  1. Add 1 to 3 cups of lemon or lime juice or 1 to 3 teaspoons of citric acid powder per quart of water. 
  2. Soak food for 5 to 10 minutes in solution. 

Soaking in sulfite solution

Sulfite solution pretreatment comes with risks for people with asthma and allergies to sulfa-based products. I recommend trying other methods first, but sulfite soaking is often discussed in the dehydrating community. 

  1. Add 1 tablespoon of sodium metabisulfite powder in 1 quart of water (NOT sodium bisulfate or sodium sulfite). 
  2. Soak in solution for 5 minutes.

Soaking in fruit juice

Soak fruit in orange or pineapple juice for 5 minutes. 

Dipping in pectin 

A pectin syrup solution can be used to glaze fruits and berries.

  1. Add 1 box of pectin to 1 cup of boiling water
  2. Add ½ cup of sugar
  3. Add an additional cup of cold water
  4. Cool completely and glaze fruit with a thin film

Dipping in honey

  1. Add ½ cup honey with 1 quart of water.
  2. Dip fruit in honey solution.

Commercial fruit protector

Multiple products are available at the grocery store that are designed to decrease fruit browning. 

Spraying with lemon juice

Mist fruit on dehydrator trays with lemon juice.

4) Spread Food Evenly

Photo: ©Daniel Borkert/OutdoorFootprints.com

Keep space between food pieces to allow for airflow. It’s okay to mix and match different fruits and vegetables on the same tray. I mixed my apple slices with my bananas. Just keep in mind that they may dry at different rates.

Also, avoid mixing and matching strong-flavored foods such as garlic with mild foods such as fruit. Spread prepared meals or leathers less than ¼ inches thick on tray liners.  

5) Start Dehydrating

Photo: ©Daniel Borkert/OutdoorFootprints.com

I dehydrated my apples and bananas at 135°F (63°C). Every few hours, I checked the dryness and turned the slices or rotated the trays.

Time

The time to dehydrate varies significantly depending on the relative humidity and size of the pieces. It’s not uncommon for some larger pieces and chunks to take over a day to dry.

Here are several common foods and their general drying times: 

  • Precooked meals vary significantly (usually until crumbling) 
  • Fruit leathers take 6-15 hours.
  • Apple slices take 5-10 hours.
  • Bananas take 7-12 hours.
  • Blueberries take 8-24 hours. 
  • Cherries take 10-20 hours. 
  • Corn takes 6-12 hours. 
  • Cranberries take 14-25 hours.
  • Cucumbers take 4-6 hours. 
  • Grapes take 12-20 hours. 
  • Greens take 3-5 hours. 
  • Herbs take 2-18 hours. 
  • Jerky takes 4-8 hours. 
  • Mangoes take 6-12 hours. 
  • Mushrooms take 3-6 hours. 
  • Onions take 6-10 hours.
  • Oranges and other citrus take 9-13 hours. 
  • Peaches take 6-12 hours. 
  • Pears take 6-15 hours. 
  • Peas take 5-9 hours. 
  • Peppers take 6-10 hours. 
  • Chile peppers take 4-15 hours. 
  • Pineapples take 8-14 hours. 
  • Plums take 8-18 hours. 
  • Potatoes take 7-12 hours. 
  • Raspberries take 12-20 hours. 
  • Strawberries take 7-14 hours. 
  • Tomatoes take 8-12 hours. 
  • Zucchini takes 7-15 hours. 

Temperature 

Dehydrators usually have a temperature setting. However, the temperature of most dehydrators fluctuates by several degrees.

The following are guideline target temperatures for drying food:  

  • Vegetables with a target of 125°F (52°C)
  • Fruits with a target of 135°F (63°C)
  • Prepared foods such as soups with a target of 150°F (66°C)
  • Precooked meat (for jerky) with a target of 140°F (60°C). Per USDA guidance, heat meat to an internal temperature of 160°F (165°F for poultry) before or after dehydrating to kill pathogens.
  • Fruit leathers with a target of 135°F (63°C)

Turning and stirring

You should check the pieces every few hours and turn and stir, if appropriate, to make sure everything dries evenly. 

6) Test for Dryness

Photo: ©Daniel Borkert/OutdoorFootprints.com

I prefer my dried apples a little crisper, so when I bent it, I was looking for a snapping or cracking sound.

Dryness varies depending on the dehydrator, food type, humidity, and temperature. Guidelines for how long to dehydrate a specific food are just recommendations, as the variables, especially relative humidity, are difficult to control completely at home. Testing for dryness is critical to ensure the food is dehydrated properly. 

How to test for dryness of food in 3 steps

  1. Cool a piece of the food to room temperature before testing. 
  2. Compare to the description of finished dehydrated food:
  • Leathery or supple dehydrated food should be dry on the surface and able to bend. 
  • Brittle, dehydrated foods should break or snap when you bend them. 
  • Overdry food is better than underdry foods. 
  • Moisture should not be present in the center. 
  1. If food isn’t done at the end of the day, you can run a dehydrator overnight at a reduced temperature of 90-100°F (32-38°C). 

7) Remove Pieces of Food

Photo: ©Daniel Borkert/OutdoorFootprints.com

I would periodically remove pieces that felt done and let them cool for a few minutes. I would then test for dryness as above. Pieces that passed the dryness test went into a glass jar. The apples took about 8 hours to finish, and the bananas 11 hours.

Food in the dehydrator often dries at different rates, so remove individual pieces as they finish. Remember, overdrying is much better than underdrying [2]. 

8) Condition or Pasteurize Dried Food

Photo: ©Daniel Borkert/OutdoorFootprints.com

Dried fruit especially benefits from conditioning to equalize the moisture content among the pieces. This is usually done on the counter in a glass jar, which you can shake daily for several days.

Conditioning recently dehydrated food, especially dried fruits, is recommended if you plan to store it for more than a few weeks. Conditioning equalizes the moisture throughout the newly dried pieces, reducing the risk of spoilage.

To condition your newly dried food, place it in a glass jar and seal tightly. Remember only to place one food type per jar. Set the jar aside at room temperature away from direct sunlight. Gently shake the jars daily and check for any moisture or haziness on or in the jar (if so, return the food to the dehydrator for a few more hours and try again). 

Pasteurization is recommended for sun-dried foods or optionally for unpeeled fruits or veggies. Sometimes, insects lay eggs in the peels or sun-dried foods that don’t get killed in the drying process.

Pasteurization is achieved in two main methods: heat at 175°F (80°C) for 15 minutes or freezing at 0°F (-18°C) for 48 hours. Pasteurization may change the flavor and nutrients. 

9) Package Dried Food for Storage

Photo: ©Daniel Borkert/OutdoorFootprints.com

The final stage of dehydrating food consists of storing it for future use. The primary idea is to reduce air exposure to the food.

Consider storing foods in smaller containers as moisture will enter the food and container after you open it. Most properly stored fruits and vegetables will stay preserved for several months or more [3]. Homemade jerky lasts up to 2 months at room temperature or longer in the freezer [4]. You can best achieve good dehydrated food storage as follows: 

  • Air-tight containers such as glass jars
  • Vacuum sealed bags
  • Jars or bags with oxygen absorber packets 
  • Jars or bags with Silica gel packets for moisture protection 

Dehydrated food needs airtight containers, such as glass jars, to prevent absorbing moisture and spoiling. Then, store your dehydrated food in their containers in a dark, cool, dry place.

10) Rehydrate Food when Ready to Use

Of course, the whole purpose of dehydrating food is to use it at some point. Most dehydrated foods, such as dried apples, banana chips, or jerky, are consumed dry.

Some foods, such as dehydrated soups or many veggies, require rehydration before you can enjoy eating them. 

Two Methods to Rehydrate Food

  1. Hot-soaking –takes approximately 15 min to hours to rehydrate.
    • Pour boiling water to cover the dehydrated food in a container. 
    • Let stand with occasional stirring. 
  1. Cold-soaking – takes overnight or several hours to rehydrate. Food-safety note: perishable ingredients should not sit unrefrigerated for extended periods — keep cold-soak times limited and be cautious with meat, dairy, and eggs.
    • Pour room-temperature purified water to cover the dehydrated food.
    • Refrigerate overnight.

You can create dehydrated food at home with simple preparation, equipment, and testing. Follow the 10 steps in this article to get started and experiment with different ingredients and recipes. Check out our camp meals for inspiration.

Don’t forget to start your camping checklist before your next outdoor adventure. If you’re just getting started exploring the outdoors, look at our hiking for beginners while making some homemade dried snacks.

Please leave any comments or ideas below! 

FAQs

Why dehydrate my own food for camping and hiking?

I find dehydrating food interesting because it’s a great way to preserve food for camping and hiking.

Dehydrated food is lighter and more compact and doesn’t require refrigeration, making it perfect for hiking and backpacking trips.

You can also dehydrate many premade meals, such as soups, then rehydrate them on the trail or at camp.

You can also save lots of money when dehydrating your own food compared to the expensive freeze-dried food you get at the store.

Sources

How to Build a Fire in 5 Steps

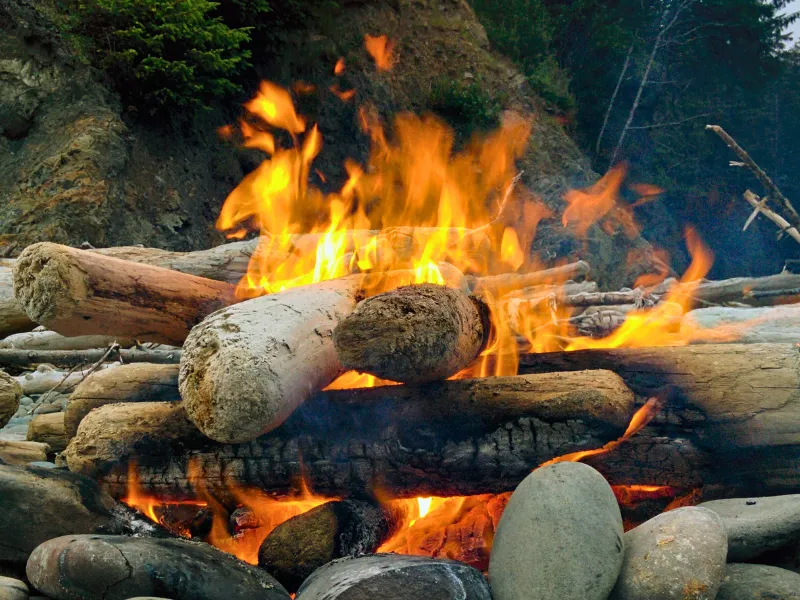
Bonfire on the beach

You can make and tend a cozy, successful fire in 5 steps, whether in your backyard, at the campground, or in the backcountry. Successful firebuilding is an art that takes practice.  

I’ve been building and making cozy, safe fires for decades, whether in the backyard, hearth, or the backcountry. I’ve experimented with several different fire-building methods with varying degrees of success. My favorite method is the log cabin method due to its burning efficiency and cozy, pleasing manner.  

Step 1 – Find a fire pit

Fire ring at campground
Photo: ©thefurnaceroom via Canva.com

Building a fire in a campground

Always use the designated fire pit or fire ring in a campground. Don’t try to move the fire ring or build a fire bigger than the designated fire pit. Never leave a fire unattended. 

Building a fire in backcountry/wilderness areas

If possible, use an existing fire ring or previous fire pit. You want to minimize environmental impact while also considering safety. Not all previous fire pits are great locations for a fire, so look for potential hazards such as low-hanging trees, bushes, or brush that is too close to your fire. 

If an existing fire pit or fire ring is not available or ideal, consider creating a fire mound. A fire mound is a 6-8” deep gravel or sand circular pile that you make flat. You then build your fire on top of the fire mound. When you are done with your fire, you scatter the fire mound, leaving minimal impact on the area and following the leave no trace guidelines. 

Step 2 – Gather firewood

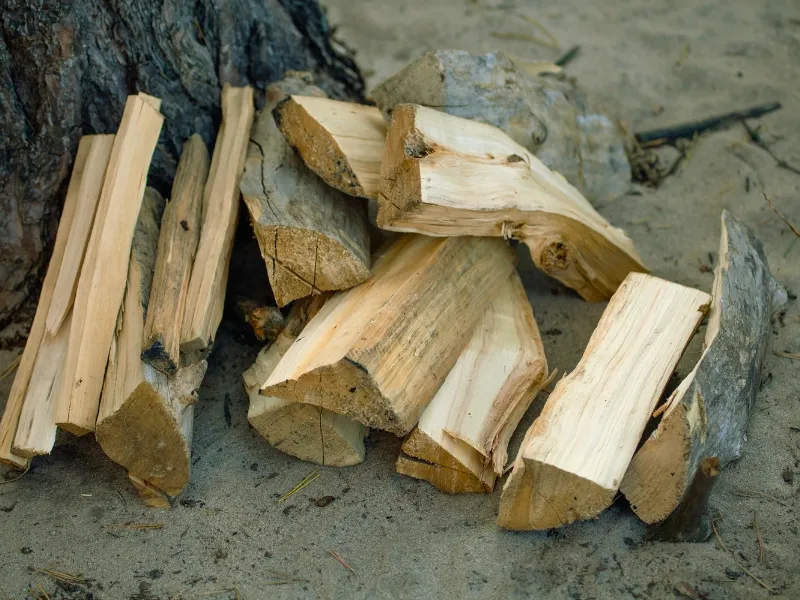
Pile of split firewood
Photo: ©Svetlanka777 via Canva.com

Next, you will need to gather the fuel for your fire. You can separate your firewood/fuel into 3 different groups: tinder, kindling, and fuel wood. 

Gather Tinder

Tinder provides the initial fuel for starting your fire. This means tinder should light easily and burn quickly. Tinder has many different options.

Generally, you want something light and very dry. When car camping, I often loosely crumple old newspapers as kindling. I also use paper towels or TP for kindling when backpacking.

Other great kindling includes yellow, dry pine needles or dry brown grass. The key is making sure it’s very dry and not too compacted together. You will generally need a handful or so of tinder. 

Gather Kindling

Kindling is the small and medium-sized sticks that are less than 1 inch in size and provide the fuel for your tinder when starting your fire. Kindling could almost be tinder, but it doesn’t start well by itself. Kindling burns longer than tinder and helps get your main fuel firewood going.

Often, you can create kindling by splitting pieces off your firewood chunks with a hatchet. Small, dry, dead branches also work well. You will need a small basketball-size pile of kindling. 

Gather Fuel Wood

Your fuel firewood provides the long-lasting heat and crackling logs that most people imagine when they think of a fire. When car camping, buying local pre-cut wood sourced < 50 miles away from your camp is best to avoid introducing pests [1].

If you’re gathering wood from the forest, check the regulations in the area for gathering wood [2]. You should only gather downed wood that is no thicker than an adult’s wrist. 

Artificial logs provide another option for fuel firewood and may burn cleaner than regular firewood [3]. The disadvantage of artificial logs is that they often don’t burn as hot or aesthetically pleasing as regular firewood. 

Step 3 – Build your fire structure

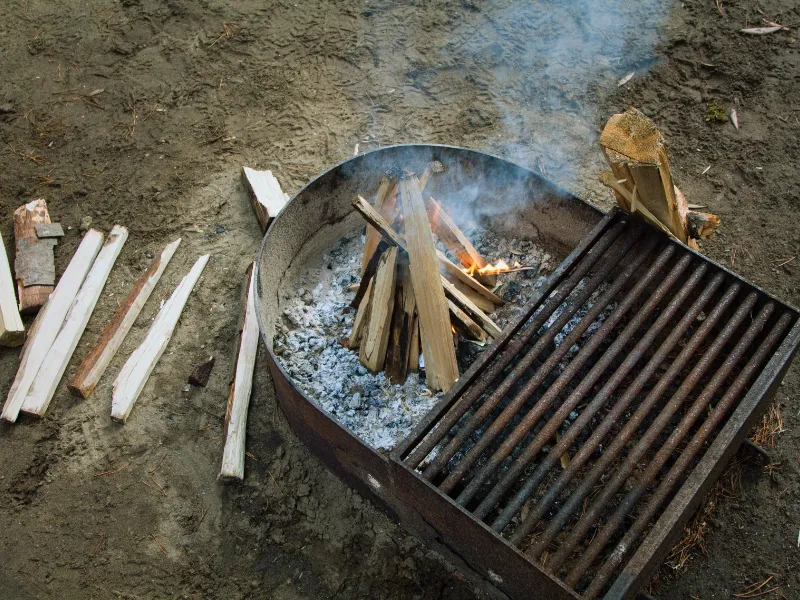
Teepee fire in a metal firepit
Photo: ©TinkerJulie via Canva.com

A fire structure is how you organize and burn firewood in the fire pit. 

Here are 6 popular fire structuremethods:

Log cabin fire

The log cabin fire burns slower but quickly makes a large fire.

How to build a log cabin fire 

  1. Place two large fuel wood parallel approximately 6”-12” apart.
  2. Stack two additional pieces on top at a right angle. 
  3. Continue alternate stacking patterns, building a log cabin-type structure. 
  4. Place tinder at the base in the middle of the structure. 
  5. Fill the inside of the cabin loosely with kindling.  
  6. Light kindling at multiple points. 

Teepee or cone fire

A teepee or cone fire works best for cooking because it burns fast and creates a hot bed of coal, but it needs more frequent maintenance to keep going. Cook food after the teepee collapses on a coal bed and feed the fire with kindling. 

How to build a teepee or cone fire

  1. Place several pieces of fuel wood on their edges, creating a cone-shaped structure. 
  2. Place the tinder inside the center of the teepee/cone.
  3. Place some kindling inside and in the gaps of the cone/teepee structure.
  4. Light kindling inside the teepee.

Pile Fire

A pile fire is easy to build and can create a nice bed of coals for cooking. It also requires maintenance to keep burning. 

How to build a pile fire

  1. Place tinder in the center of the fire pit. 
  2. Loosely pile kindling on top of the tinder. 
  3. Pile a few pieces of fuel wood on kindling.
  4. Light kindling at multiple points. 

Platform or upside-down pyramid fire

A platform or upside-down pyramid fire works great for cooking and is a longer-lasting fire. However, it will take time for the fire to burn down before you can cook well. 

How to build a platform/pyramid fire

  1. Place three large pieces of fuel wood together on the bottom
  2. Layer three pieces of wood at a right angle on top of the previous layer. 
  3. Continue layering fuel wood from larger to smaller for at least three layers thick. 
  4. Place tinder and kindling wood on the top. 
  5. Light the tinder. 

Lean-to fire

A lean-to fire works well for cooking and works best for windy conditions. 

How to build a lean-to fire

  1. Secure a long piece of kindling or fuel wood in the ground at an angle with the tinder underneath.
  2. Build a “roof” on one side with kindling and fuel wood, creating a lean-to structure. 
  3. Light tinder under the lean-to. 

Star Fire

A star fire can work well if you only have whole logs. It also burns slower but requires maintenance as the log ends burn. 

How to build a star fire

  1. Place several log ends or fuel wood ends towards each other to create a spoke structure or star structure. 
  2. Build a teepee/cone fire in the center to start the star fire. 
  3. As the log ends burn, push the ends toward each other. 

Step 4 – Feed and tend fire 

Man putting wood onto fire
Photo: ©Ali Barut via Canva.com

After you’ve started your fire. You will need to feed and maintain it. Usually, this involves occasionally placing 1-2 pieces of fuel wood on the fire. If you’re cooking, you’ll want to make smaller adjustments with kindling only. Generally, you’ll start with smaller pieces and then gradually burn the larger pieces. Never burn trash, especially any plastics. Take care to stir and rearrange the fire with a long enough stick.

Step 5 – Extinguish fire

Pouring water onto fire
Photo: ©tzahiV via Canva.com

Always extinguish your fire when you’re done with it [4]. Never leave the fire unattended.

When we were backpacking, a nearby group had a nice fire but then left it going after they went to bed in their tents. The wind picked up, and their fire became a serious hazard. 

Extinguishing a fire usually starts at least 30 minutes before you plan to be done with the fire. This is when you let the fire burn down as much as possible. 

How to extinguish a campfire

  1. Break the fire structure apart, keeping pieces in the fire pit. 
  2. Pour water on firewood in the fire pit until steam and sizzling stop. 
  3. Stir ashes and wood with a stick and pour more water on the ashes and unburnt wood. 
  4. Observe for any signs of smoke, steam, or heat from the fire requiring further water dowsing. 

Try these methods on your next car camping trip or in the backyard fire pit. Check out camping meal suggestions to enjoy around your cozy campfire.

Learn how to build a survival shelter for your campfire or different ways to purify waterif you’re in a survival situation with only your hiking essentials. 

What is your favorite fire-building method? Do you have any tips or tricks that we should know? Leave a comment below.

FAQs

What if I don’t have matches or a lighter?

You can still start a fire without matches or a lighter in survival situations. It’s usually much more difficult, so consider practicing these methods beforehand.

Flint and Steel: Strike steel against flint to create sparks that ignite tinder.
Solar Method: Focus sunlight through a magnifying glass onto the tinder.
Friction Methods: Learn primitive techniques like the bow drill or hand drill.

Can I use any wood for my fire?

Not all wood is created equal when it comes to building a fire. Generally, wood is classified as hardwood or softwood:

Hardwoods: Like oak and maple, burn slower and hotter, making them ideal for cooking and warmth.
Softwoods: Softwoods like pine burn faster and are good for starting fires. They can pop and throw sparks but also work well to make a quick cooking fire.
Avoid: Using green or moist wood is hard to burn and produces excessive smoke.

Much of your wood choice is probably regionally dependent on what’s available. Hardwood has more energy packed into it, so it usually burns hotter and longer. Softwoods usually have less energy but can burn quicker and are usually easier to split and use.

Sources

How to Purify Water 6 Different Ways

You need clean drinking water in an emergency survival situation. Here are 6 ways to purify water in an emergency survival situation: boiling, filtering, disinfection, UV light, solar disinfection, and a sip well.

I’ve been hiking and camping for decades and successfully used several methods to purify water without ever getting sick. My favorite method is using UV light to purify my water when hiking or backpacking. I’ve also spent many years using various water filters with success. You, too, can learn how to purify water successfully in any situation.   

1) Purify Water by Boiling

Photo: ©Valeriya Turkova via Canva.com

If you have built a fire or have a stove, boiling water for 1 minute is an easy and efficient way to purify water from germs [2]. You might need a rough sand or debris filter to remove silt from the raw water.

Boiling doesn’t eliminate chemicals or other toxins in the water, but most water in a wilderness survival situation just needs the bacteria, viruses, and parasites neutralized.

How to purify water by boiling in 3 steps: 

  1. Filter cloudy water with paper towels, coffee filters, gravel, or clean debris like pine needles. 
  2. Bring water to a boil for 1 minute (at elevations above about 6,500 feet, boil for 3 minutes, per CDC guidance).
  3. Let the water cool before drinking. 

2) Purify Water by a Filter

Photo: ©Kelly vanDellen via Canva.com

Water filters are designed to remove germs. They also can work well for removing some toxins, but note that common backpacking filters (0.1–0.2 micron) remove bacteria and protozoa without reliably removing viruses — true water ‘purifiers’ are a separate category. The Centers for Disease Control (CDC) recommends a filter that is <1 µm pore size, which should remove bacteria and parasites [3].Also, filters usually have a carbon part to the filter, which can improve the taste.

Don’t assume the common pitcher or refrigerator filters can also filter out germs, as they aren’t intended for this.

There are multiple filter types to choose from, including simple straw filters, water bottle filters, gravity filters, pump filters, and other filter types [4].  For directions on how to purify water with a filter, see the manufacturer’s guidelines, as each filter works differently. 

3) Purify Water by Disinfection

Photo: ©blyjak via Canva.com

Disinfect Water with Bleach

Disinfection water purification generally means using chemicals to kill germs.

Small quantities of common household chlorine bleach can disinfect water, making it safe to drink. Hikers and campers can carry chlorine dioxide or iodine tablets for wilderness water purification. 

How to purify water by bleach in 3 steps: 

  1. Gather a medicine dropper from an emergency kit and fresh liquid chlorine bleach (the active ingredient of 6% or 8.25% sodium hypochlorite). 
  2. Use 2 drops of regular unscented household bleach (6–8.25% sodium hypochlorite) per 1 quart or 1 liter of water — double to 4 drops only if the water is cloudy.
  3. Stir and let stand for at least 30 minutes [5].
Chart: Washington State Department of Health

Disinfect Water with Iodine

Common household iodine can also purify water, although pregnant women, people with thyroid disorders, and people with iodine allergies should avoid this method. It is also not recommended to drink iodine-treated water for more than a few weeks.  

How to purify water by iodine tincture in 2 steps: 

  1. Use 5 drops of 2% tincture of iodine per 1 quart or 1 liter of water.
  2. Stir and let stand for at least 30 minutes [6]. 

Don’t use pool tablets to purify water.

Silver is used by Europeans for disinfection but is not approved for safe water purification in the US.

Other commonly recommended household products, such as hydrogen peroxide and citrus juice, are not recommended for water purification, per the CDC [7].

4) Purify Water by a UV Light

Photo: ©Ryo Chijiiwa CC BY 2.0 Deed

Ultraviolet light can quickly and easily kill most germs in water. Handheld UV light water purification devices are affordable and available for hikers and backpackers.

UV water purification is my preferred method of purifying water as it is quick, easy, and lightweight. Unfortunately, my UV light has failed multiple times, resulting in having to boil water as a backup.

For directions on how to purify water by UV light, see the manufacturer guidelines, as each device works slightly differently.   

5) Purify Water by Sunlight

Photo: ©Xurzon via Canva.com

Sunlight essentially acts as a UV source for purifying water. This is also called solar disinfection or SODIS [8].

How to purify water by solar disinfection in 3 steps: 

  1. Filter cloudy water with paper towels, coffee filter, gravel, or clean debris like pine needles. You may let the water settle and then use the clear water on top.  
  2. Fill clear PET bottles (ideally under 3 liters) with clear water.
  3. Lay bottles on their side on a dark surface in direct sunlight for at least 6 hours [9]. Allow up to 2 days in cloudy weather.

6) Purify Water with a Sip Well

AI Photo: Daniel Borkert/Canva Magic Media™

A sip well, also known as a coyote well or gypsy well, can work as a last resort if you don’t have access to a heat source for boiling or any other way to purify water.

The basic premise is that the water will filter through the dirt and debris in the ground from a nearby water source into a small hole you dig.

I didn’t find any research that this was effective in purifying water from the germs that make you sick (such as Giardia, Cryptosporidium, and E. coli) [10].

Use this method cautiously. If possible, I always recommend disinfecting water from a sip well with another method, such as boiling.

How to purify water by a sip well in 4 steps:

  1. Find a source of standing water (pond, large puddle, lake, spring) or stream. 
  2. Dig a small hole at least 3 feet or more from the water source that goes down below the level of the water source.
  3. Let water seep into your hole until filled.
  4. Process water from your sip well if possible (recommend further boiling or disinfection). 

You have learned how to purify water in six ways: boiling, filtering, disinfection, UV light, solar disinfection, and sip well. Each method has advantages and disadvantages, depending on your situation and available resources.

In addition to obtaining safe drinking water, you will also need to build an emergency shelter in a survival situation.

Stay prepared with the hiking essentials on your next camping or hiking trip, and avoid a wilderness survival situation altogether. 

FAQs

Why bother with purifying my water when hiking or camping?

There are over 100 germs (bacteria, viruses, parasites) in the US surface water. Water purification is essential in avoiding waterborne illness. In a survival situation, you need water to live, but you also want to avoid getting seriously ill from contaminated water.

Sources

28 Easy, Delicious Car Camping Meals

Discover some of the most mouth-watering and satisfying camping meals you can make with minimal equipment and ingredients for your next camping trip. From breakfast to dessert, these camping meal ideas will make your trip more enjoyable and memorable. 

I have decades of experience in car camping, and these are some of my favorite yet easy car camping meals. I’ve included some tips, including whether your will need a cooler, gas stove, or campfire.

Contents

Breakfast

Photo: ©FrankieCarr via Canva.com

1) Eggs and bacon/sausage

Cooler needed for meat and eggs. Stove with a skillet also required. 

2) Pancakes

Stove with a skillet and flipper required. Don’t forget cooking spray and syrup or other toppings. 

3) Oatmeal

Instant or quick oats work well with hot water mixed in with dried fruit or nuts. 

4) Omelets

Cooler needed for cheese and eggs. Stove with a skillet also required. Mix ingredients in a plastic ziplock 

5) Breakfast burritos

Cooler needed for cheese and meat. Prepare ahead of time and home and store in a ziplock in the cooler. Heat on the stove or campfire. 

6) Avocado Toast

Stove/campfire with a skillet required to toast bread.  

Lunch

Photo: ©THP Creative via Canva.com

1) Peanut butter and jelly sandwiches

Cooler required for jelly. Substitute honey for jelly if not using a cooler. 

2) Deli meat sandwiches

Cooler required for meat and cheese and opened condiments. 

3) Cheese, summer sausage, and crackers

Don’t forget to bring a knife to cut cheese and meat. Often opened meat with need to go into the cooler for storage. 

4) Pita and packaged tuna/chicken salad

Flatbread or flour tortillas filled with pre-packaged tuna salad or chicken salad. 

5) Pasta salad

Cooler required for storage. 

6) Quinoa salad

Cooler required for storage. 

Dinner

Photo: ©Peera_Sathawirawong via Canva.com

1) Hot dogs and beans

Stove with pot/skillet or campfire required. Don’t forget roasting skewers for hot dogs and all the toppings. 

2) Hamburgers

Cooler required for meat and cheese. Stove/campfire with skillet or grill required.

3) Canned soups

Stove/campfire with pot required. Don’t forget the can opener. 

4) Tacos

Cooler required for meat and cheese. Stove with skillet required. 

5) Chili

Cooler required for cheese and meat. Stove/campfire with pot required.

6) Nachos

Cooler required for cheese and meat. Stove/campfire with pot required.

7) Ramen noodles

Stove/campfire with pot required. 

8) Chicken kabobs

Stove/campfire with skillet or grill required. Don’t forget the skewers and a knife to cut pieces. 

9) Mac & cheese

Stove/campfire with pot required. 

10) Pasta with sauce

Stove/campfire with pot required. 

11) Loaded roasted potatoes

Cooler required for cheese and sour cream. Campfire with grill required. Don’t forget the aluminum foil for roasting the potatoes.  

12) Bratwurst with peppers and onions

Stove with pot/skillet or campfire with grill required. 

13) Chicken stir fry with rice

Stove/campfire with pot required. 

Dessert

Photo: ©bhofack2 via Canva.com

1) S’mores

Campfire required with skewers. 

2) Apple crisp

Stove/campfire with pot required. 

3) Banana boats

Campfire with grill required. 

Bon appétit! Don’t forget to use a camping checklist to help prepare you for your next car camping trip or how to pick the perfect campsite. If you’re hiking, check out the essential hiking gear guide.

What are your favorite car camping meals?

Food safety basics: Keep your cooler at or below 40°F (4°C) — use a thermometer to check. Follow the 2-hour rule: don’t leave perishable food (meat, dairy, eggs, cooked leftovers) out at camp for more than 2 hours, or more than 1 hour if the temperature is above 90°F.

FAQs

What essential cooking gear should I bring for car camping?

The right cooking gear can enhance your car camping experience significantly, so I recommend using a camping checklist to make sure you don’t forget anything.

A portable stove, such as the Jetboil Genesis Basecamp Cooking System or the Coleman Classic Propane Stove, is crucial for boiling water and cooking meals.

A high-quality cooler like the Yeti Tundra 65 or Coleman Steel Belted Cooler will keep your perishables fresh.

Don’t forget a cast iron skillet for versatile cooking, cooking spatulas, a good chef’s knife, a paring knife, and a lightweight cutting board. 

If you enjoy grilling, a portable grill like the Weber Q1200 can be a great addition.

How do I manage food storage and keep meals fresh during car camping?

Proper food storage is key to keeping meals fresh. Non-perishable items such as canned goods, granola bars, dehydrated foods, and instant oatmeal are convenient as they don’t require refrigeration.

For perishable items like fresh fruits, vegetables, cheese, and meat, a well-insulated cooler packed with ice will maintain freshness.

Organize your food items in a camp kitchen bin for easy access and to prevent any critters from getting into your supplies. Remember to pack your cooler with a combination of ice packs and loose ice to ensure a consistent cold temperature.

Check out the FDA food storage tips for more info.

14 Science-Based Benefits of Being Outside in Nature

Man enjoying the benefits of being outside

Did you know that there are tons of science-based benefits of being outside? Your exposure to nature can significantly impact your health and well-being. Many studies reveal a wide range of health benefits from enjoying nature outdoors [1].   

I’m a passionate outdoors enthusiast who finds lots of personal rejuvenation and joy in nature outdoors. I’m also a medical provider and love to help others improve and optimize their health. While modern medicine has its place, there’s not much better than the prescription to enjoy the outdoors to benefit your health and well-being.

I’ve found fourteen benefits of being outside in nature for the whole family. These could be further categorized broadly as mental health benefits and physical benefits, although both intertwine and contribute to our overall health.  

1) Improves Cognition

Photo: ©FatCamera via Canva.com

Time spent outside, including hikingand camping, can result in an improved ability to concentrate and think [2].  Spending time outdoors can also improve your ability to focus overall [3]. Research has shown that the time to complete a task was decreased by more than 7 seconds for those who spend time outdoors in nature [4].

2) Lowers Stress

Photo: ©Gajus via Canva.com

Stress reduction is a potential benefit of being outside. Studies have shown that spending time outdoors, including hikingand camping, reduces the stress hormone cortisol and overall sense of stress [5, 6].

3) Decreases Depression and Anxiety

Photo: ©Gajus via Canva.com

Multiple studies have shown a benefit in reducing depression and anxiety symptoms in participants who spent quality time outdoors [7, 8].  A 50-minute hike weekly improved the mood and cognition of individuals who were being treated for depression [9].

This didn’t replace treatment but acted as a powerful supplement to existing treatment for those experiencing depression. People who exercised outside also experienced decreased anxiety more than those who exercised indoors [10].

4) Lowers Risk of Psychiatric Disorders in Youth

Photo: ©halfpoint via Canva.com

Youth who have regular time outside in nature are at a decreased risk for mental health disorders compared to kids who have minimal outdoor exposure. Youth with minimal outdoor nature exposure have a 55% higher risk of developing a psychiatric disorder into adulthood [11].

Kids with attention-deficit/hyperactivity disorder (ADHD) improved their ability to focus after a walk outdoors [12]. Regularly hikingand campingwith your kids could potentially improve their general mental health and decrease their risk of developing a mental health disorder. 

5) Improves Overall Mood and Sense of Well-being

Photo: ©Sunny Studio via Canva.com

Spending time in nature outside improves mood and sense of well-being [13, 14, 15]. People who spend time outside also feel an improvement in their vitality [16]. One study associated spending 120 minutes per week outside with improved mood and well-being [17].

6) Increases Social Connections

Photo: ©martin-dm via Canva.com

Spending time outside can increase social connections and a sense of belonging in a community [18]. Community is an important aspect of human health and well-being.

The outdoor community is generally friendly and welcoming to beginner hikersand people from all backgrounds. Many life-long friendships and marriages have resulted from people’s love of the outdoors. 

7) Improves Sleep

Photo: ©cottonbro studio via Canva.com

Sleep cycles are dependent on our circadian rhythm or internal clock. Sunlight is a potent regulator of our sleep/awake cycles [19]. Therefore, exposure to sunlight requires spending time outside. Who doesn’t want better sleep?

8) Improves Longevity

Photo: ©RgStudio via Canva.com

Research shows that people who spend time outdoors in nature live longer  [20, 21]. This effect is probably due to multiple factors, but the result is a longer lifespan from spending time in nature. 

9) Improves Physical Fitness

Photo: ©halfpoint via Canva.com

Being outside increases physical activity with lower perceived exertion, resulting in improved physical fitness [22, 23]. Not only will you exercise more, but you’ll enjoy the experience of getting in shape more.  

10) Lowers Cardiovascular Risk

Photo: ©Robert Kneschke via Canva.com

Heart disease and stroke are among the top causes of death, according to the CDC [24]. Getting outside has multiple benefits for your cardiovascular system, including decreased blood, heart rate, and overall stroke/ heart disease mortality [25, 26, 27].

11) Lowers Obesity

Photo: ©Robert Kneschke via Canva.com

People who regularly participate in outdoor activities such as hikingor campinghave decreased obesity [28, 29, 30]. This is probably partially related to the increased physical activity. 

12) Lowers Diabetes Risk

Photo: ©halfpoint via Canva.com

Studies have associated spending time outdoors frequently with a lower risk of developing type 2 diabetes (the most common type of diabetes) [31]. Having diabetes significantly increases your risk of other health problems, including heart disease, kidney dysfunction, vision problems, and multiple other health complications [32].

13) Improves Immune Function

Photo: ©Robert Kneschke via Canva.com

New research has found that spending quality time outside may boost your immune system and decrease the risk of infections [33]. It’s unknown exactly how this works (probably multiple pathways), but outdoor exposure results in a boosted immune system. 

14) Lowers Risk of Needing Glasses for Kids

Photo: ©FatCamera via Canva.com

Getting your kids outdoors may decrease the risk of needing glasses for nearsightedness compared to friends who spend most of their time indoors [34, 35]. 

FAQs

How much time do I need to spend outside to get the benefits?

According to a 2019 study, spending at least 120 minutes per week in nature can significantly boost your health and well-being. You can take a 2-hour chunk or break it into smaller daily segments.

Another study found that people who were being treated for depression improved their mood and cognition after only a weekly 50-minute hike [9].

The time outside is probably different for everyone, but the point is that getting outside, even in small doses, is probably beneficial.

What are some outdoor activities that can help me enjoy nature?

Many outdoor activities can help you enjoy nature, such as hiking, camping, caving, fishing, picnicking, gardening, birdwatching, or simply walking in a park or a green space. You can also involve your family and friends in outdoor activities and increase your social connections.

How can being outside in nature help me cope with isolation and loneliness?

Being outside in nature can help you cope with isolation and loneliness by providing opportunities to connect with other people and living beings. You can join a local outdoor group, volunteer for a conservation project, or simply chat with a friendly stranger at the park.

If you have thoughts of hurting yourself or others, please seek help or call 911.

How can being outside in nature enhance my creativity and problem-solving skills?

Being outside in nature can enhance your creativity and problem-solving skills by stimulating your brain and reducing mental fatigue. Nature offers novel and diverse stimuli, such as sights, sounds, smells, and textures, that can spark your imagination and curiosity. Nature can also help you relax and clear your mind, allowing you to focus better and think more clearly.

How can being outside in nature support my children’s development and learning?

Being outside in nature can support your children’s development and learning by fostering their physical, emotional, social, and cognitive growth. Nature can provide your children with a safe and stimulating playground where they can exercise, explore, play, and learn. Nature can also help children develop positive attitudes, values, and behaviors towards themselves, others, and the environment.

Sources/References

  1. Urban Nature for Human Health and Well-Being by the USDA, Forest Service.
  2. Understanding Nature and Its Cognitive Benefits by Schertz and Berman
  3. The Cognitive Benefits of Interacting with Nature by Berman, Jonides, and Kaplan
  4. The Influence of Interaction with Forest on Cognitive Function by Shin, Shin, Yeoun, and Kim
  5. More Green Space is Linked to Less Stress in Deprived Communities by Thompson et al. 
  6. Psychological effects of forest environments on healthy adults by Morita et al. 
  7. Exposure to Neighborhood Green Space and Mental Health by Beyer et al. 
  8. Longitudinal Effects on Mental Health of Moving to Greener and Less Green Urban Areas by Alcock et al. 
  9. Interacting with nature improves cognition and affect for individuals with depression by Berman et al.
  10. The Relationship between the Physical Activity Environment, Nature Relatedness, Anxiety, and the Psychological Well-being Benefits of Regular Exercisers by Lawton et al.
  11. Residential green space in childhood is associated with lower risk of psychiatric disorders from adolescence into adulthood by Engeman et al. 
  12. Children With Attention Deficits Concentrate Better After Walk in the Park by Taylor and Kuo
  13. What is the Best Dose of Nature and Green Exercise for Improving Mental Health? A Multi-Study Analysis by Barton and Pretty
  14. Nature and mental health: An ecosystem service perspective by Bratman el al.
  15. The Relationship Between Nature Connectedness and Eudaimonic Well-Being: A Meta-analysis by Pritchard et al. 
  16. Vitalizing effects of being outdoors and in nature by Ryan et al. 
  17. Spending at least 120 minutes a week in nature is associated with good health and wellbeing by White et al.
  18. Streetscape greenery and health by Vries et al. 
  19. Effects of light on human circadian rhythms, sleep and mood by Blume, Garbazza, and Spitschan
  20. Urban residential environments and senior citizens’ longevity in megacity areas by Takano, Nakamura, and Watanabe
  21. Exposure to Greenness and Mortality in a Nationwide Prospective Cohort Study of Women by James et al. 
  22. The great outdoors: how a green exercise environment can benefit all by Gladwell et al.
  23. Environmental factors associated with adults’ participation in physical activity by Humpel, Owen, and Leslie
  24. Leading Causes of Death in US by the CDC
  25. The health benefits of the great outdoors by Bennett and Jones
  26. Neighborhood greenspace and health in a large urban center by Kardan et al. 
  27. Residential green spaces and mortality by Gascon et al. 
  28. Green and blue areas as predictors of overweight and obesity by Halonen et al.
  29. Exploring the relationship between childhood obesity and proximity to the coast by Wood et al. 
  30. The relationship of physical activity and overweight to objectively measured green space accessibility and use by Coombes, Jones, and Hillsdon
  31. Is Neighborhood Green Space Associated With a Lower Risk of Type 2 Diabetes? By Astell-Burt, Feng, and Kolt
  32. Diabetes Complications by the American Diabetes Association
  33. How might contact with nature promote human health? by Ming Kuo
  34. Green spaces and spectacles use in schoolchildren in Barcelona by Dadvand et al. 
  35. Protective behaviours of near work and time outdoors in myopia prevalence and progression in myopic children by Huang et al.

Hiking for Beginners: The Essentials for How to Get Started Hiking

Hiking as a beginner can be overwhelming or scary, but it is a great way to enjoy nature, exercise, and hang out with physically active friends.

I have been hiking for almost four decades and have explored hundreds of trails throughout the USA. I love hiking and want to share my passion and knowledge with you. I will give you some tips on how to start hiking, choose a hike, what to bring, what to wear, how to hike safely and responsibly, and how to have fun with kids and dogs.

How to Choose a Hike?

Man on beginner hike
Photo: ©Stacy Borkert/OutdoorFootprints.com

1) Find hikes nearby

You want to find a local hike if you’re starting out hiking. There are lots of ways to find hikes, but here are some suggestions for finding a great hike:

2) Choose a hike that fits your fitness level

Generally, you want to do a relatively easy hike for your first hike. It’s best to underestimate your fitness level and gradually explore more challenging hikes as you get experience. Hiking is endurance walking, so consider how far you think you can walk comfortably.

3) Choose a short, easy local hike

Start small and easy for your first hikes. A successful hike involves many little details, including finding the trailhead and parking, walking on uneven ground, carrying a pack, and endurance walking.

4) Consider how much time you plan to hike

Most people hike 2-3 miles an hour with occasional breaks. I recommend a 2-5 mile hike at most for your first hike, which should take about 2-3 hours round trip. Try to start your hike in the early morning when the sun is starting to rise. This gives you plenty of time to do your hike, and the parking is usually easier.

5) Evaluate hike length and elevation gain

Remember to include the distance it takes to get back. Also, look at the total elevation gain. I would recommend a hike with only 300-500 ft of elevation gain for your first hike.

6) Check on roads and parking situation to get to hike

Parking for the most popular hikes usually fills up mid-morning on the weekends. Also, many hikes require driving on dirt roads and may require a high-clearance vehicle. Many user trail reports will include something about the parking and road situation.

7) Check the weather

This helps you decide what layers to bring and anticipate possible inclement weather. I generally use NOAAfor the best weather info.

What Gear to Bring on a Hike?

Man hiking on the coast
Photo: ©Stacy Borkert/OutdoorFootprints.com

1) Water bottle

Plan to drink about ½ liters of water per hour of hiking. To avoid dehydration, you must bring at least a 1-liter water bottle and probably more if you’re hiking longer or the weather is hot.

2) Backpack

If you’re exploring hiking, any backpack will carry your stuff. A 10-20 liter day pack with waist and chest straps might be a great investment in your future hiking adventures.

3) Rain gear and clothing layers

After you check the weather, you’ll know better what clothing to bring. The idea is always to stay warm and dry. Always bring rain gear, even if it’s just an emergency poncho (it can also serve as an emergency shelter).

4) Snacks

High-calorie, energy-dense snacks are the best, but the type of snack isn’t too important. Bring snacks you enjoy. I like dehydrated fruit because is lightweight and tasty. Consider bringing lunch, too.

5) Phone with map/navigation

Bring your phone for pictures. I usually hike with my phone on airplane mode to save battery, so having offline/downloaded maps on my phone works best for trail navigation. I like the Alltrails app and Gaia GPS app. You can also download Google Maps for offline use.

6) Other hiking essentials

Check out the 11 Core Essentials for Most Hikesfor further ideas about what to bring on a hike.

What Clothes and Shoes Do You Need?

Couple hiking on the coast
Photo: ©Stacy Borkert/OutdoorFootprints.com

1) Wear a moisture-wicking base layer

Athletic clothing and hiking-specific clothing work great. You will probably sweat some, so consider what works well for you in that situation.

2) Bring a mid-layer

Mid-layers include long-sleeved t-shirts, sweatshirts, and anything you “layer” over your base layers or under your shell layer but can easily take off if you get hot.

3) Bring an outer shell layer

Shell layers include stocking hats, gloves, rain jackets, and puffy jackets. 

4) Wear closed-toed shoes with some grip and sole support

Regular sneakers work okay if they have some support and grip. Keep in mind they will probably get dusty and dirty. Hiking shoes and boots are a highly recommended upgrade for hiking comfort and enjoyment.

How to Hike Safely?

Man hiking on the snow
Photo: ©Stacy Borkert/OutdoorFootprints.com

1) Hike with a friend or let someone know where you’re hiking

Always tell someone where, when, and how long you plan hiking, especially hiking alone.

2) Stay on the trail

Seems obvious, but it’s easy to get off trail when trying to take that perfect picture or when going poop or pee. If you need to go off trail (such as going to the restroom), always maintain awareness of where the trail is by marking the trail and backtracking. Also, most animals and snakes avoid hanging out on the trail. If a snake is on the trail, it is usually more visible and is quickly passing on to safer terrain.

3) Carry and know how to use an offline map

Always have an offline map available that you can use on your phone or a physical map with a compass. You can download and print USGS topo maps for free, too.

4) Bring rain gear

You never know when it might rain in the wilderness. Even if the weather is perfect and the chance of rain is low, rain gear can still act as a windbreak or an emergency shelter.

What Trail Etiquette Should You Know?

Group of hikers walking up a trail
Photo: ©Pekic via Canva.com

1) Hikers going uphill have the right of way.

Step aside to let uphill hikers pass [1]. They might defer, but don’t assume.

2) Hikers should yield to horses on the trail.

I can count on one hand the number of horseback riders I’ve seen on a trail, but occasionally, you’ll come upon one.

3) Bikes are supposed to yield to hikers.

Often, it’s easier to step aside and let them pass as they are usually moving through quickly.

4) Slow hikers should step to the side to let faster hikers and runners pass as needed. 

Not everyone hikes at the same speed. Please be aware and let others pass by.  

5) Consider others when playing music or speaking loudly. 

Portable speakers work great at home or the park but are incredibly annoying to other hikers and scare wildlife. Leave them at home. Also, be considerate of others when talking or shouting loudly.

6) A smile and greeting go a long way in fostering community with other hikers. 

Generally, most hiking people are friendly and share a love of the outdoors and nature.

How Can You Hike Responsibly?

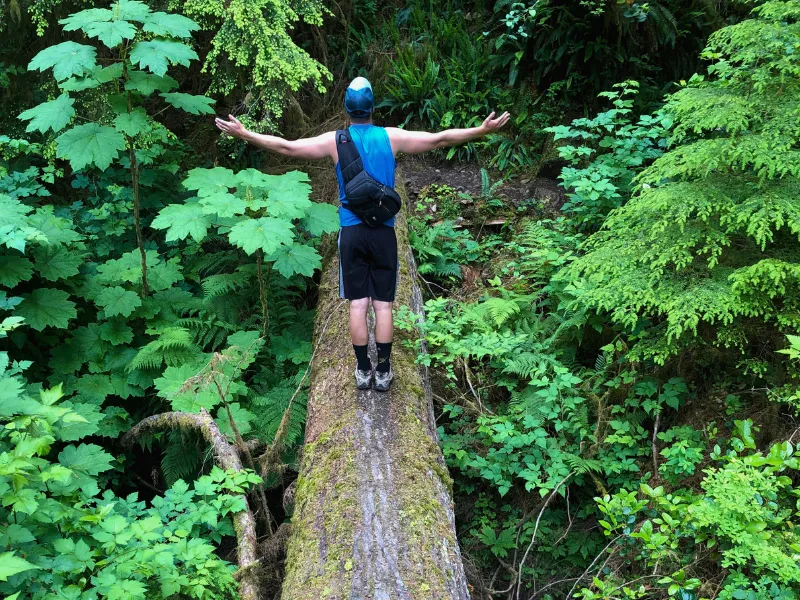
Man standing on log bridge hiking
Photo: ©Stacy Borkert/OutdoorFootprints.com

1) Follow Leave No Trace guidelines.

Leave No Trace provides a guide to responsibly enjoying the outdoors.

2) Watch wildlife from a distance and leave it alone

Generally, animals stay away from the hiking trails, but if you come upon an animal, be kind and leave it alone. Don’t feed animals, especially chipmunks and birds.

3) Pack out all trash and peels. 

Fruit peels and trash take longer than you’d expect to decompose in the wilderness.

4) Don’t pee or poop on the trail. 

Try to pee on rocks or other durable surfaces off the trail for smell and sanitation. Poop in the outhouse if available, or otherwise poop in a hole at least 200 ft from the trail, camp, or water sources.

5) Clean up and pack out dog poop. 

Dog poop is similar to human poop, with a variety of diseases that can get into the local water.

How Do You Hike with Kids and Dogs?

Man hiking with baby in baby backpack along the water
Photo: ©Stacy Borkert/OutdoorFootprints.com

Hiking with Kids

  1. Infants and toddlers can hike well in a baby carrier, but remember to add extra layers to keep them warm and dry.
  2. Bring extra diapers, wipes, and a change of clothes.
  3. Choose short hikes and stop often to enjoy nature. 
  4. Keep kids within sight of adults. 
  5. Teach kids what to do if they get lost. 
  6. Remember to bring snacks and water. 

Hiking with Dogs

  1. Check for dog-friendly trails.
  2. Always have your dog on a harness and leash. 
  3. Bring poop bags and pack out your dog’s poop.
  4. Consider snacks and water for your dog.
  5. Learn more about hiking with dogs here.

Leave comments below about other beginner hiking tips and great beginner hiking trails in your area.

Other FAQs

What are some of the most common hiking mistakes?

Common hiking mistakes include:
– Overestimating your ability: Start with shorter, easier trails and gradually build up to more challenging hikes.
– Poor planning: Check the weather forecast, trail conditions, and park regulations before leaving.
– Inadequate gear: Dress in layers and bring water and a rain jacket. Consider learning how to use a map and compass, and bring a first aid kit along with the other hiking essentials.
– Overpacking: Packing too much can weigh you down and make your hike less enjoyable. Evaluate your gear and only take what’s necessary. Remember, the goal is to be prepared, not overburdened 
– Leaving a Trace: Respect nature and practice Leave No Trace principles. This means packing out all your trash, staying on designated trails, and minimizing your environmental impact.

Sources

  1. Hiking Ettique by the National Park Service
  2. Hiking for Beginners by REI

How to Build 8 Practical Wilderness Survival Shelters

How do you build a practical survival shelter in the wilderness? What materials do you need? How do you choose the best design for your survival shelter? How do you make it effective? These are survival shelters that you could most realistically build without any extra tools.

I have built several survival shelters for fun throughout the years, but thankfully, I have never had to use one in a wilderness survival situation. I have also studied and watched many articles and videos on various types of survival shelters and bushcraft. I have selected the 8 most popular and practical ones for you in a wilderness survival situation. You could most realistically build these survival shelters without any extra tools beyond what you find in nature.

Key Takeaways

1) Natural Shelter

Photo: ©ipsimus via Canva.com

Natural shelter includes rock overhangs, caves, tree roots, hollow logs, or sturdy fallen trees. When lost, this is often the quickest way to establish a shelter and camp. Often, natural shelters can be modified to reduce wind and rain exposure. They also often let you focus on laying down bedding and getting a fire going before nightfall. 

Pros

  • Quick modify
  • Require less energy

Cons

  • May not be as safe due to logs or rocks falling 
  • May also be home to other animals or pests 
  • May not provide adequate weather protection without modification 

Materials

  • Natural shelter
  • Bedding materials such as vegetation or branches
  • Sticks or rocks to modify the entrance 

Directions

  • Look for rock overhangs, large exposed tree roots, or whatever naturally might provide a temporary shelter
  • Add a thick layer of bedding material
  • Add a fire pit outside of the shelter with plenty of firewood for the night
  • Modify entrance as needed 

2) Debris Cocoon or Nest Shelter

AI Photo: Daniel Borkert/Canva Magic Media™

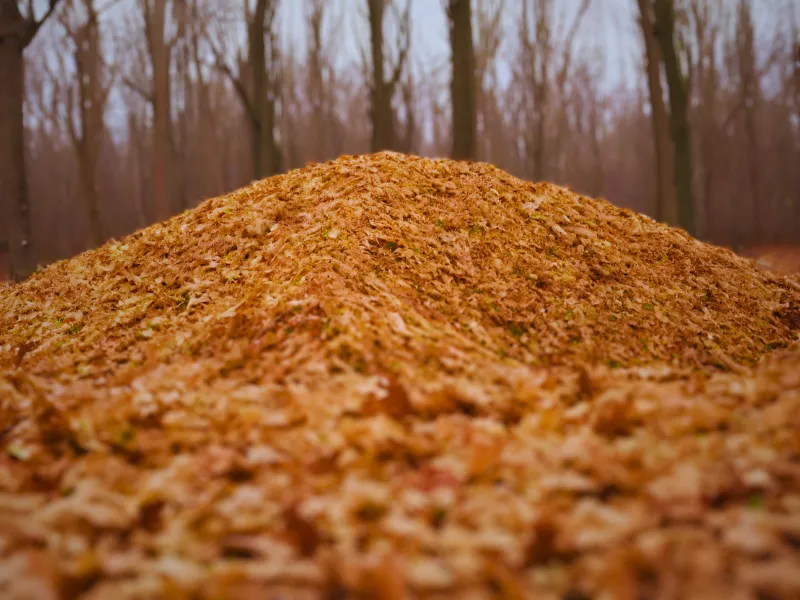
Cocoon or nest shelters are temporary emergency shelters that provide insulation protection from the elements. They are constructed by gathering as much debris as possible and crawling in the middle to sleep. 

Pros

  • Easy to construct with minimal tools
  • Adaptable to various situations and terrains
  • Helps maintain body heat

Cons

  • Can take time to gather a large enough pile 
  • Dirty and sometimes difficult to get in and out.
  • Not always waterproof in downpours
  • Fire hazard if using a fire pit nearby. 

Materials

  • Piles of leaves or dried grass or other vegetation

Directions

  • Find a location, preferably under a tree with lots of leaves or dried grass nearby
  • Gather a massive pile of debris, providing at least a few feet of padding off the ground and 3-4 feet around you in depth. 
  • Bore a small tunnel in the middle where you will sleep
  • Plug the entrance with a bundle of debris to reduce drafts 

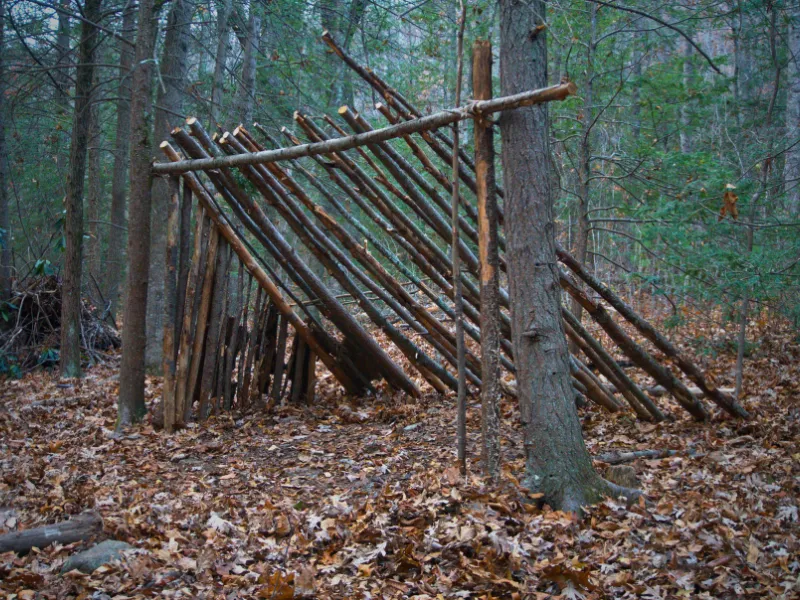
3) Lean-To Shelter

Photo: ©James Mahan via Canva.com

Lean-to shelters provide a fairly quick way to get out of the rain or sun. They are often paired with a good fire as they provide little protection from the cold. 

Pros

  • Simple to construct 
  • Provides shade and basic rain protection
  • Works well with a fire

Cons

  • It doesn’t provide any insulation from the cold
  • Exposed if the wind changes direction

Materials

  • Sturdy log/stick several feet long for main beam
  • Several sticks for frame
  • Large amounts of branches, leaves, grass, moss for roofing

Directions

  • Secure main beam stick/log between two trees (can also have one end on ground)
  • Lean branches and sticks against one side of main beam to create a roof structure
  • Fill gaps with branches or other debris
  • Shingle roof with bark or moss starting from bottom up to waterproof roof
  • Remember to create a bed inside shelter to insulate from ground

4) A-Frame Shelter

Photo: ©Sergey Razbitnov via Canva.com

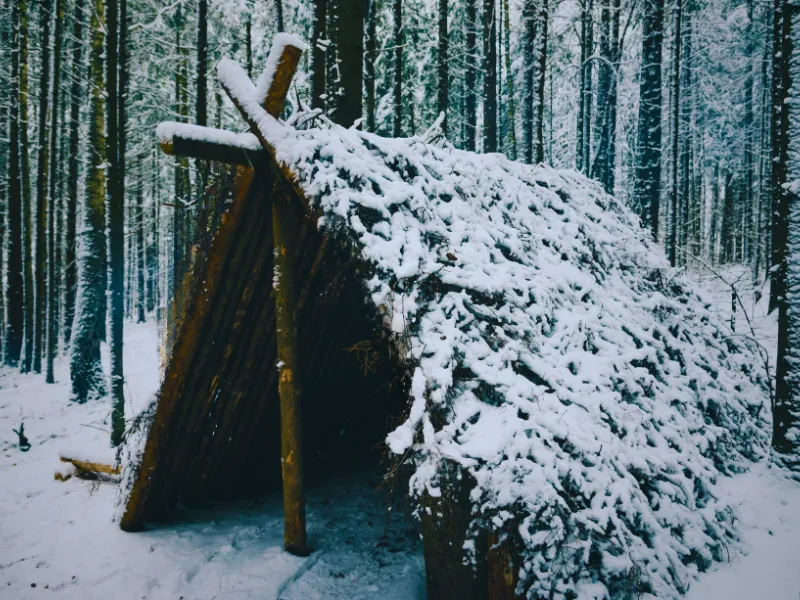
An A-frame shelter is an upgraded lean-to shelter with a roof constructed on both sides. A-frame shelters provide more protection from the elements. They also require more time and skill in the construction process. 

Pros

  • Protects well from wind, rain, and sun. 
  • Provides a more permanent shelter option
  • Works well with fire pit nearby

Cons

  • Takes longer to construct
  • Doesn’t insulate from cold weather

Materials

  • Sturdy stick or log for main, center beam
  • Several sticks for roof frame
  • Large amounts of branches, leaves, grass, or moss for roof sealing

Directions

  • Secure main beam stick/log between two trees (can also have one end on ground) preferable so you can sit up inside. 
  • Lean branches and sticks against both sides of main beam to create a roof structure
  • Fill gaps with branches or other debris
  • Shingle roof with bark or moss starting from bottom up to waterproof roof
  • Remember to create a bed inside shelter to insulate from ground

5) Wickiup Shelter

Photo: ©James Mahan via Canva.com

A wickiup shelter is similar to a teepee but uses debris for roofing and insulation rather than a covering such as a tarp or animal skin seen on a teepee. For warmth, build a fire at the shelter entrance or just outside — never burn a fire inside the enclosed wickiup, where smoke can fill the space with carbon monoxide and sparks can ignite the dry debris. It is a great more permanent primitive shelter option.

Pros

  • Works well with a fire pit built at the shelter entrance or just outside — never inside
  • Provides good protection against rain, wind, snow, and sun.

Cons

  • Takes a lot of time to construct
  • Take more skill to construct
  • If improperly constructed, it may collapse on you. 
  • Fire and carbon-monoxide hazard: a fire inside this enclosed debris shelter can ignite the dry walls and roof, and smoke can fill the space with carbon monoxide — an odorless gas that can kill within minutes. Never burn a fire fully inside the wickiup

Materials

  • 3+ large poles or sturdy sticks for primarily tripod supports
  • Several poles or sticks for secondary supports
  • Large amount of debris for covering insulation and waterproofing

Directions

  • Secure support poles in a tripod with the top securely tied or interlocked
  • Arrange secondary supports around the tripod
  • Fill gaps in the roof with debris and branches
  • Insulate the roof with a thick layer of debris. If you plan a fire, build it at the shelter entrance or just outside — never fully inside the wickiup
  • Weigh down debris with branch to prevent debris from blowing away
  • Ensure the shelter is sturdy and won’t collapse 
  • Line edges inside with bedding material
  • Build a small fire pit at the shelter entrance or just outside — never fully inside the wickiup

6) Pit Shelter

Photo: ©wanderluster via Canva.com

A pit shelter works best in locations with minimal rain, such as the desert. Usually, a natural depression is utilized with building a rough wickiup shelter overhead for sun and wind protection. Pit shelters can also provide warmth at night in a more arid region with cold nights. A scout’s pit is an alternative pit shelter where you dig a trench and sleep in it, covering yourself with a tarp or other natural covering. 

Pros

  • Provides great wind protection
  • Can usually provide significant warmth with a fire

Cons

  • Doesn’t work well in rainy areas
  • Take a lot of time to dig

Materials

  • Stick or shovel for digging
  • Soft sandy ground
  • Materials for covering (see above for wickiup)

Directions

  • Dig a shallow pit that you can lie down in comfortably 
  • Construct a wickiup type cover for the roof to protect from the sun

7) Quinzhee Snow Shelter

Photo: ©Jupiterimages via Canva.com

A quinzhee snow shelter offers protection from the cold and wind in an emergency survival situation in a snowy area. You basically collect a huge pile of snow and burrow it into the middle. 

Pros

  • Fairly easy to construct
  • Provide wind protection

Cons

  • Take a long time to construct
  • It is easy to get hot and sweaty when constructing, resulting in cold, wet clothes later

Materials

  • Lots of snow
  • Several small sticks broken approximately 2 feet long

Directions

  • Collect a massive pile of snow. You want the walls to be about 2 feet thick, so consider how much room you need to move around inside. 
  • Let the snow settle for several hours to stabilize.
  • Insert sticks around the outside roof as markers for how thick the wall/roof needs to be
  • Burrow a hole at the base of the pile 
  • Carefully carve out a room inside of the pile, stopping at the sticks 
  • Create a bed inside that is higher than the entrance.
  • Create a small air hole to let some fresh air in.
  • Create a plug for the entrance. 

8) Snow Cave Shelter

Photo: ©panaramka via Canva.com

A snow cave resembles a quinzhee but doesn’t require gathering snow. You rather burrow into a large snow drift to create a room. 

Pros

  • Straight forward construction
  • Provides good wind protection

Cons

  • Takes a lot of time to construct
  • It is easy to get hot and sweaty when constructing
  • It’s still pretty cold inside.
  • Risk collapsing shelter if someone walks on top 

Materials

  • Large snow drift
  • Shovel if available

Directions

  • Burrow a hole at the base of the snow drift
  • Carefully carve out a room inside of the pile that is higher than the entrance
  • Create a bed inside that is higher than the entrance.
  • Create a small air hole to let some fresh air in.
  • Create a plug for the entrance. 

Remember to follow Leave No Trace principles when out in the wilderness, and practice shelter building only if you’re in an emergency or survival situation. 

FAQs

Why is a survival shelter important?

One of the most important things you need to survive in the wilderness is shelter. A shelter can protect you from the cold, rain, sun, and wind. It can also give you a place to rest and plan your next move. Without a shelter, you could die from exposure and hypothermia in a matter of hours.

What should I consider when selecting a location for my survival shelter?

Choosing a survival shelter site is similar to choosing a camping site. When choosing a location, look for an area with natural shelter materials, such as leaves, branches, and trees. Ensure the site is far from potential hazards, offers concealment from threats, and has multiple entry and exit points for safety. Avoid flood-prone areas and be wary of wildlife when considering natural shelters like caves or hollowed-out trees.
What are some common materials used for building a survival shelter?

Common materials include leaves, branches, and trees. If available, rope or paracord is beneficial, but you can also make sturdy rope from vines and roots. Without these, look for natural shelters that require minimal construction, such as caves or overhangs.

The Ultimate Essentials Camping Checklist

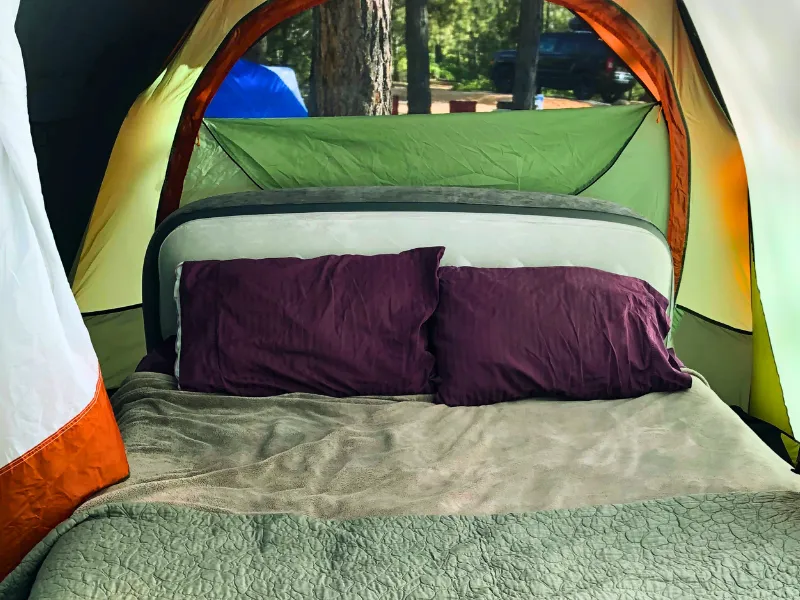
Car camping setup with air mattress and tent

A good camping checklist helps you figure out what you need to take on your next car camping trip. This camping checklist includes the essential items for an enjoyable and comfortable car camping trip while including some optional items depending on your trip. 

I have been car camping for decades and have refined my camping checklist over the years. We especially enjoy our car camping trips to various national parks. I’ve found that it’s really easy to bring too much stuff for car camping, so I’ve included the items that I have found are important for an enjoyable camping trip.

Campsite

Tools and Accessories

Kitchen

Clothes

Hygiene & Health

Personal Items

Leisure & Recreation

Organizational Items

Camping with Kids

Camping with Dogs

Car/Vehicle


Most of these items are found at your local outdoor store. You might be interested in checking out the planning tips for how to find a great campsite. If you’re hiking on your car camping trip, don’t forget to bring the essential hiking gear for a safe, fun hike.

FAQS

What type of car is best for car camping?

An SUV, crossover, wagon, or minivan with fold-down seats provides plenty of cargo space for gear. Higher clearance helps access campsites down dirt roads, and all-wheel drive adds stability for varied terrain.

How do I organize my gear for car camping?

Keeping your car organized is crucial due to the gear you can bring. Store each gear category in separate bins and ensure everything has a designated place in your car. Keep essentials like your headlamp, water bottle, and portable charger in your center console for easy access.

How can I ensure safety and comfort while car camping alone, especially as a solo female traveler?

Car camping can be a safe way to travel solo if you follow common sense and a list of safety precautions. Choose well-lit and populated campgrounds or big box stores that welcome campers. Always lock your doors at night and keep a personal safety device within reach.

How to Use a Compass: Steps for Compass and Map Navigation

Compass on a topo map

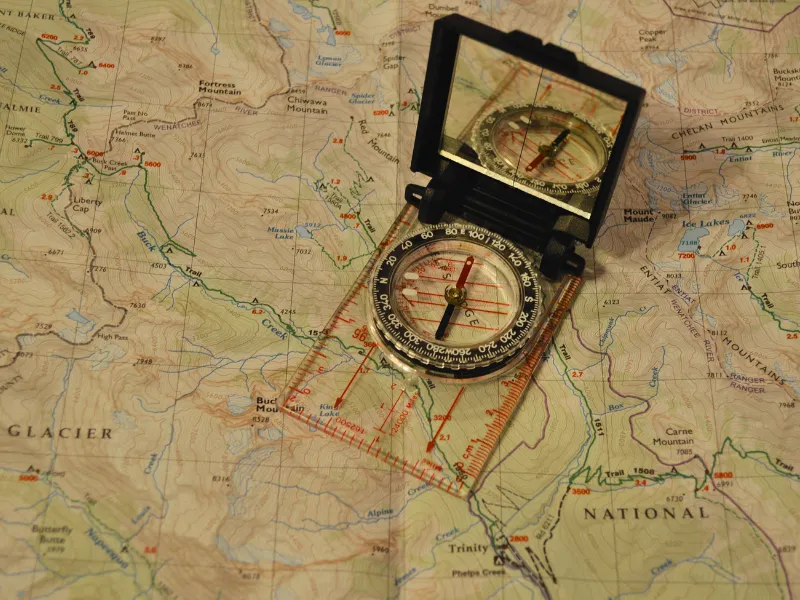
A compass and map greatly reduce the chance of staying lost outdoors, but they are not a guarantee — always carry a map, tell someone your plan, and practice before you need them. Most outdoors experts recommend carrying a compass as part of your essential hiking gear. However, using a compass is a lost science, as most hikers and backpackers use a phone or GPS for navigation. This guide helps you learn how to use a compass for navigation, so your compass isn’t just dead weight in your pack.
I’ve put together a step-by-step guide to learning the science of using a compass based on my experience hiking with a compass and map. I’ve also researched the best outdoor navigation resources to help you learn to use your compass effectively.

Why Use a Compass?

You will probably navigate most of your hikes with your phone using something like Gaia, Google Maps, or even a separate GPS device. This is not only easy but also often more accurate. But there a 2 reasons to bring and use a compass on your hike:

  1. A compass can quickly orient your map.If you have a paper map (which you should on a longer hike), using a compass to orient the map in the correct position is quick and easy with a compass.
  2. A compass provides backup. If your phone or GPS fails, you need a backup, especially on a longer or remote area hike. Also, dense canopy and deep canyons can degrade GPS accuracy and slow satellite fixes, though they rarely eliminate reception entirely. Having and knowing how to use a compass is a worthwhile skill to reduce getting lost in the woods.

Compass Basics

Types of Compasses

Baseplate or orienteering compass

Open baseplate compass
Photo: ©Daniel Borkert/OutdoorFootprints.com

A baseplate, also called an orienteering compass, is the most common type of hiking and backpacking compass. It usually is made of a flat piece of transparent plastic with an adjustable dial or bezel. Some baseplate compasses come with a mirror that allows sighting capabilities. Baseplate compasses work well either by themselves or with a map.

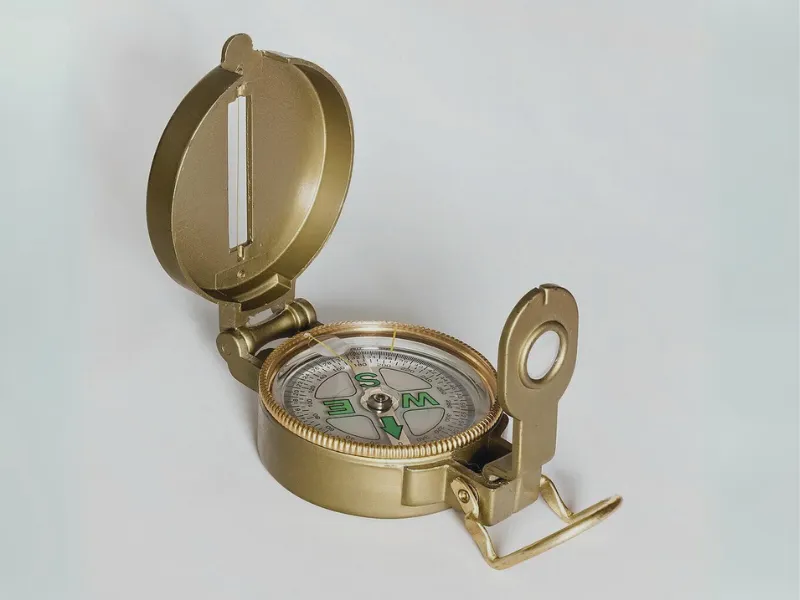
Lensatic compass

Open lensatic compass
Photo: ©Jacek Halicki/CC BY-SA 4.0 via Wikimedia Commons

Lensatic compasses are commonly seen in military and action movies. They are usually round with a sighting wire and lid. They can work in a pinch both in the field and using a map. However, for hiking and backpacking, you will generally want to get and use a baseplate compass rather than a lensatic compass.

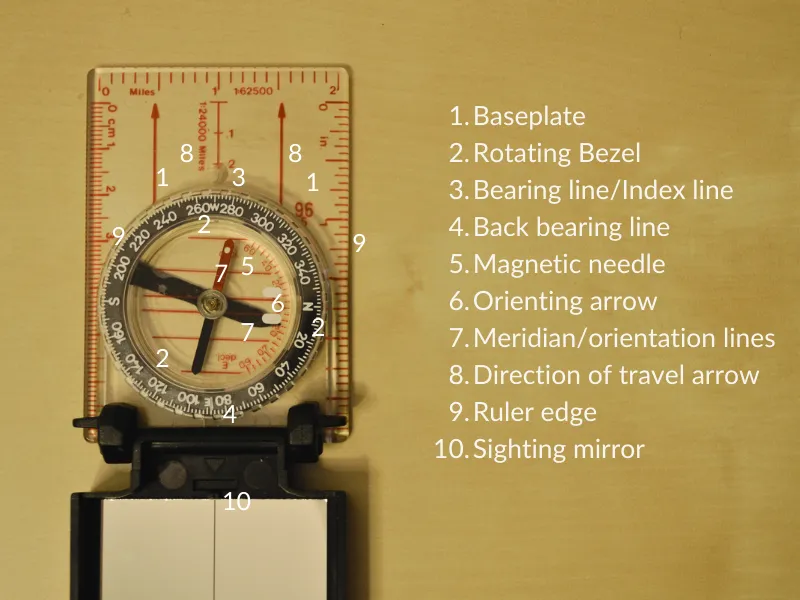
Parts of a Baseplate Compass

Numbered parts of a compass
Photo: ©Daniel Borkert/OutdoorFootprints.com
  1. Baseplate: The large flat rectangular plastic piece that has the ruler edges, bezel, index line, and direction of travel arrow
  2. Rotating Bezel: The dial with numbers 0-359 representing degrees (the angles as measured from North, which is 0°)
  3. Bearing Line/Index Line: The marker of the current direction the bezel is set at in degrees
  4. Back Bearing Line: The marker that is always 180° from the index line or bearing
  5. Magnetic Needle: The marker in the middle always points towards the magnetic north (usually, the north part of the needle is red/colored while the south part of the needle is usually black)
  6. Orienting Arrow: This is how you will line up the bezel with the magnetic needle so your compass reads accurately
  7. Meridian/Orientation Lines: Run North/South and help you line up the compass correctly on a map
  8. Direction of Travel Arrow:Points away from you in the direction you want to travel or take a bearing
  9. Ruler Edge: The long edge of the baseplate, usually marked in inches and centimeters, helps you measure distances on a map.
  10. Sighting Mirror (optional): A mirror can help you more accurately shoot a bearing (mirror usage not covered in this guide)
  11. Declination Adjustment (optional): Some compasses have a key or tool you can use to adjust for declination, as discussed further below in this guide.

How to do Basic Compass Navigation

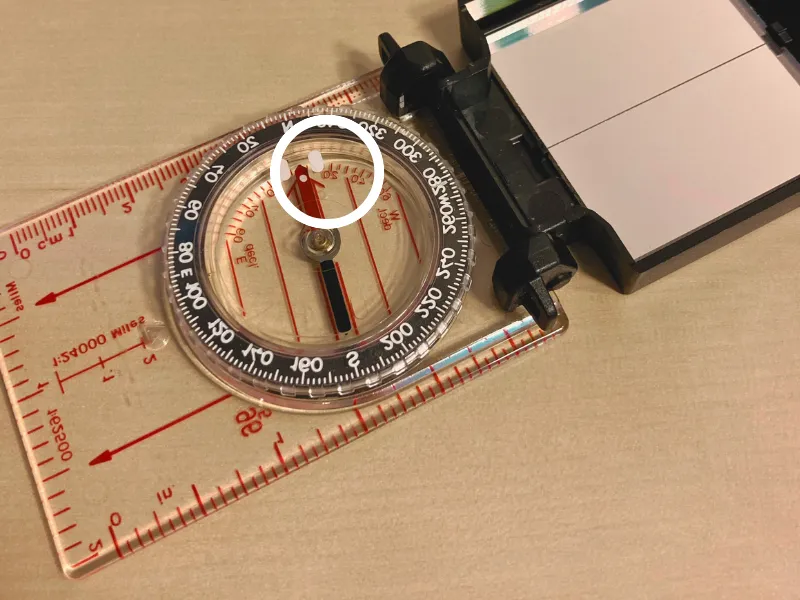
  1. Hold the compass flat at waist height with both hands and elbows tucked in for support, with the direction arrow facing away from you towards your intended destination.
Photo: ©Daniel Borkert/OutdoorFootprints.com
  1. Rotate the bezel dial until the orienting arrow is aligned with the red magnetic arrow. Remember the phrase, “Put Red in the Shed.”
Photo: ©Daniel Borkert/OutdoorFootprints.com
  1. Read the number on the index line/bearing line. This is the direction you’re currently facing expressed in degrees (an angle clockwise from North is considered 0 degrees). The back-bearing is 180 degrees behind you and should be on your back-bearing line.
Photo: ©Daniel Borkert/OutdoorFootprints.com
  1. If possible, note a landscape feature directly aheadwithin the next hundreds of feet on your bearing and a point behindyou on your back bearing.
Shooting a bearing course with intermediate points going up Five Finger Jack | Photo: ©Daniel Borkert/OutdoorFootprints.com
  1. Draw an imaginary line in your mind. Your compass bearing should match this imaginary line.
  2. Don’t change anything on the compass until you want to go in a different direction.
  3. Put the compass away and walk/hike toward the landscape feature you identified ahead of you. If you lose sight of the feature ahead, look behind for the back-bearing feature you identified.
  4. Once you’re at the landscape feature you identified, take your compass out and, without adjusting anything on the compass, rotate your body until the magnetic needle lines up with the orienting needle. “Put red in the shed”.
  5. Repeat steps 5-8 until you reach your intended destination.

How to Use a Compass with a Map

Photo: ©Daniel Borkert/OutdoorFootprints.com

Using a compass with a map is a powerful, reliable navigation tool for lost-proofing yourself. Most hikers and backpackers should have some basic skill with reading and using a map with a compass. You can download and print USGS topo maps for free, so there’s no excuse for not always having a good topo map when hiking or backpacking. Here are a few common scenarios when using a map and compass together with the basic steps.

Always Adjust for Declination

Chart: USGS Educational ResourcesPublic Domain

Your compass’s magnetic needle always points to the “magnetic north.” However, the magnetic north is actually slightly different from “true north” or the north pole. This difference is called declination and varies depending on where you are in the world. 

We care about declination because most maps are oriented for “True North.” If you’re not using a map, you can skip adjusting your compass for declination. 

Chart: ©Cavit, CC BY 4.0 via Wikimedia Commons

Declination adjustment for your compass can be confusing, but I have found two easy methods for adjusting your compass for declination that help you avoid doing too much math and calculations. If at all possible, plan ahead for declination before your trip and avoid trying to do any declination addition/subtraction in the field.  

Find the declination offset for your current area

You first have to know the declination offset for your particular area. Generally, you can search by zip code using the Magnetic Field Calculator. This will give you a declination of either East or West by degrees. The USGS topo maps also have a declination offset on the bottom. The declination changes slightly yearly, so an older map might not have an accurate declination offset number. 

Example using the Magnetic Field Calculator in my area in Washington State | Screenshot: Daniel Borkert accessing NOAA Declination Calculator website

Adjust your compass for the declination

After you know your declination offset in East or West degrees, you must adjust your compass to account for the declination. There are multiple ways to do this, but here are the 2 easiest ways to adjust for declination on your compass. 

Method #1– With an adjustable orienting arrow built into the compass.

Some compasses come with a way to adjust the orienting arrow to account for your decline. I recommend looking up the user guide for how to do this, but usually, it’s just a simple screw you turn to adjust the orienting arrow to the specified declination degree, either East or West. With this method, you will still “Put red in the shed.”

Suunto Compass with Declination Adjusted | Screenshot: Summit Sparrow via Youtube
Method #2– With tape as the new orienting arrow on non-adjustable compasses.

Some baseplate compasses do not have an adjustable orienting arrow for declination. You can either add/subtract on the fly, which can get confusing, or you can use a strip of tape to mark the declination and use the tape as the new orienting arrow. With this method, you will now “Put red on the tape.”

Compass now adjusted for declination with black tape as a new orientation arrow. | Photo: ©Daniel Borkert/OutdoorFootprints.com

When you know your location on the map

  1. Adjust the compass for declination as above.
  2. Orient the map using landscape features (optional step). You are basically using your compass as a protractor to find an angle from north on the map, so you can ignore the magnetic needle while it’s on the map.
  3. Place the compass on the map with the back ruler edge on your current location.
  4. Place the front ruler edge on your intended destination. Direction arrows should be facing toward the intended destination. 
Turn off (current location) towards Robin Lakes (intended destination) using the ruler edge on my compass. | Photo: ©Daniel Borkert/OutdoorFootprints.com
  1. Rotate the bezel so the meridian/orienting lines are pointed north on the map and parallel with the North/South lines on the map. Remember to ignore the magnetic lines/needle at this point. Also, ignore the adjusted declination orienting arrow or taped declination. 
Ignore the magnetic needle. The compass meridian lines must align with the map’s north/south lines. | Photo: ©Daniel Borkert/OutdoorFootprints.com
  1. Read the bearing number at the index line once the meridian/orienting lines parallel the map’s North/South lines. This is the bearing you need to reach your intended destination.
The compass edge is set on the turnoff, aligning with my destination (Robin Lakes), ANDthe compass meridian lines are set parallel. Bearing 93° at the index line is the bearing I need to take to get from the turnoff toward Robin Lakes. | Photo: ©Daniel Borkert/OutdoorFootprints.com
  1. Remove the compass from the map without rotating the bezel (keep it at 93°).
  2. Now rotate your body with the compass and align the magnetic needle with the adjusted declination orienting arrow or taped declination line (“Put red in the shed” or “Put red on the tape”).
  3. Once lined up, you should be facing the direction and bearing of your intended destination.
  4. Use the basic navigation steps above to work your way to your destination.
  5. In more extreme terrain, you may need to plot multiple bearing lines to avoid obstacles.

When you don’t know your location on the map

When you don’t know where you are on a map, but you’re on the trail.

  1. Orient map to true north using the compass.
Orient the map to true North by lining up compass meridian lines parallel to map lines with the direction arrows facing the top of the map. Then rotate the map to put “Red in the shed” or “Red on Tape,” depending on how you adjusted the compass for declination. | Photo: ©Daniel Borkert/OutdoorFootprints.com
  1. Attempt to identify a landscape feature that matches the map and take a bearing of that feature.
  2. Line up the front ruler edge with the landscape feature.
Photo: ©Daniel Borkert/OutdoorFootprints.com
  1. Rotate the entire compass baseplate until meridian/orienting North/South lines parallel the map’s North /South lines. Don’t rotate the bezel to do this.
Photo: ©Daniel Borkert/OutdoorFootprints.com
  1. The front rule edge should still be a landscape feature on the map, and the back edge should be towards your current location on the trail. You may need to use a straight edge to extend the line backward until it hits your trail.
An additional bearing of a landscape feature seen on the map should help confirm your location on the trail. This is a recommended but optional step. | Photo: ©Daniel Borkert/OutdoorFootprints.com
  1. Look for additional features near the trail to double-check your work.

When you don’t know where you are on a map, and you’re not on a trail. 

  1. Orient map to true north using the compass as demonstrated above.
  2. Attempt to identify a landscape feature that matches the map and take a bearing of that feature.
  3. Line up the front ruler edge with the landscape feature shown above.
  4. Rotate the entire compass baseplate until the meridian and orienting lines parallel the map’s North and South lines. Don’t rotate the bezel to do this.
  5. Mark this line on your map.
  6. Repeat steps 1-5, at least 1-2x more with different landscape features, preferably 90 degrees or more from each other.
  7. The intersection of lines should form a small area where you are approximately on the map.
If you’re not on a trail, use your compass to take 3+ bearings, which can help you “triangulate” your position on the map. The three bearings above form a triangle that approximates the area I’m currently standing on the map. | Photo: ©Daniel Borkert/OutdoorFootprints.com

Tips for Using Compass

  1. Rotate the bezel only when necessary. 
  2. Rotate your body with the compass, keeping the front arrow straight in front of you. Do not rotate the compass only with your hands.
  3. Keep the compass flat when using it.
  4. Avoid using a compass around metal objects such as phones, keys, cars, or power lines.
  5. If you use a map, always plan to account for declination on your compass before you get outside (doing math on the fly increases the chance of error).

Practice, Practice, Practice

Learning how to use a compass is primarily a hands-on experience. The best way to get good at using a compass is to go outside and practice. Here are some exercises for getting comfortable with your compass for basic navigation. 

Bearing/back-bearing exercise

  1. Mark your starting location. 
  2. Look for an object or landscape feature several yards away and take a bearing from your current location. 
  3. Make a note of the back bearing. 
  4. Put your compass away and walk towards the identified landscape feature. 
  5. When you reach your intended destination, adjust your compass to the back bearing.
  6. Make your way back to where you started. 
  7. Repeat the exercise but increase the distance.

You should arrive at your starting location if you identified a landscape feature in line with your back bearing. If you didn’t identify a landscape feature in line with your back bearing, you might end up slightly off to the right or left of your starting location. This is called “lateral drift” and can easily happen, especially over long distances, so always having an object or landscape feature identified on your bearing line helps keep your course. 

The Square exercise

  1. Mark your starting location. 
  2. Adjust the compass index line pointing to the North or 0 degrees.
  3. Rotate your body to align the orienting arrow with a red magnetic needle. “Put red in the shed.”
  4. Walk 10 steps, then stop and mark your spot.
  5. Adjust the compass index line pointing to the East or 90 degrees.
  6. Rotate your body to align the orienting arrow with a red magnetic needle. “Put red in the shed.”
  7. Walk 10 steps, then stop and mark your spot.
  8. Adjust the compass index line pointing to the South or 180 degrees.
  9. Rotate your body again to align the orienting arrow with a red magnetic needle. “Put red in the shed.”
  10. Walk 10 steps, then stop and mark your spot.
  11. Adjust the compass index line pointing to the West or 270 degrees.
  12. Rotate your body one last time to line up the orienting arrow with a red magnetic needle. “Put red in the shed.”
  13. Walk 10 steps, then stop. You should be at your starting location, having completed a square. 

Map and compass exercise

  1. Get or print a topo map of your area
  2. Adjust your compass for magnetic declination using one of the two methods for declination adjustment as above.
  3. Orient your map north with a compass. 
  4. Mark your current location on the map and find an intended destination. 
  5. Use your compass on the map to plot a course, taking note of the bearings. 
  6. Use your compass with the bearing to reach your intended destination, remembering to use intermediate landscape features to keep your line from drifting. 
  7. For a further challenge, use your compass and map to pinpoint your location on the map.

Knowing how to use a compass is a powerful tool for safely navigating hikes, especially for beginners. Having and using a compass and map together significantly decreases your risk of getting lost in the great outdoors. Check out our essential hiking gear guide for other ways to plan your upcoming hiking trips, including packing a good first aid kit.

FAQs

How do I read a compass for beginners?

Reading a compass starts with understanding its main components: the base plate, the direction of travel arrow, the rotating bezel (or compass ring), and the magnetic needle. The needle typically has a red end, which points toward magnetic north. To read a compass:

1. Place it flat on your palm or a level surface.

2. Rotate the bezel so the orienting lines match the compass needle’s direction.

3. The direction of travel arrow now points to your desired direction.

What is the correct way to hold a compass?

Hold the compass level in front of you. Ensure the direction of travel arrow points straight away from you. Keep the compass away from metal objects or electromagnetic fields to avoid interference. This position ensures accurate readings.

How do I set a bearing on a compass?

1. Identify your current location and destination on a map.

2. Place the compass edge between these two points.

3. Rotate the bezel until the orienting lines parallel the map’s meridians, ensuring the north

4. indicator points to map north.

5. The direction of travel arrow now points to your destination, with the bearing number at the index line.

Does a compass always point to true north?

No, a compass points to magnetic north, not true north, due to the Earth’s magnetic fields. The difference between these is known as magnetic declination, which varies depending on your location.

How can I adjust for declination on a compass?

Some compasses have a built-in declination adjustment. For these, refer to a local map for the declination angle, adjust the declination scale accordingly, and your compass will now align with true north. If your compass lacks this feature, you’ll need to calculate the adjustment when setting your bearing manually.

Can I use a compass without a map?

Yes, a compass can be used independently to maintain a straight path or find a general direction. However, combining it with a map provides precise navigation and location tracking.

How do I find north using a compass?

1. Hold the compass level.
2. Turn yourself and the compass until the red end of the needle aligns with the orienting arrow.
3. The direction of travel arrow now points to magnetic north.

What are some common mistakes when using a compass?

– Not holding the compass level, causing inaccurate readings.

– Allowing the compass to be near metal or electronic devices.

– Forgetting to adjust for magnetic declination, leading to off-course navigation.

– Misreading the bearing or confusing the north on the compass with the map’s north.

How do I use a compass for orienteering?

Orienteering involves using a compass and map to navigate from point to point in diverse and usually unfamiliar terrain:

1. Understand the map’s scale, symbols, and contours.

2. Set bearings between checkpoints.

3. Use the compass to orient the map and yourself to the north.

4. Navigate using both the compass for direction and the map for terrain recognition.

Remember, practice makes perfect. Start with simple exercises in familiar areas to build your skills before venturing into unfamiliar territory.

The Ultimate Day-Hiking Essentials Guide

Backpack, boots, and other hiking gear on a log.

What should you bring on your hike? It all depends on the hike! This guide will help you or a beginner hiker bring what you need for a great day-hiking trip. 

I have gone on hundreds of day hikes over the last 30+ years. Much of this guide comes from my extensive experience and mistakes over decades of hiking, backpacking, caving, and camping. I also sought the opinions of several other experienced hikers and outdoor adventurers to help you have a safe, comfortable, and fun day hike. 

#1 Essential is Planning Ahead

Hiking planning with map and gear on table
Photo: ©arinahabich via Canva.com

The safest and most comfortable hike depends on your situational awareness and understanding of what you’re getting into before you enjoy the benefits of the outdoors.

Specific hiking gear is usually dependent on several major but variable factors, including the weather/season, trail conditions, hike duration, and terrain/geography. However, if you take a brief moment to plan ahead, most of these factors can be anticipated and prepared for.

Gather intel about the trail ahead of time.

  • Search for trip reports on both the hike and the trailhead conditions, such as from Alltrailsor your local hiking association. (WTAif you are in Washington State). 
  • Look for the roundtrip length and elevation of your hike. As a rule of thumb, plan on hiking approximately 2-3 miles every hour.  
  • Look at the directions and map to the trailhead, including the estimated travel time. Road construction or dirt roads can significantly delay the estimated time to the trail. Many hikes require a high-clearance vehicle. Also, consider your car’s gas situation and plan accordingly. 
  • Look for permit information and parking fee information. 
  • Look for pet-friendly trails if bringing a dog. 
  • It’s optional but helpful to know if the trailhead has a toilet, especially if you’re drinking coffee on the way there. 
  • Have a backup plan if the main hiking trail doesn’t work out due to traffic, road conditions, weather, full parking, or other unforeseen circumstances. No need to get into a risky situation if you can avoid it.

Check the weather forecast and recent weather patterns

  • Look for rain or snow. Remember that weather forecasts in mountain areas are often unpredictable, so looking at recent past weather patterns can be helpful. Consider an alternative plan unless you’re well-prepared for hiking in rain or snow.Getting wet can quickly turn into feeling cold and can potentially lead to an emergency. 
  • Look at high and low temperatures; this helps determine the clothing layers you should wear and bring. 
  • Look for wildfires or smoky weather. Smoke from wildfires isn’t fun to hike in, especially when you’re huffing and puffing up a hill. Also, wildfires impact road closures. Never hike in closed-off areas.  
  • Look for high winds. Usually, wind means a storm is around the corner, but it can also result in tree branches falling on you or dust storms on the trail. 
  • The weather doesn’t have to be perfect, but avoid weather in which you wouldn’t feel comfortable walking around your neighborhood.

Bring appropriate gear and clothing

  • Always think about your footwear, including shoes and socks. Trails are usually dirty and rough, so consider shoes with soles to absorb the bumps and are closed-toed and closed-backed. I have hiked short distances with flip-flops, but I always prefer a pair of shoes or, even better, a hiking boot when day hiking. You don’t need fancy boots for most hiking. You mainly need durable shoes that you don’t mind getting dirty. I recommend getting hiking shoes or boots and hiking socks if possible.
  • Wear athletic underwear, pants, shorts, and shirts. Hiking in jeans isn’t great because of chafing and heat. Cotton garments aren’t preferable because they retain moisture when sweating, but I sometimes hike in a cotton t-shirt. I’ve been told regular bras aren’t comfortable for hiking, so consider athletic undergarments. Basically, you can hike with whatever you might go to the gym in as a base layer (your main/primary clothing). 
  • Bring a lightweight, warm mid-layer, such as a sweatshirt or long-sleeved T-shirt. Pair this with a lightweight raincoat, and you will stay warm for most summer or warm-weather hikes. 
  • Consider rain gear. No matter the weather forecast, I always bring a rain jacket or poncho. It doesn’t have to be special; an emergency poncho or a plastic trash bag works well if you don’t have any rain gear. Getting wet and cold can quickly become deadly. 
  • You might want a hat, beanie, or sweatband. This is a personal preference, but hiking usually involves sweat in the face. I usually wear a hat, providing additional sun and rain protection. 
  • At the end of the day, you don’t need specialized clothing or footwear. You probably have everything you need to start hiking! Just consider that hiking involves sweat, dirt, and potential rain.

Test gear at home if needed

  • Avoid hiking in new shoes or boots because they can cause blisters until broken in properly.
  • Test gadgets and other new gear at home to avoid on-trail surprises. 
  • Gear testing is more important for longer hikes (8+ miles).

Schedule your arrival at the trailhead in the morning if possible

  • Know when it gets dark. The sun may dip behind the mountains, making it dark earlier than expected.  
  • Plan to be back at the car, preferably >2 hours before it gets dark.
  • Plan on hiking approximately 2-3 miles every hour.
  • If you’re likely to be in the dark, bring a spare light, such as a headlamp or flashlight. Don’t depend on your phone if you have a remote chance of being in the dark.

Plan your nutrition

  • Anticipate drinking 0.5L per hour on average. Plan for much more if it’s hot or a strenuous-looking hike such as up a mountain. 
  • Consider energizing snacks and a meal if needed. Use an estimated calories per mile calculator if you want an estimate. Plan on at least a few granola bars or a bag of trail mix.

11 Core Essentials for Most Hikes (Short Hikes)

Vector: Daniel Borkert/Canva Pro

The 11 Core Essentials are what I consider the necessary hiking gear for everyone on a short hike. This differs from “the 10 essentials,” which are frequently recommended by hardcore hikers. The 11 Core Essentials for Short Hikes come from my experience and hiking friends. 

As a beginner hiker, you don’t really need to buy any new gear to get into hiking, and most of the 11 Core Essentials are common everyday items you probably already have.

1) A Plan

Have a plan in your head, on paper, or on your phone. Your safety and comfort depend on your plan and preparation. See above #1 Essential Planning Ahead for creating a plan.

2) Trail guide/Map/Navigation

This will usually be on your phone, either with Google Maps (just remember to download the map for offline use) or a hiking map app such as Gaia or Alltrails. Keep in mind your phone’s battery life. Also, consider printing out a trail guide or report if available, as this can help with landmarks or dangers to look out for. 

3) Water

Bring at least a 1L water bottle. Plan to use at least 0.5L/hour of hiking. Bring a way to purify water to lighten the load if there’s water available on your hike. Consider an electrolyte drink if you sweat a lot and are hiking for more than 1 hour to avoid dehydration. 

4) Food

Bring a snack or meal to replenish your energy. The type of snack isn’t too important for a shorter hike, but preferably something higher in calories. I like dehydrated foodbecause they are light, calorie-dense, and easy to consume. 

5) Rain Jacket

Bring a large plastic trash bag if you don’t have a rain jacket. This works in a pinch for unexpected rain. Always have a rain plan, even if it’s just to run back to the car. Combine a rain jacket with a long-sleeve sweatshirt or T-shirt for wind protection and warmth. Even if you’re in a desert area, a rain jacket also doubles as a windbreaker or even as an emergency shelter. 

6) Backpack/bag

You’ll need something to carry your food, water, wallet, keys, and layers in (never leave keys or wallet in the car due to theft). I also have hiked a lot with a camera bag that holds my snack, camera, and water. This doesn’t need to be expensive or special for a short hike. If you buy a hiking pack, I find that a 10-20L daypack with waist and chest straps works best.

7) Durable boots or shoes

Hiking boots or shoes are preferable to protect your feet from rocks, bumps, and dirt. Regular sneakers work fine for shorter distances just keep in mind they will get dirty. Good sole support and shoe grip are important due to the roughness of hiking trails, and boots provide ankle support when navigating uneven terrain. 

8) Weather-appropriate clothes in layers

Bring appropriate layers for the weather, such as sweatshirts, puffy jackets, pants, hats, and gloves. Bring rain gear and a long-sleeved t-shirt or sweatshirt as a combined layer, especially in mountain areas. Also, you’ll probably get really warm hiking, so consider a base layer similar to what you’d use at the gym after you warm up. 

9) Sunscreen

Your favorite sunscreen will work fine. This is especially important for kids. 

10) Toilet paper

Whether you use the woods unexpectedly or blow your nose, a little roll of TP is light and handy when nature calls.

11) Band-aids and Vital Medications

I would consider a first aid kit optional for a shorter hike, but having a few bandaids is helpful if you get a cut or blister. Also, always bring your rescue medications if you have asthma or a bee allergy. 

Optional Short-Hike Gear

First aid kit

Some might consider this essential. If you tend to get hurt, a good customized hiking first aid kit should probably be part of your core essential hiking gear. I’ve never needed a first aid kit after hundreds of short hikes. I usually carry some bandaids for blisters, but I only usually need them on a longer hike. Bring your Epi-pen and allergy medication if you have an allergy to something. 

Hiking socks

Hiking socks that wick moisture are nice but unnecessary on a shorter hike. Regular gym socks work fine. 

Hiking shorts/pants

These are nice, but gym clothes are usually more comfortable for me, even on longer hikes. 

Hat/sunglasses

I always wear a hat for sweat and sun protection, but it’s not a big deal if I forget it. Also, I usually don’t need sunglasses because of the shadows in the forest. This is really dependent on where you are hiking, such as snowy, desert, or open areas. 

Water filter

It’s nice to have a small water filter if you run out of water, but usually, you can carry the water you need for a shorter hike. 

Towel and swimsuit

If you’re hiking to a lake, this is nice and makes the hike much more fun. I usually change out of my swimsuit to avoid chafing problems.   

Change of clothes/shoes in the car

I usually bring my street shoes and a change of socks, but it’s not necessary to enjoy hiking. 

Extra light source or battery pack

If you’re likely to be in the dark, you must bring a headlamp or flashlight. If you use your phone as a flashlight, you need a backup battery pack. 

Trekking Poles

If you have a bad back, knees, or other joints or just tend to roll your ankles, consider using trekking poles. I usually only use them when hiking with a heavy backpack downhill because I otherwise find them annoying. But many hikers swear by their hiking poles, so if they seem helpful, then definitely use them.

Long-Hike or Remote Hike Essentials

10 essentials banner
Design: Daniel Borkert/Canva Pro/Magic Media™

Hikes over 8+ miles require more planning and preparation, especially regarding nutrition, water, and footwear. For decades, multiple essential hiking lists have been proposed, which, in my opinion, are more appropriate recommendations for longer hikes, remote short hikes, or backpacking trips rather than the common, shorter day hikes. The most popular list is “The 10 Essentials” by the Mountaineers [1].

Generally, I go on an overnight backpacking trip if I’m hiking more than 8-10 miles. The 10 essentials plus some definitely apply to backpacking. Otherwise, I rarely go on longer day hikes, primarily because they take so much time, cause sore feet, and require more planning. 

I would also consider any snowy hike to be a remote-type hike. Snow hikes are not as popular as summer hiking, and the chance of getting lost or in a bad situation both on the road and trail in the winter is much higher, requiring more essential gear for safety. Many of the 10 essentials are for safety if you get into an emergency needing a wilderness rescue. 

The 10 Essentials for Long Hikes

If you’re using your phone, have offline maps and a battery pack. Consider getting a dedicated GPS device. Also, consider getting an emergency portable locator beacon or satellite messenger device. 

A paper map is always a good backup for longer hikes. Learn how to use a compass and map together for navigation. 

Headlamp and extra batteries

Don’t rely on your phone as the only light source. Headlamps are nice because you can free up your hands. I usually also carry a small flashlight. 

Sun protection

Like a short hike, sunscreen is important for frequent reapplication down the trail. Also, consider bringing a brimmed hat and long sleeves. 

First aid

A basic first aid kit provides bandages and other basic aid items, such as wraps and over-the-counter pain/allergy medication. The further you are from emergency assistance, the more comprehensive your first aid kit will be. 

Knife

A single-blade knife, pocket knife, or small multitool is helpful for longer hikes.

Fire

Bring a box of waterproof matches in a baggie or a lighter if you need to build a fire for warmth in an emergency. 

Shelter

An emergency blanket can suffice as an emergency shelter for longer hikes while waiting for rescue.

Extra food

Pack extra food beyond what you plan to eat for your hike if you end up in the wilderness longer than expected. Most people can survive at least several days without food, but consider your own situation and comfort level. 

Extra water

Bringing a water filter or purification methodas extra water is heavy (“a pint’s a pound the world around”). Drinking untreated water is strictly a last-resort emergency measure when no other option exists — as routine practice, always treat or filter water from natural sources. Never ever drink salt water [2].

Extra clothes

A rain jacket is essential not only for rain but also for wind protection. Also, consider the weather and bring appropriate layers. I always bring a long-sleeved athletic shirt and my rain jacket. Consider gloves and hats, depending on the weather. Also, consider the heat generated while hiking and dress appropriately to reduce the risk of heat stroke. 

Additional Long Hike Essentials

Toilet paper

TP and a trowel to bury poop is essential both in leaving no trace and for comfort. 

Hiking socks and boots

Hiking boots or shoes are more important for longer hikes because they have better soles and grip and usually better foot support. Hiking socks are also more important because they reduce blisters. 

Hiking clothes

Hiking-specific clothes generally provide moisture-wicking and sun protection in addition to comfort. I still usually wear gym or athletic clothes even for longer hikes, as they are more comfortable for me while providing moisture wicking. 

Backpack

You will want a backpackwith a hip and chest strap for comfort, especially since you’ll carry more gear on a longer hike.

Planning ahead for your hike is the #1 essential for any hike.

The 11 Core Essentials for Short Hikes and the 10 Essentials for Long Hikes provide a guide, but these don’t replace situational awareness and good planning. It’s best to avoid a risky situation altogether if possible. Depending on your hike location, you may also need to add additional gear, such as bear spray or bug repellent (planning ahead helps answer this). Also, don’t forget the leave no trace guidelines for every outdoor adventure.

FAQs

What are the ‘Ten Essentials’ for hiking?

The ‘Ten Essentials’ are items recommended for safe travel outdoors, including navigation tools, sun protection, insulation, illumination, first-aid supplies, fire-starting gear, repair tools, nutrition, hydration, and emergency shelter.

I would argue that there are Eleven Core Essentials for most day hikes.

Why is appropriate footwear important for hiking?

Proper footwear provides traction, support, and protection. It’s crucial for maintaining comfort and preventing injuries on varied terrains. I would say you can get away with wearing athletic shoes on most day hikes. See my article about hiking shoes vs. boots for more info on hiking-specific footwear.

How much water should I carry for a day hike?

Hydration needs vary widely with exertion, heat, humidity, and altitude — drink to thirst and conditions rather than following a fixed rate. As a rough starting point, half a liter per hour suits moderate temperatures and terrain. Always carry enough for your trip, know where to find it, and purify more if needed.

What food should I bring on a hike?

Pack calorie-dense, non-perishable, and easy-to-prepare foods. Include an extra portion in case your hike takes longer than expected. Consider learning to dehydrate your own hiking food.

How do I choose a hiking pack?

For short hikes, a small daypack or bottle sling may suffice. For longer treks, a 10- to 20-liter backpack is recommended to carry extra layers, food, water, and other essentials.

What type of clothing is best for hiking?

I recommend general athletic/gym clothing. Wear moisture-wicking layers to manage sweat and adjust to changing temperatures. Include a hat and gloves for warmth, and always carry rain gear for unexpected weather.

What are some safety items I should have with me?

This is location-dependent, depending on the terrain, weather, and situation. Generally, carry a way to navigate, a rain jacket, a light source, means to start a fire, a first aid kit, and means to communicate during emergencies. These can help you signal for help and navigate if you get lost or injured

How do I protect myself from the sun while hiking?

Use sunscreen, wear sunglasses, and dress in sun-protective clothing. Even on cloudy days, UV radiation can be strong, especially at higher altitudes.

Should I bring a shelter even on a day hike?

Always carry a lightweight emergency shelter, like a space blanket, in case you get stranded or injured. A rain jacket can actually work as your emergency shelter. It can provide critical protection from the elements.

What should I bring when hiking with my dog?

You will want to bring several items when hiking with your dog, including a leash, harness, water bowl, poop bags, and doggy snacks.

Why do you recommend ’11 Core Essentials’ rather than the popular ’10 Essentials’?

The primary purpose of the 11 Core Essentials is to lower the barrier to entry into hiking, especially for beginner hikers.

Most day-hikes are up to 8 miles in length round trip. “Short” and “long hikes” are somewhat subjective depending on a hiker’s experience, preparation, and physical fitness. In my experience, the most popular, common hikes are <6 miles long. Most average people walking a block can complete a hike like this in around 3-5 hours at the even slowest of paces. Kids sometimes can’t walk as far but can usually get a few miles in.

Most beginning hikers start out on this type of hike. A beginner hiker doesn’t need a lot of extra gear beyond what they use for visiting the gym. If they had planned ahead as described above, they would have been unlikely to have gotten into a survival situation due to the popularity of the trail and their relative closeness to civilization. 

For longer hikes, the 10 Essentials are more appropriate, in my opinion.